If there's one thing that can elevate a family gathering, it's decor that tells a story. Whether it's your son's 5th birthday party or your cousin's baby shower, personalized DIY decorations have the uncanny ability to make your event look warm, inviting, and oh-so-Instagrammable.
Plus, they double as conversation starters that'll have Aunt Jenny talking about that personalized centerpiece for weeks on end. But where do you start?
Fret not, I've got you covered. Grab a cup of coffee - or perhaps a glue gun - and follow this foolproof guide to crafting personalized DIY decor for family-friendly events.
Why Personalize Your Event Décor?
First off, what's with the undeniable charm of personalized décor? It's simple - handmade decorations create a warmer, more intimate setting.
Think about it. Would you rather walk into a room covered in generic banners bought last minute at the dollar store or one adorned with décor showcasing inside jokes, family photos, and curated themes that feel uniquely yours?
Besides, personalized DIY projects can often save money and reduce waste. And if your family is anything like mine, they'll appreciate the thoughtful effort you put into making the day special. Sure, Aunt Karen may ask why there's glitter everywhere - but so what if the dog sparkles for a week? It's worth it. Now let's dive into the steps.
Step 1: Set Your Theme & Color Palette
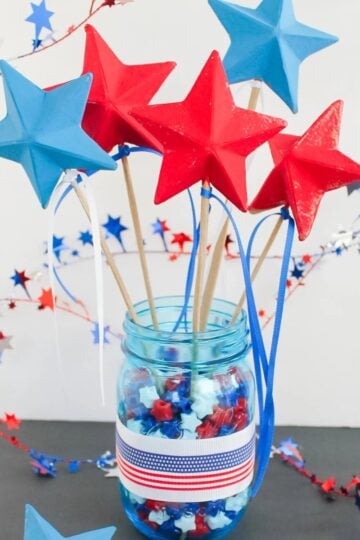
Every great event starts with a theme. It doesn't have to be extravagant. Is it a backyard barbeque? Think rustic, with burlap and mason jars.
Birthday party for your little ones? Something whimsical with pastel hues might fit the bill. A cohesive theme makes all the difference.
Once you have your theme, pick a complementary color palette. To keep it personal, pick elements unique to your family's personality. Got a family story about the time Grandpa tried to DIY a treehouse? Add a mini treehouse centerpiece as a nod to that tale - it's these quirky touches that make your decor shine.
Step 2: Use Free Design Templates (Your Secret Weapon!)
Here's the thing - they don't call it "working smarter, not harder" for nothing. If you're not a graphic designer (me neither), using free design templates can be a total lifesaver, especially when creating menus, signs, or photo booth props.
The good news; Picsart got you covered! The platform offers user-friendly digital templates for almost every occasion. From whimsical birthday fonts to elegant bridal shower signs, you'll save oodles of time while still crafting something that looks like it took hours to design.
Simply download the template, throw in your personalized text, print it out, and boom! You just became a DIY superstar without breaking a sweat.
Step 3: Gather Your Tools and Materials
Ah, the good old supply list moment - the linchpin of DIY success (or failure). Start by organizing your materials. Common essentials include:
- Scissors (bonus if it's those fancy patterned ones)
- Glue gun (aka the MVP of the DIY world)
- Cardstock, kraft paper, or fabrics (depending on your event theme and decor style)
- Paint, markers, or glitter for pizazz
- Ribbon, string lights, or fairy lights for added charm
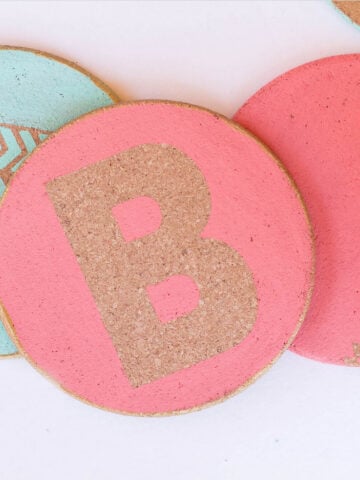
- Craft punches for patterns like hearts, stars, or flowers
The beauty here is you don't need to blow your budget at a specialty store. Many affordable options can be found at thrift stores, dollar shops, or even your local craft store clearance section.
Step 4: Time to Get Crafty
Now the real fun begins - crafting your pieces! Here are a couple of ideas to kickstart your DIY decor adventure:
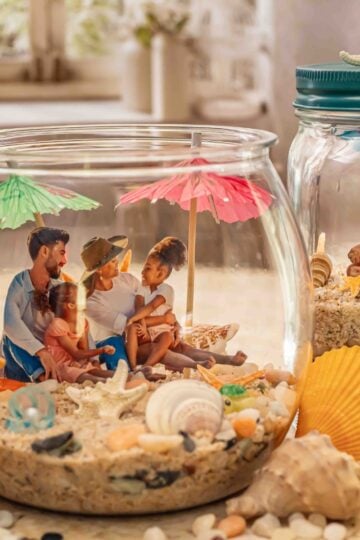
- Photo Garlands: Print memorable family pictures that tie to the event (birthday highlights, baby bump pics, etc.). String them along fairy lights or ribbons for an emotional touch.
- Personalized Centerpieces: For a BBQ, grab mason jars, wrap them in burlap, add colorful flowers, and slide in tiny chalkboards to label dishes or write cute messages like "Meat Y'all Here!" (Yes, puns are highly encouraged.)
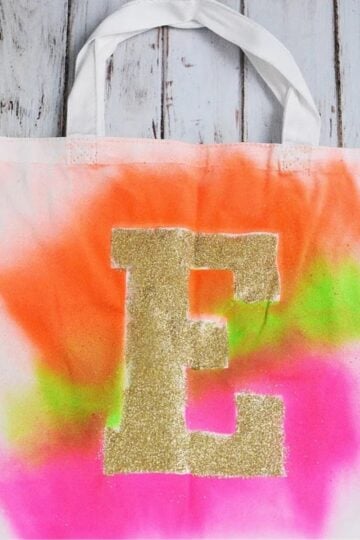
- Backdrops: Drape fabrics, hang some fairy lights, and add oversized paper flowers or balloons to create the perfect photo-worthy scene. Your Instagram feed will thank you.
Step 5: Get the Family in on the Fun
DIY is so much better (and less stressful) when you have helping hands. Have the kids paint the props or assign Grandma to cut name tags.
Family projects make for great memories in themselves. Sure, you might end up with glitter stuck in your carpet for six months, but hey - it's a small price to pay for bonding time, right?
Step 6: Add the Finishing Touches
Once all the major decor pieces are ready, it's time to bring everything together. Arrange your table settings, hang up your garlands and backdrops, and add finishing details like candles, confetti, or extra greenery.
Remember, less is more - sometimes the simplest touches make the biggest impact.
Also, take a moment to step back and appreciate your work. Grab your camera for some photos before the little ones knock over your centerpiece.
Make Your Next Event Unforgettable
DIY decor isn't just about cutting costs or filling space; it's a chance to bring your creative vision to life and make your family events uniquely yours.
If you're itching to get started but need a little more inspiration or guidance, check out Picsart Templates to simplify the process. With tools like these, the possibilities are endless - and perfectly personalized.
*This is a collaborative post. All views and texts are my own.