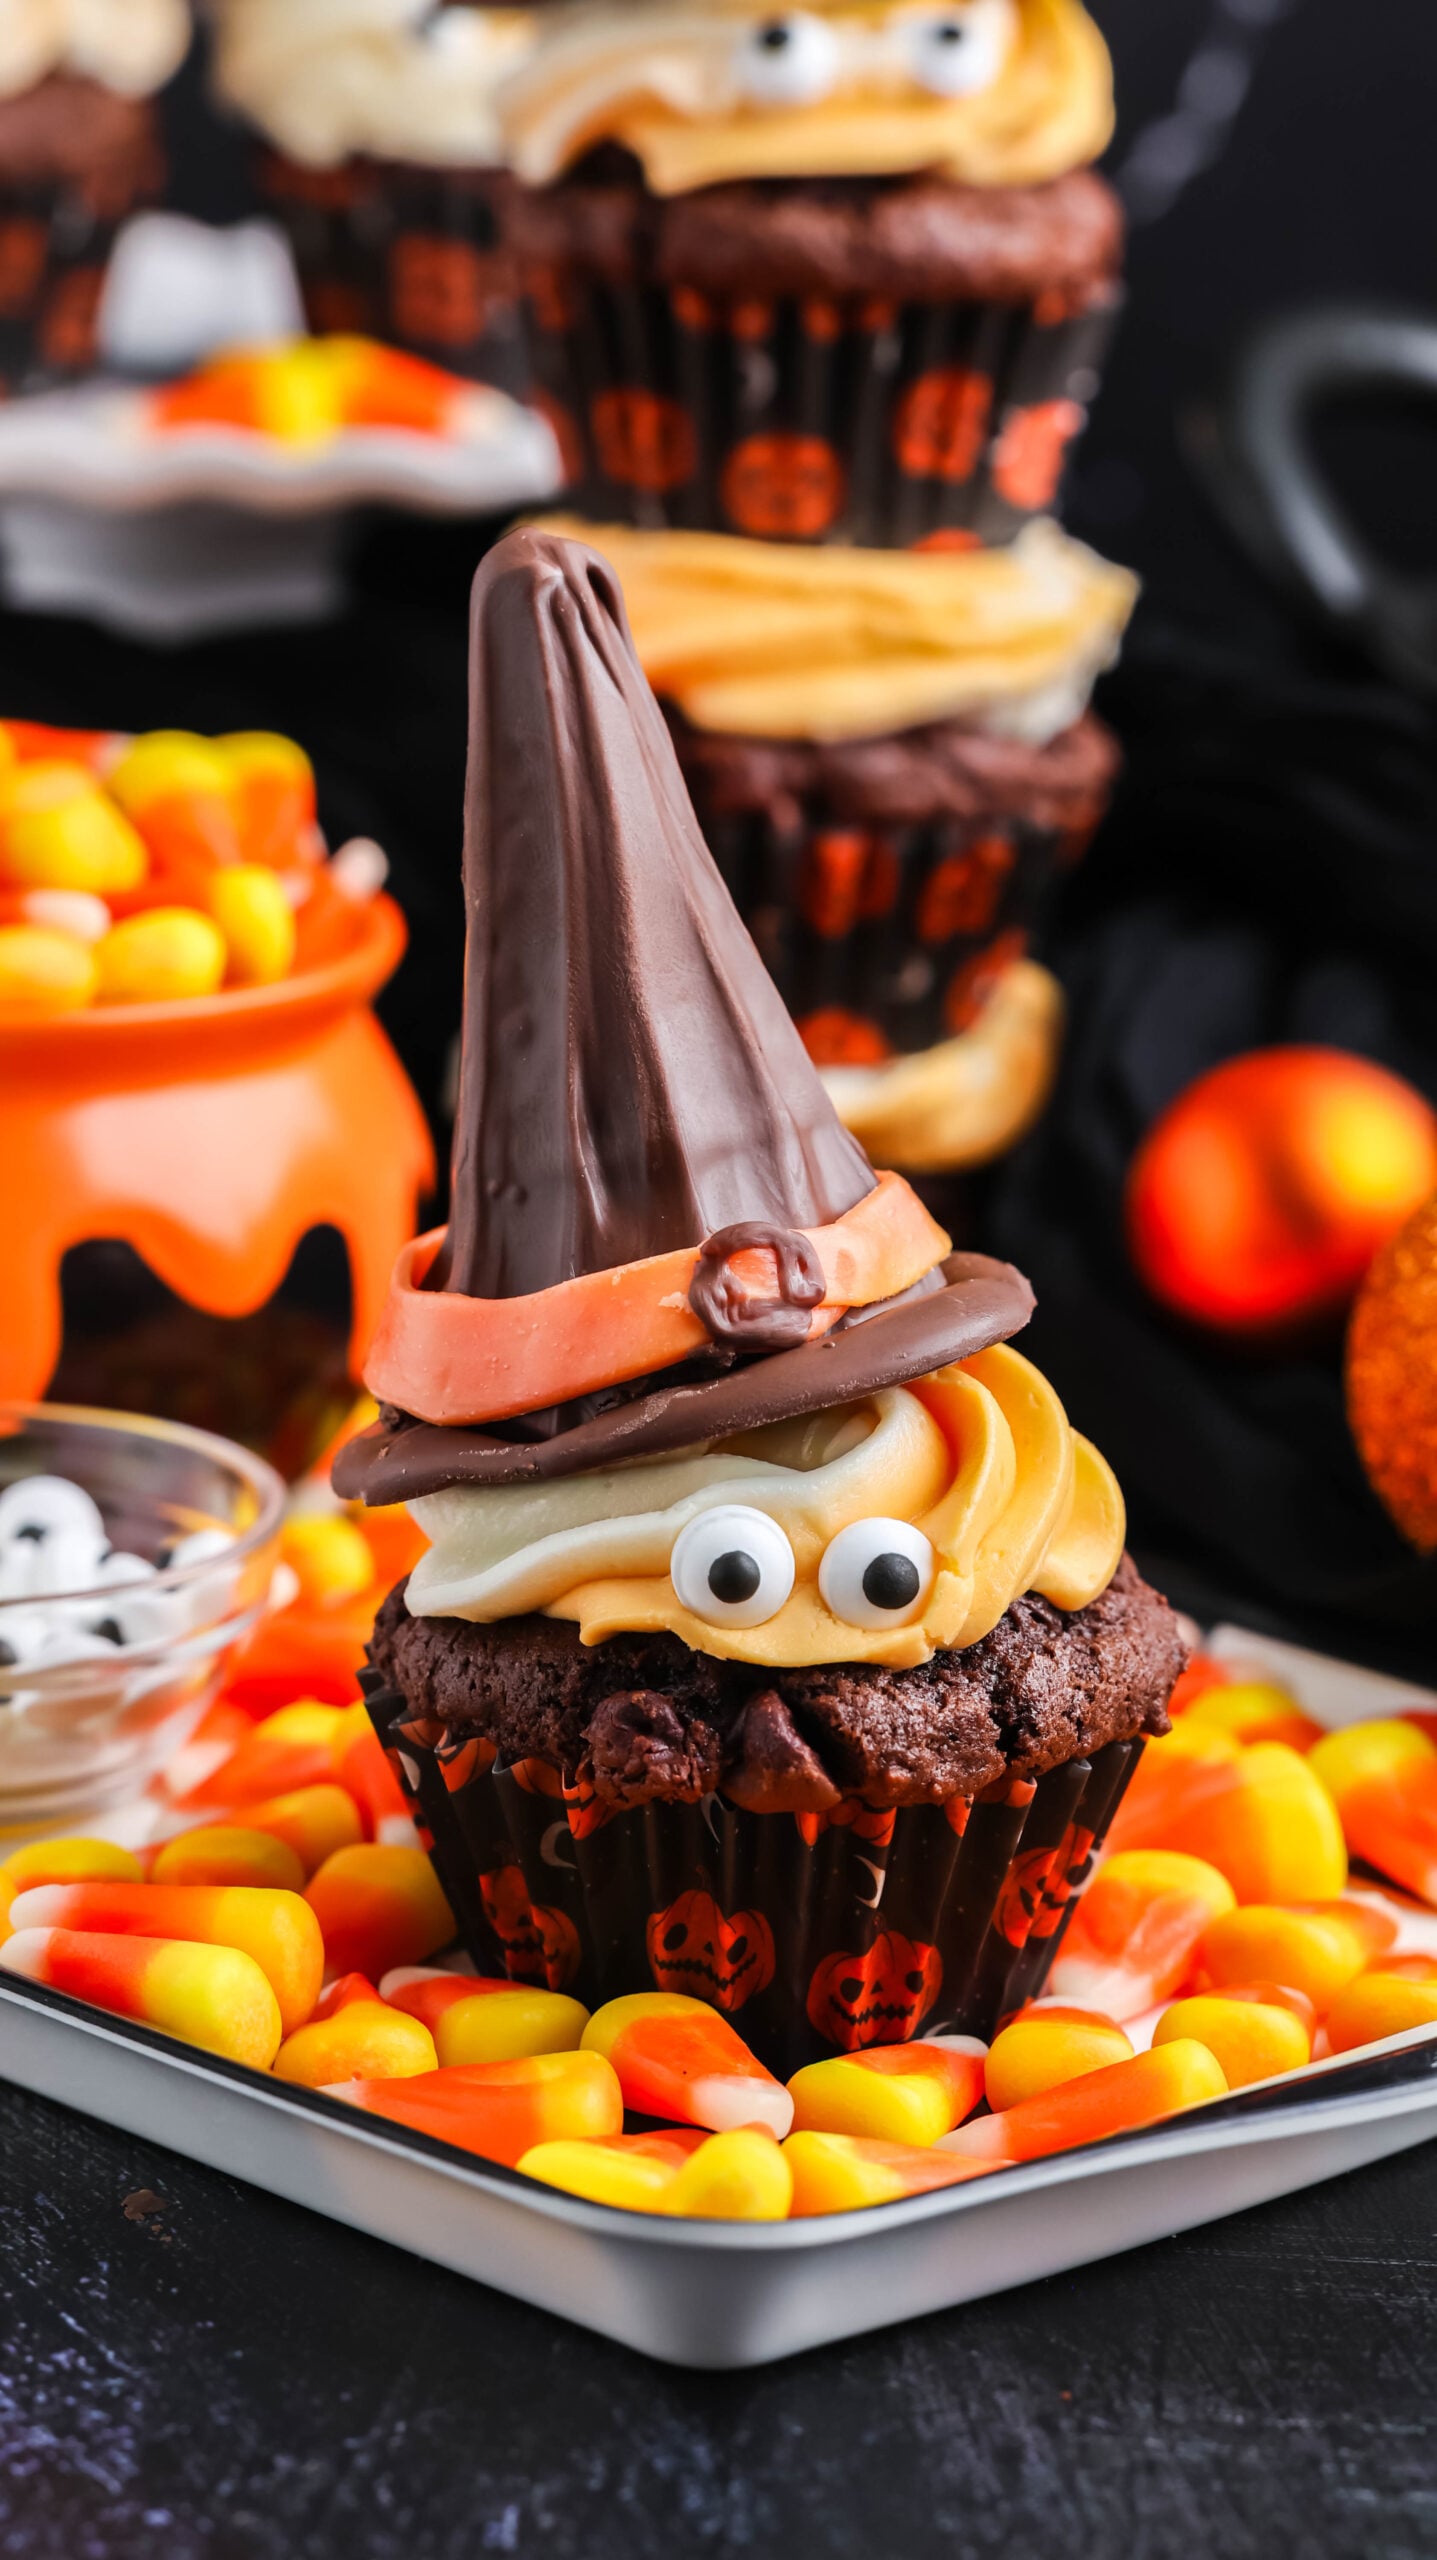
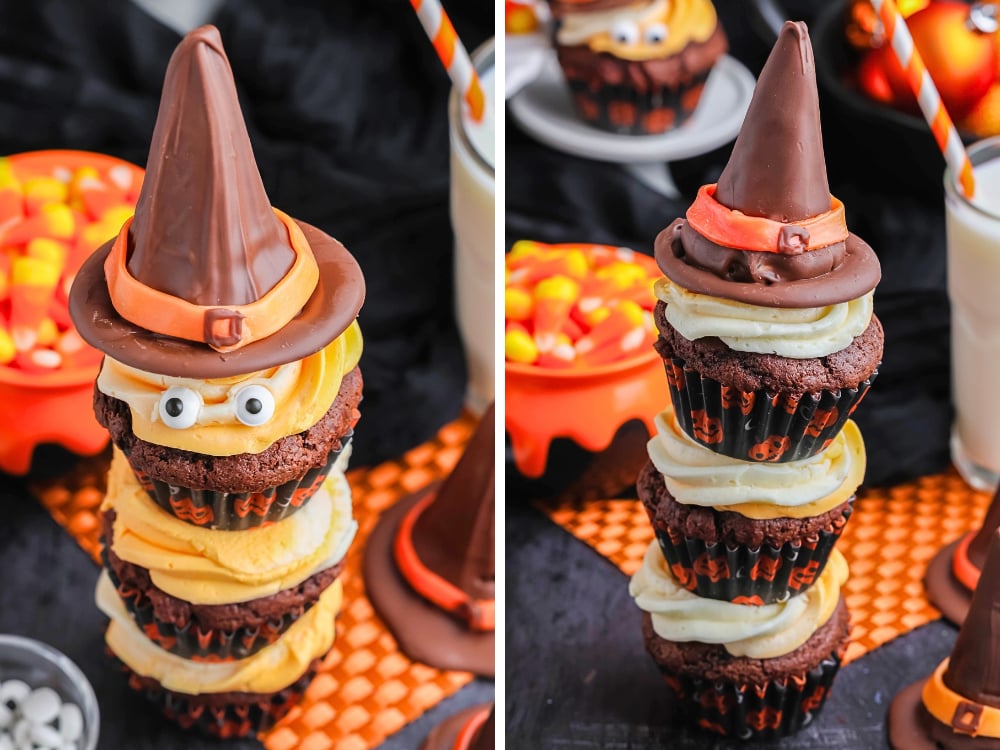
These Halloween cupcakes are rich, moist, and just spooky enough to make any October celebration feel extra special! Each homemade chocolate cupcake is topped with a tall swirl of orange-and-white vanilla buttercream and an edible witch hat made with a mini sugar cone, an Oreo, chocolate almond bark, and an orange candy band.
They look like a bakery-style Halloween dessert, but every part can be made at home-and the witch hats can be prepared a day ahead. That means less last-minute kitchen chaos when you are also trying to set out snacks, straighten the house, and get everyone into costumes. Mom life during Halloween is busy enough!
Serve these witch hat cupcakes at a Halloween party, bring them to a fall bake sale, or make them as a fun weekend baking project with the kids. The chocolate cupcakes are delicious even without the decorations, so any extras can simply be frosted and finished with sprinkles or candy eyes.
This post may contain affiliate links. As an Amazon Associate, I earn from qualifying purchases.
In This Post
Why You Will Love These Halloween Cupcakes
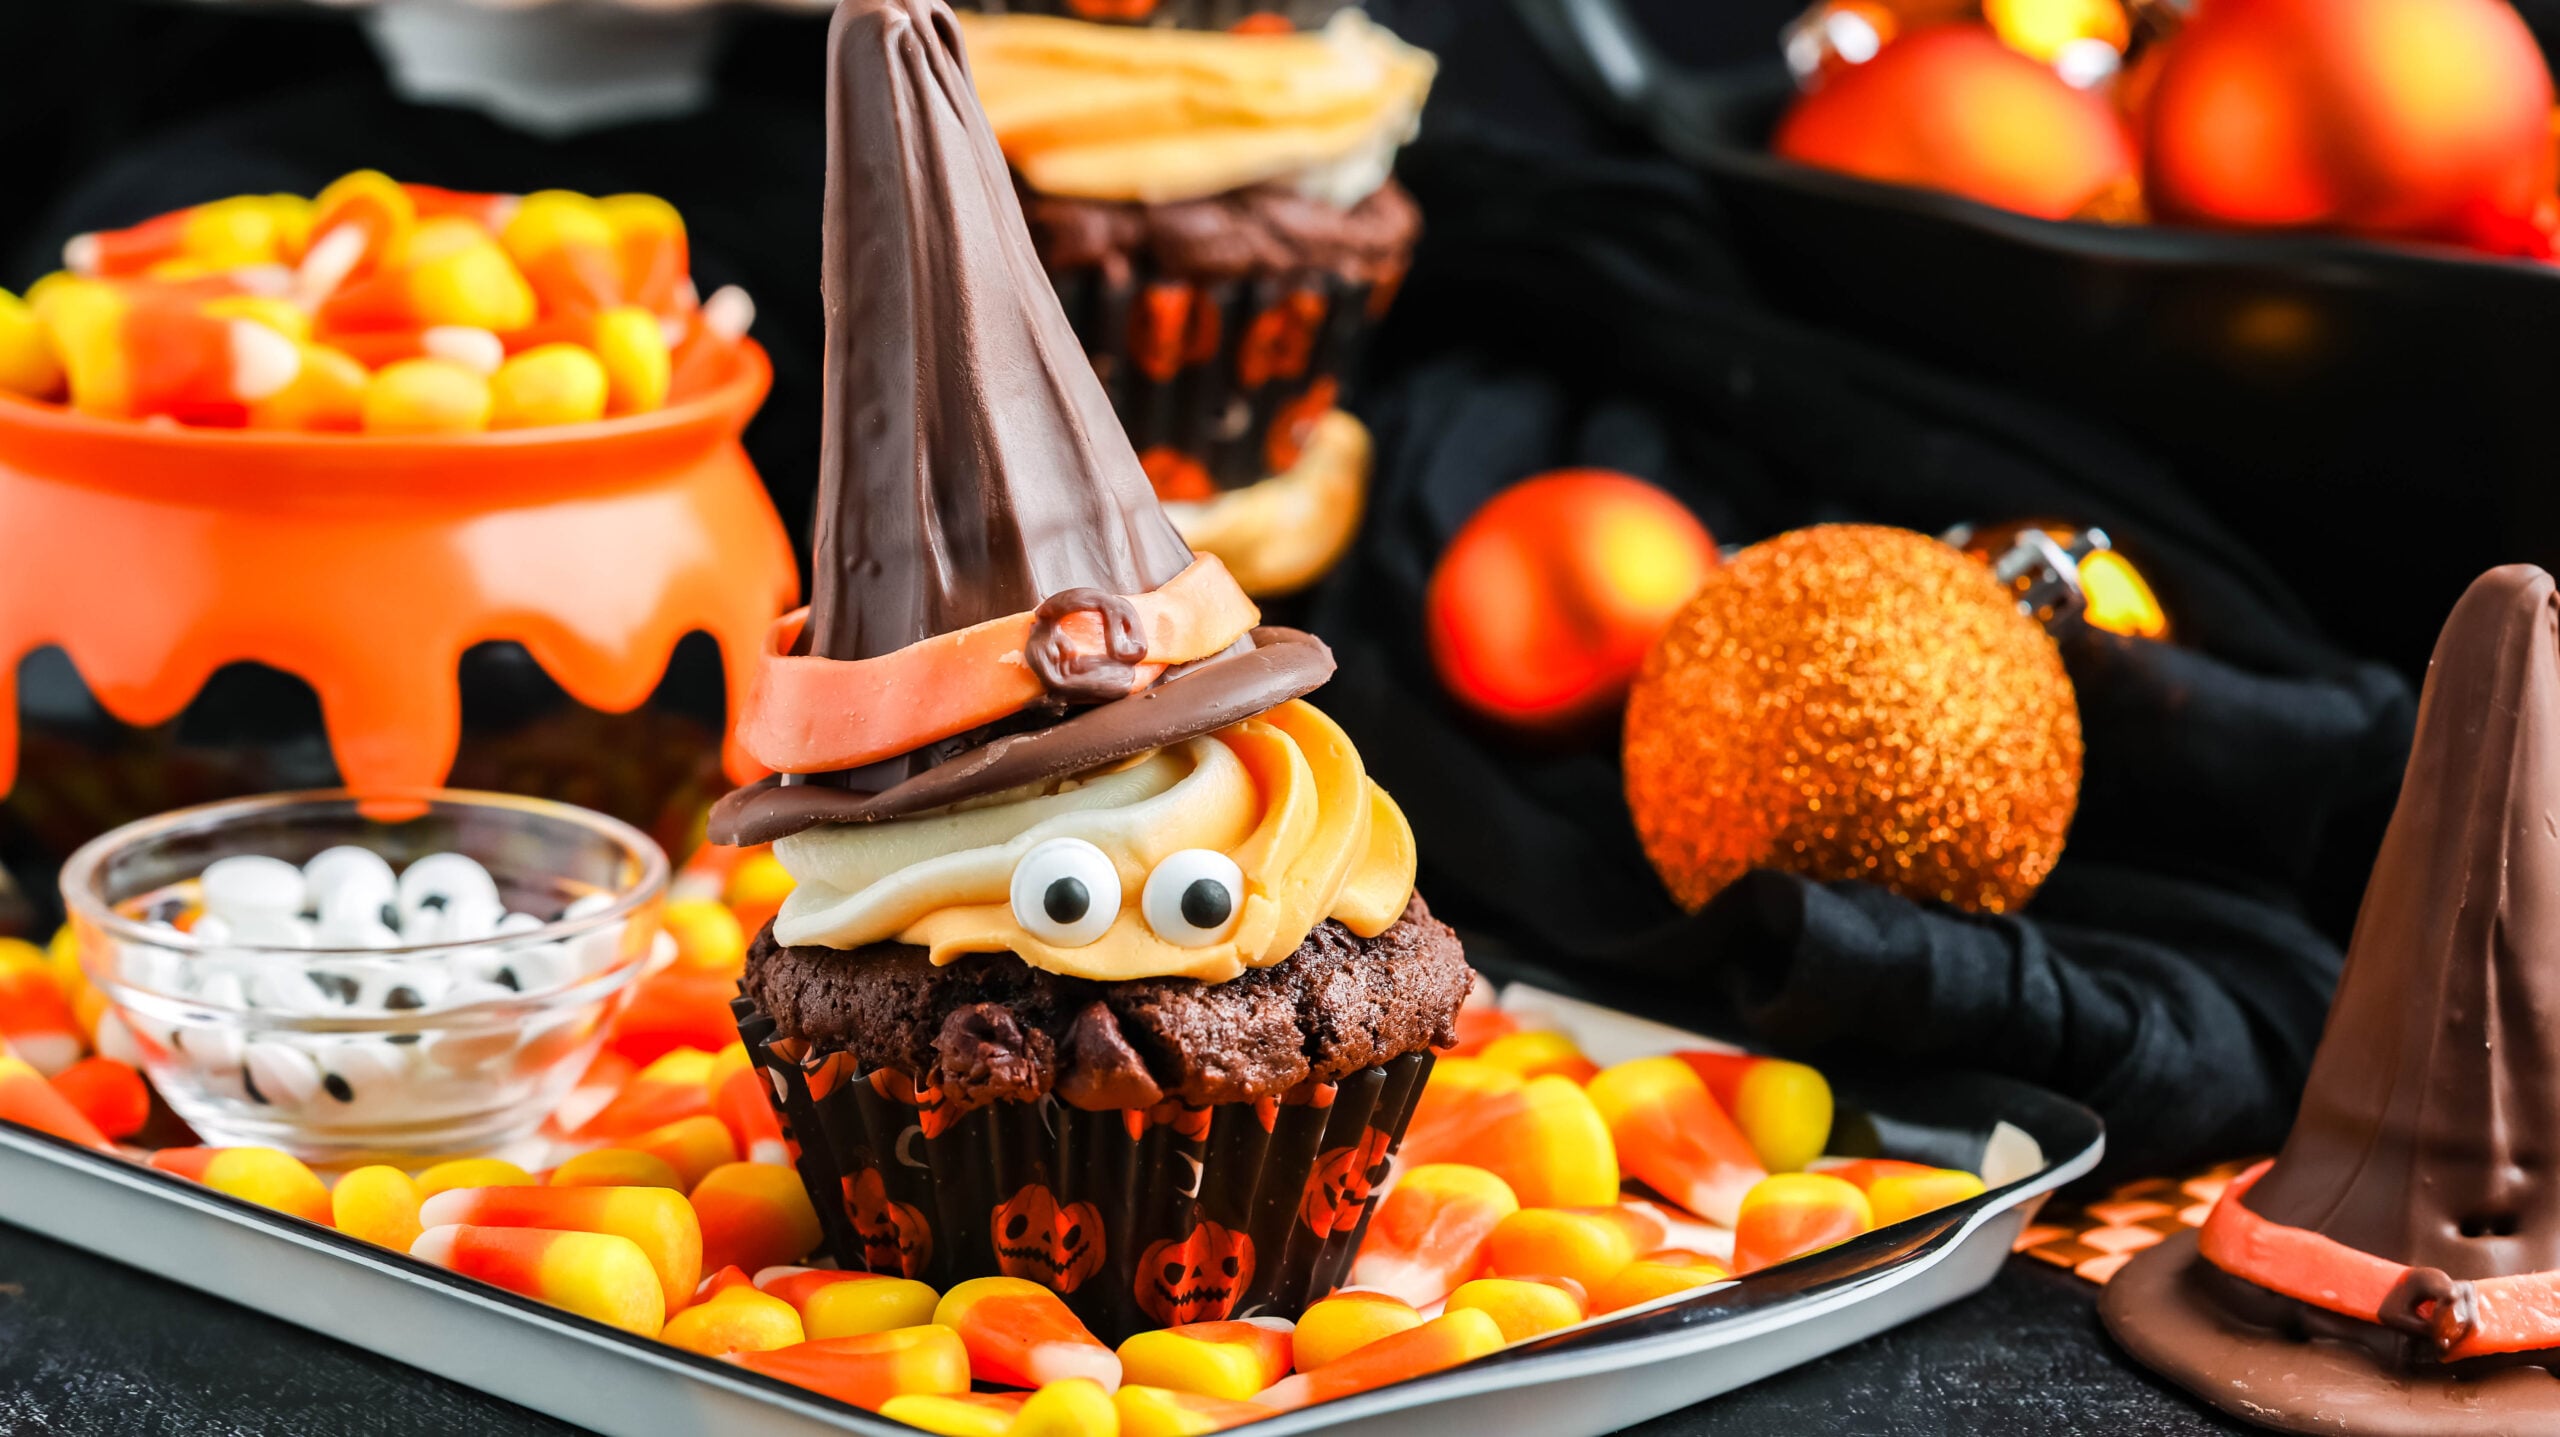
- Made from scratch: The chocolate cupcakes have a tender crumb, deep cocoa flavor, and plenty of mini chocolate chips in every bite.
- A true Halloween showstopper: The edible witch hats turn a simple cupcake into a party centerpiece.
- Make-ahead friendly: Prepare the witch hats and buttercream one day early, then assemble the cupcakes when you are ready to serve.
- Fun for kids to help decorate: Younger helpers can add candy eyes and sprinkles, while adults handle the warm candy and melted chocolate.
- Easy to personalize: Change the frosting colors, use different sprinkles, or decorate the hats with purple, green, or orange bands.
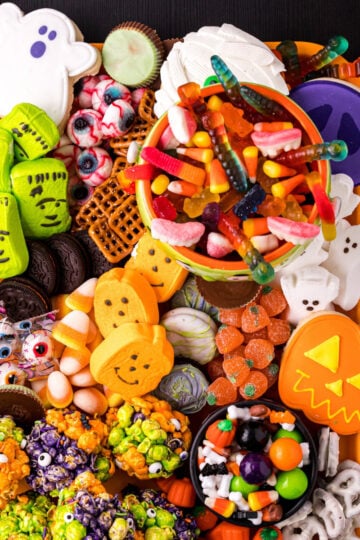
These cupcakes would look adorable beside a bowl of my Halloween Muddy Buddies snack mix or as the sweet centerpiece for this Halloween snack board.
What Do Halloween Witch Hat Cupcakes Taste Like
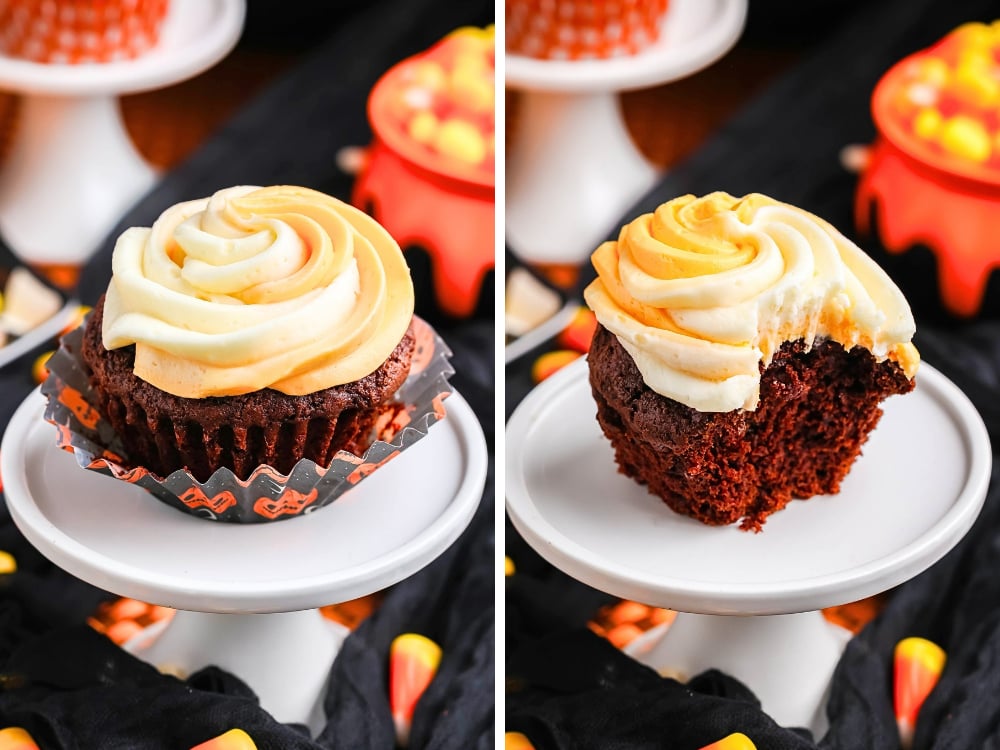
The cupcakes are soft and deeply chocolatey without being overly sweet. Cocoa powder gives the batter its rich flavor, while a small amount of espresso powder makes the chocolate taste even more intense. Do not worry-the finished cupcakes will not taste like coffee.
Buttermilk keeps the crumb tender, liquid coconut oil adds moisture, and chocolate chips create little pockets of melted chocolate. On top, the fluffy vanilla buttercream balances the dark chocolate cake, while the chocolate-coated sugar cone adds a light, crisp crunch.
Ingredients for Halloween Cupcakes
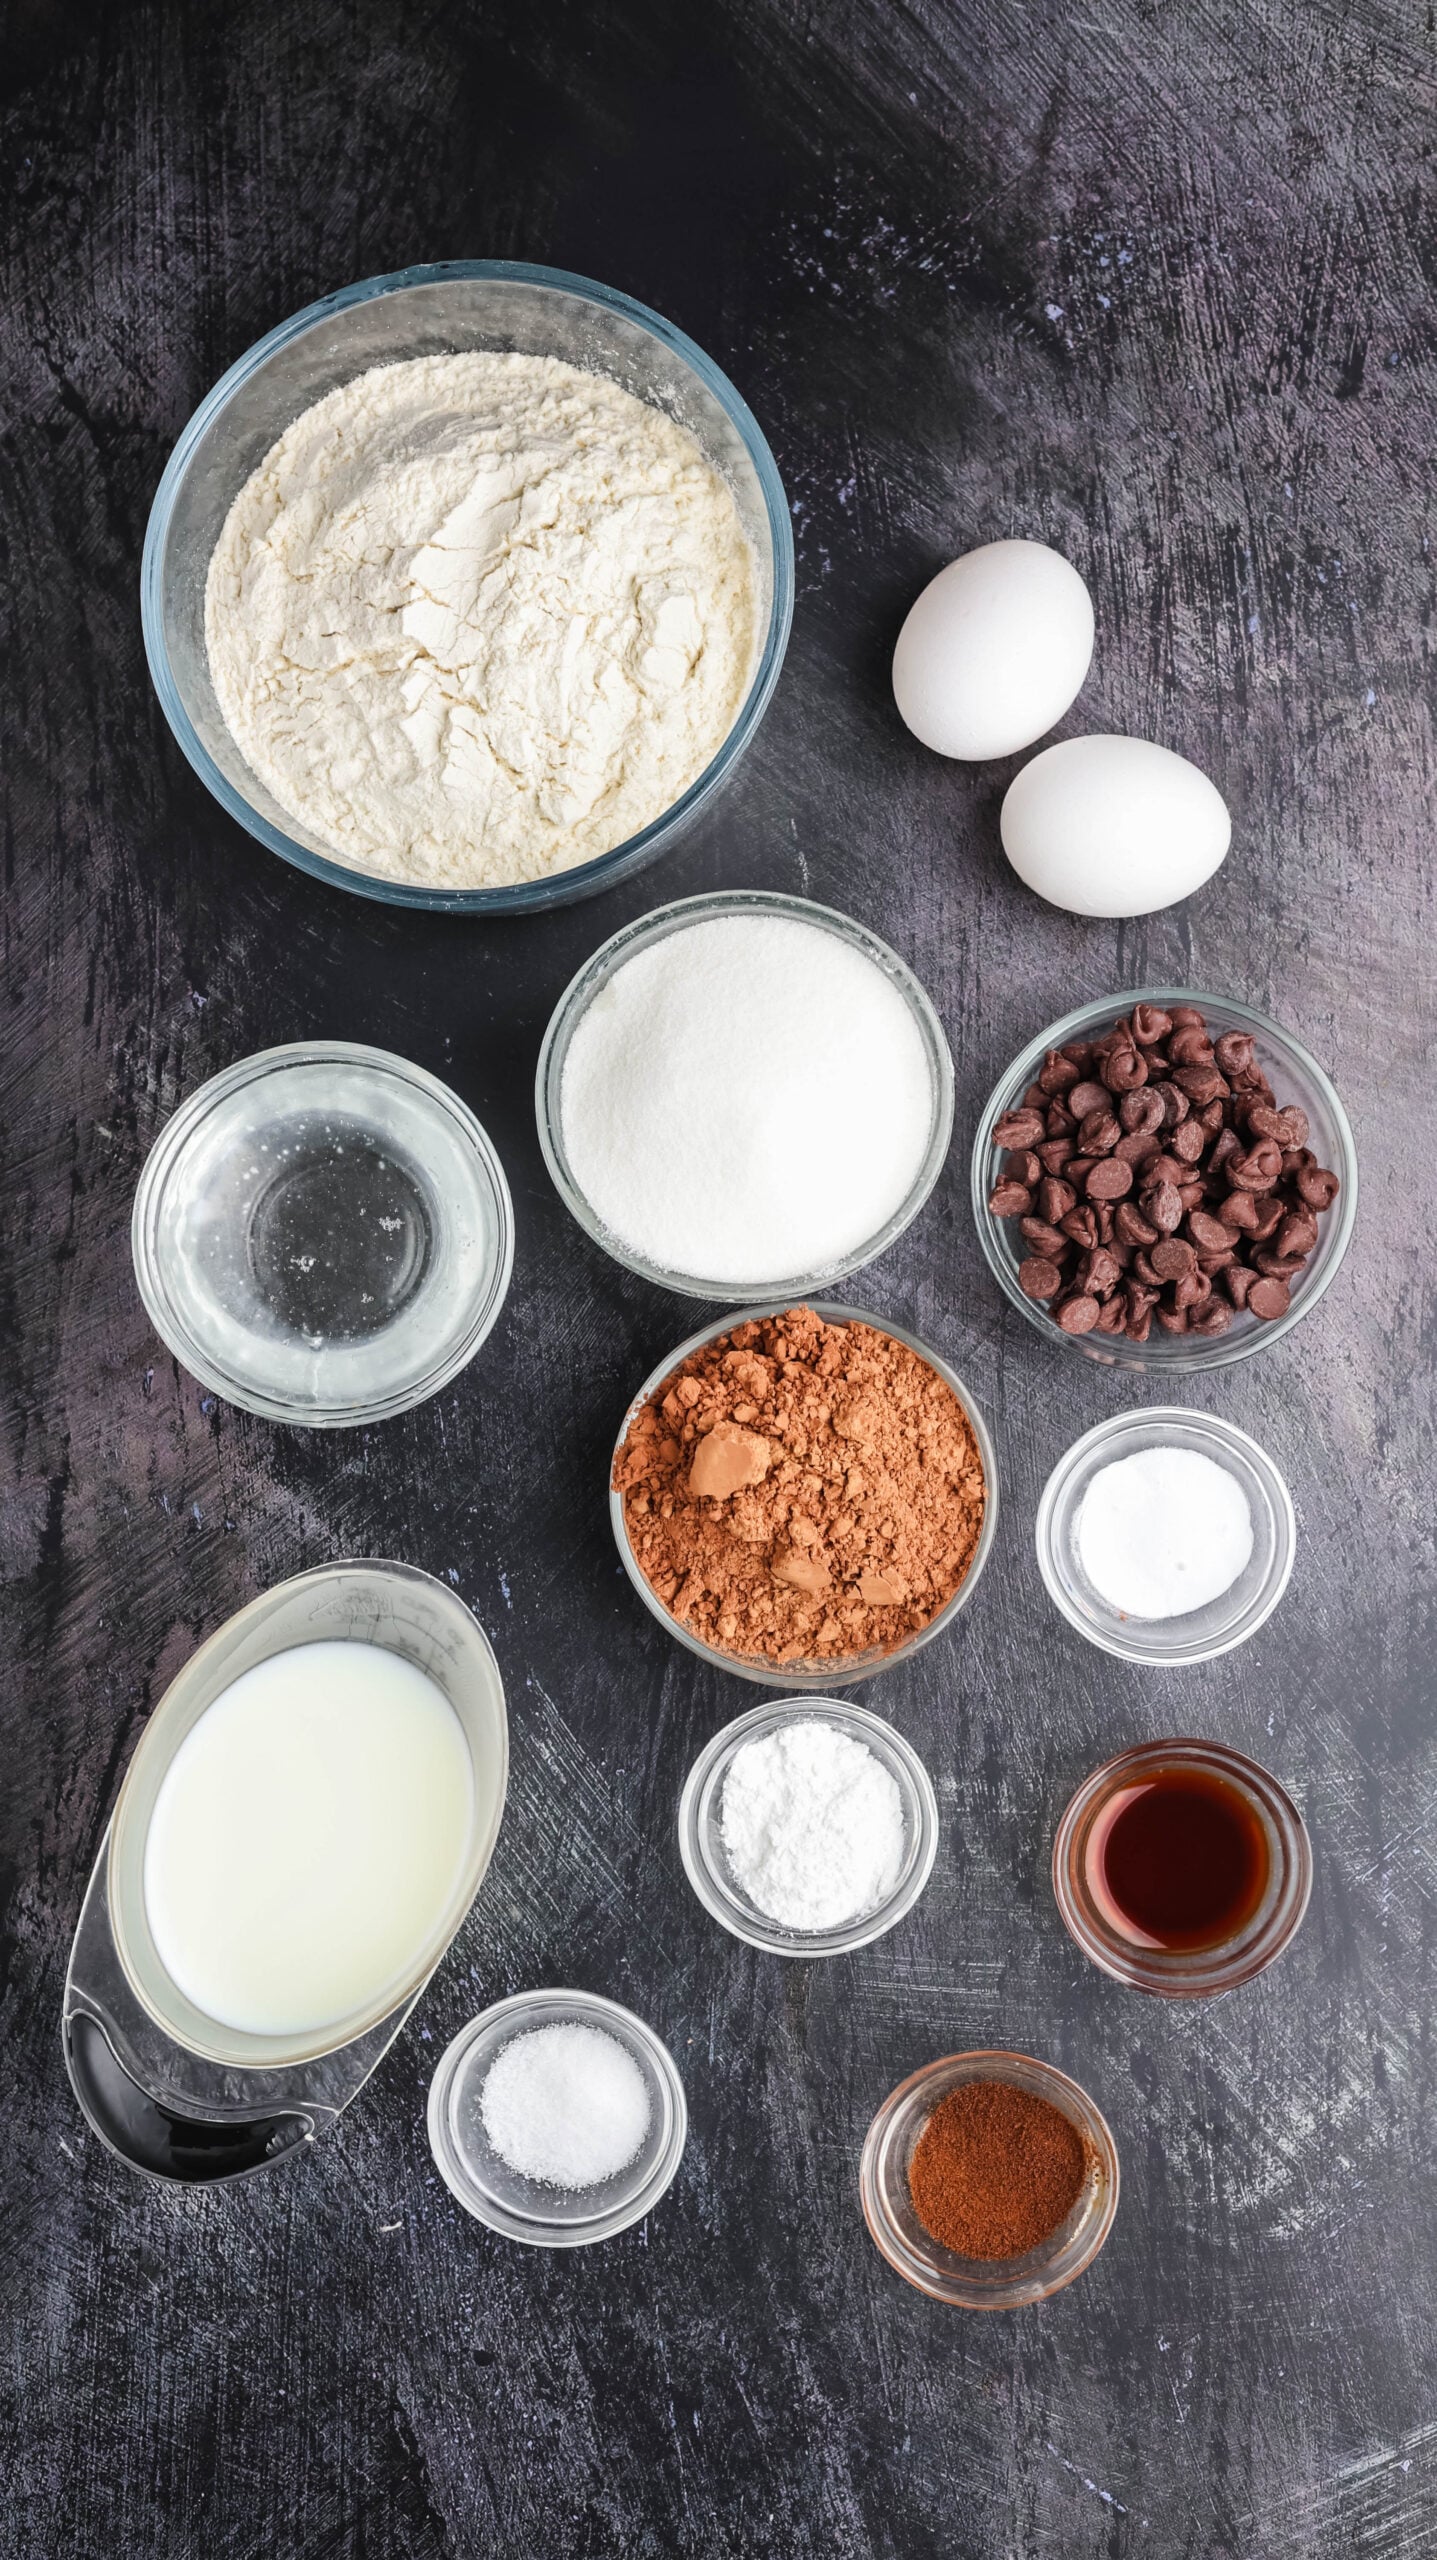
For the chocolate cupcakes
- All-purpose flour: Measure it by spooning the flour into the measuring cup and leveling the top. Scooping directly from the bag can pack in too much flour and make the cupcakes dry.
- Unsweetened cocoa powder: Natural unsweetened cocoa powder works well with the baking soda in this recipe.
- Espresso powder: This deepens the cocoa flavor without making the cupcakes taste like coffee.
- Baking powder and baking soda: The combination gives the thick chocolate batter enough lift.
- Sea salt: A little salt balances the sweetness and makes the chocolate flavor pop.
- Eggs: Use large eggs at room temperature so they blend smoothly into the batter.
- Granulated sugar: Sweetens the cupcakes and helps create a soft crumb.
- Buttermilk: Adds moisture and a gentle tang while reacting with the baking soda.
- Liquid coconut oil: Keeps the cupcakes moist. Use refined coconut oil for a neutral flavor or unrefined coconut oil if you enjoy a hint of coconut.
- Vanilla extract: Rounds out the cocoa and chocolate flavors.
- Chocolate chips: Mini chips distribute most evenly, but regular semisweet chips also work.
For the edible witch hats
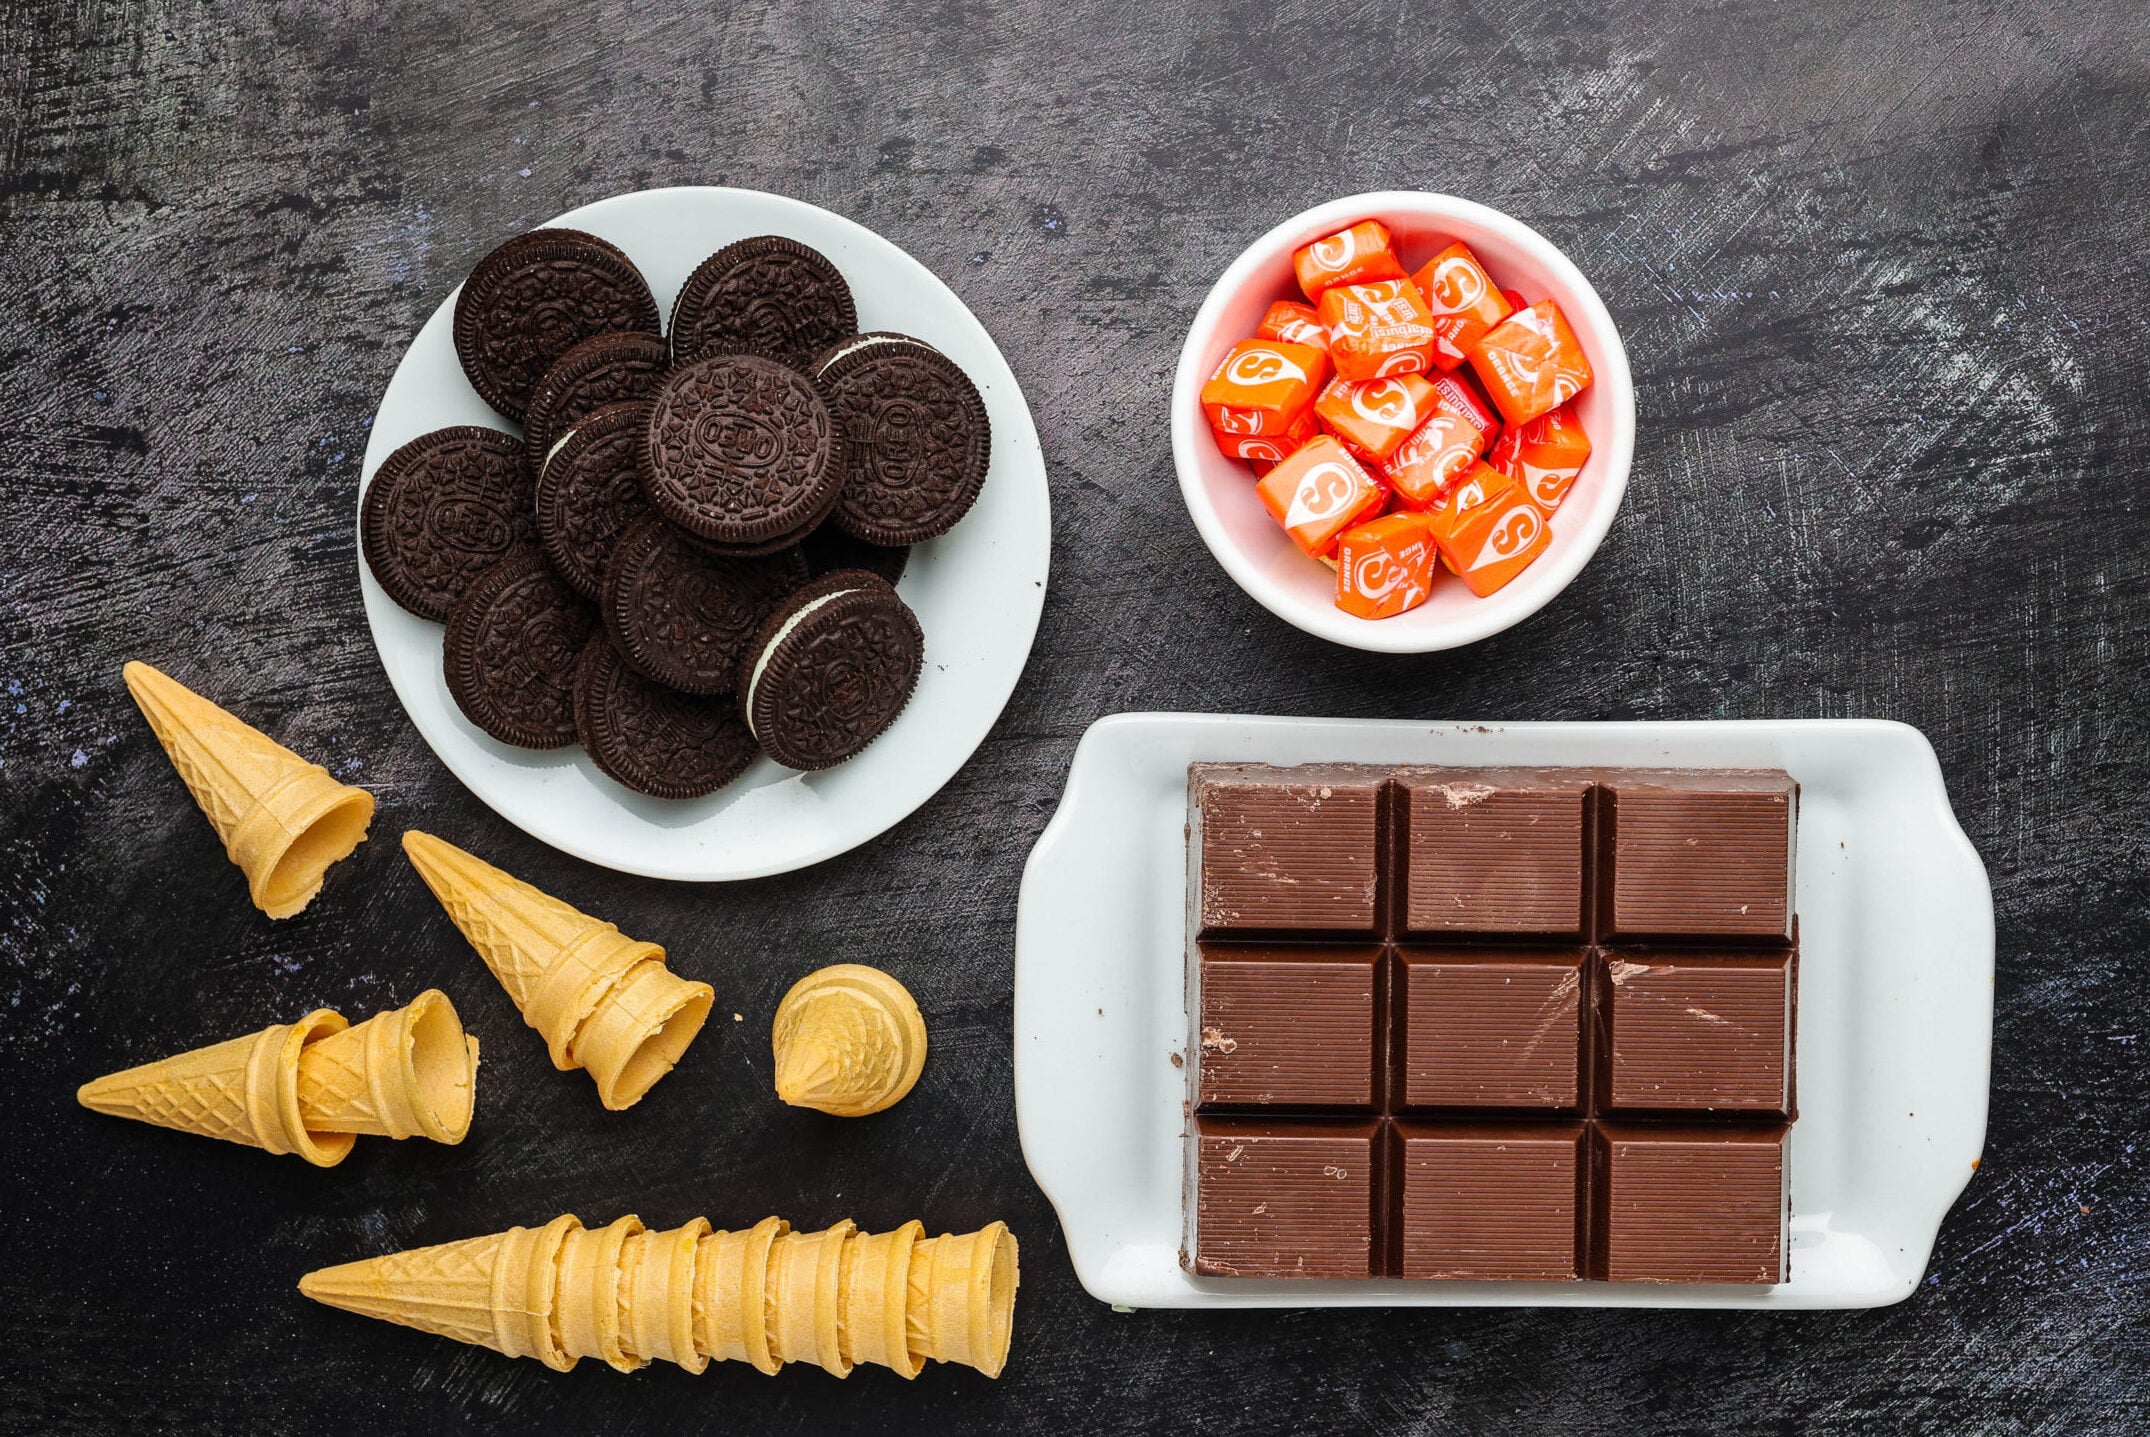
- Mini sugar cones: The pointed shape creates the top of each witch hat. I order mini sugar cones on Amazon when I cannot find them locally.
- Oreos: Separate each cookie and use the half with the cream filling. The cream helps hold the cone in place, while the cookie creates the brim.
- Chocolate almond bark: This melts smoothly, firms up well, and gives the hats an even chocolate finish. Chocolate melting wafers may also be used.
- Orange Starburst candies: Once gently warmed, the candy becomes pliable enough to roll and cut into colorful hatbands.
For the two tone buttercream
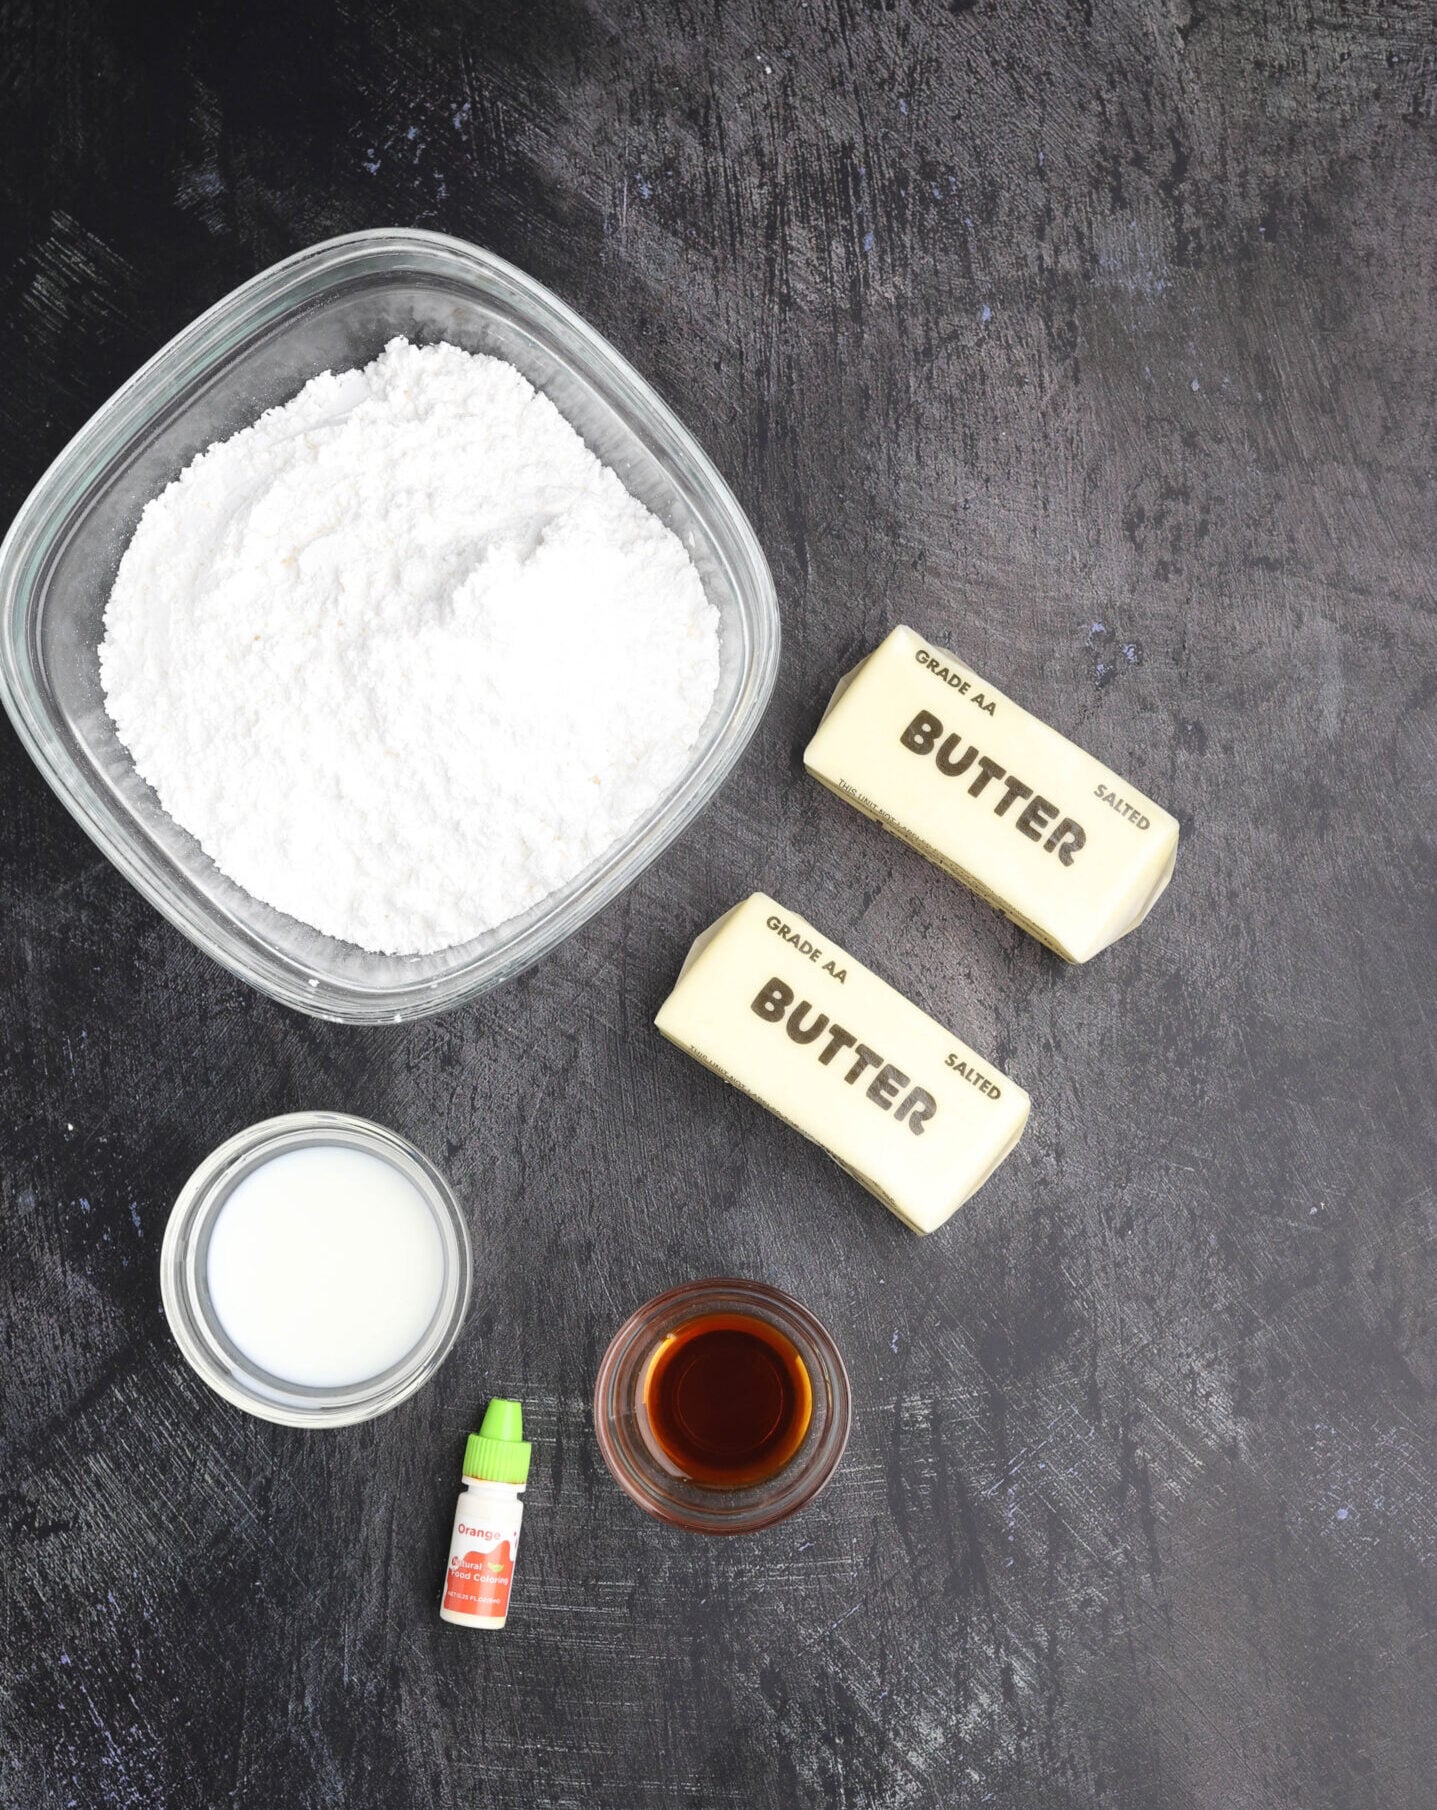
- Unsalted butter: It should be softened, but not greasy or melted.
- Powdered sugar: Gives the frosting structure and sweetness.
- Vanilla extract: Adds classic buttercream flavor.
- Milk: Add only enough to make the frosting pipeable. Any variety will work.
- Orange gel food coloring: Gel creates a vivid color without thinning the frosting as much as liquid coloring.
For even more Halloween personality, add candy eyes or Halloween sprinkles around the base of each hat.
Helpful Tools
You do not need professional decorating equipment, but a few basic baking tools make the process much smoother:
- Stand mixer fitted with the paddle attachment
- Hand mixer
- Measuring cups and spoons
- Medium cookie scoop
- Standard 12-cup muffin pan
- Halloween cupcake liners
- Silicone spatula
- Wire cooling rack and small wire rack
- Mixing bowls in several sizes
- Parchment paper
- Small cutting board
- Sharp knife or pizza cutter
- Small rolling pin
- Food-grade decorating brushes
- Piping bag and a large star piping tip
- Plastic wrap
How to Make Halloween Cupcakes
There are three simple parts to this recipe: bake the chocolate cupcakes, make the edible witch hats, and pipe the two-tone buttercream. For the easiest schedule, prepare the hats the day before.
Make the chocolate cupcakes
Preheat the oven to 350°F and line a standard muffin pan with paper liners.
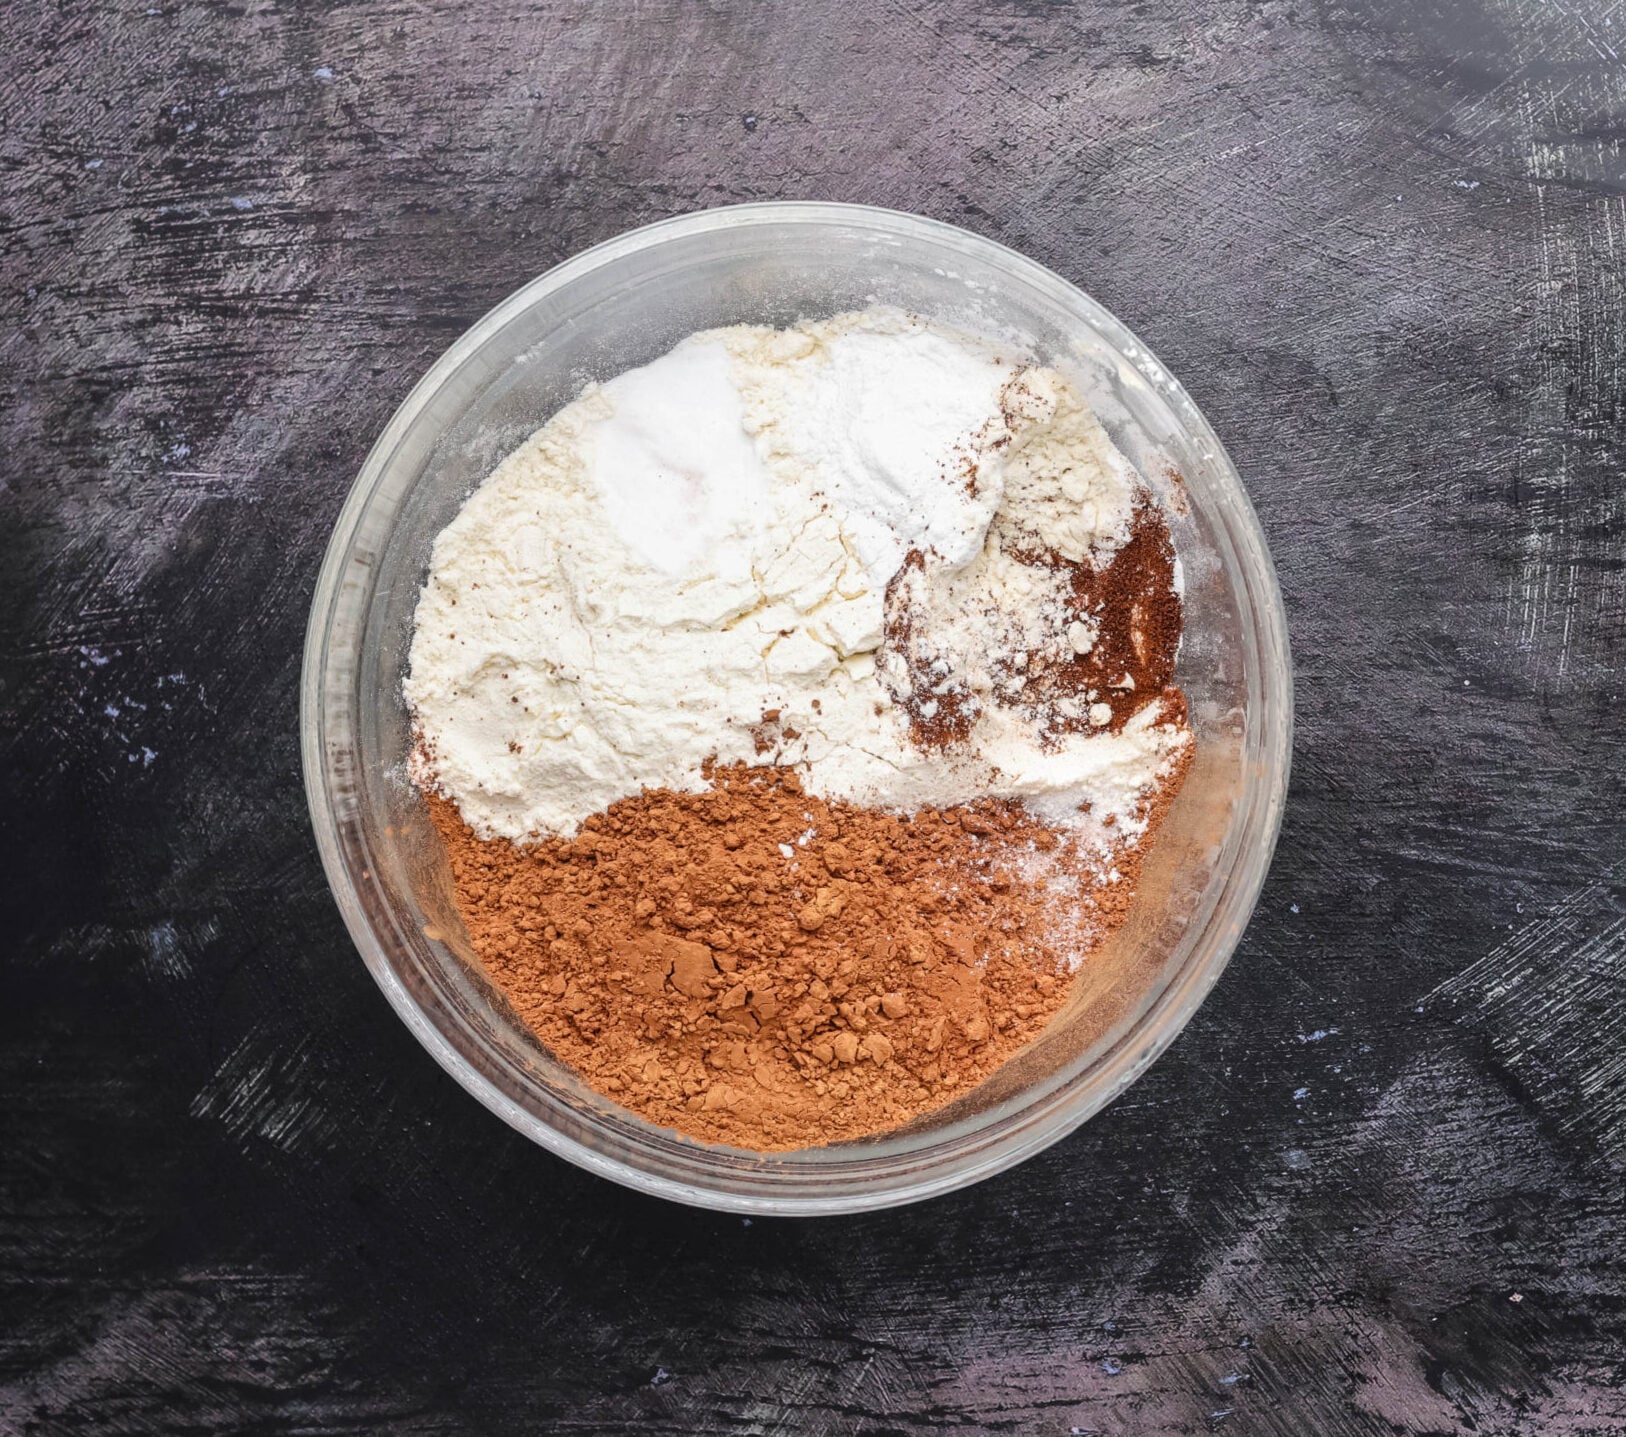
In a medium bowl, whisk together the flour, cocoa powder, espresso powder, baking powder, baking soda, and sea salt. Whisking now helps distribute the leaveners evenly so one cupcake does not rise more than the others.
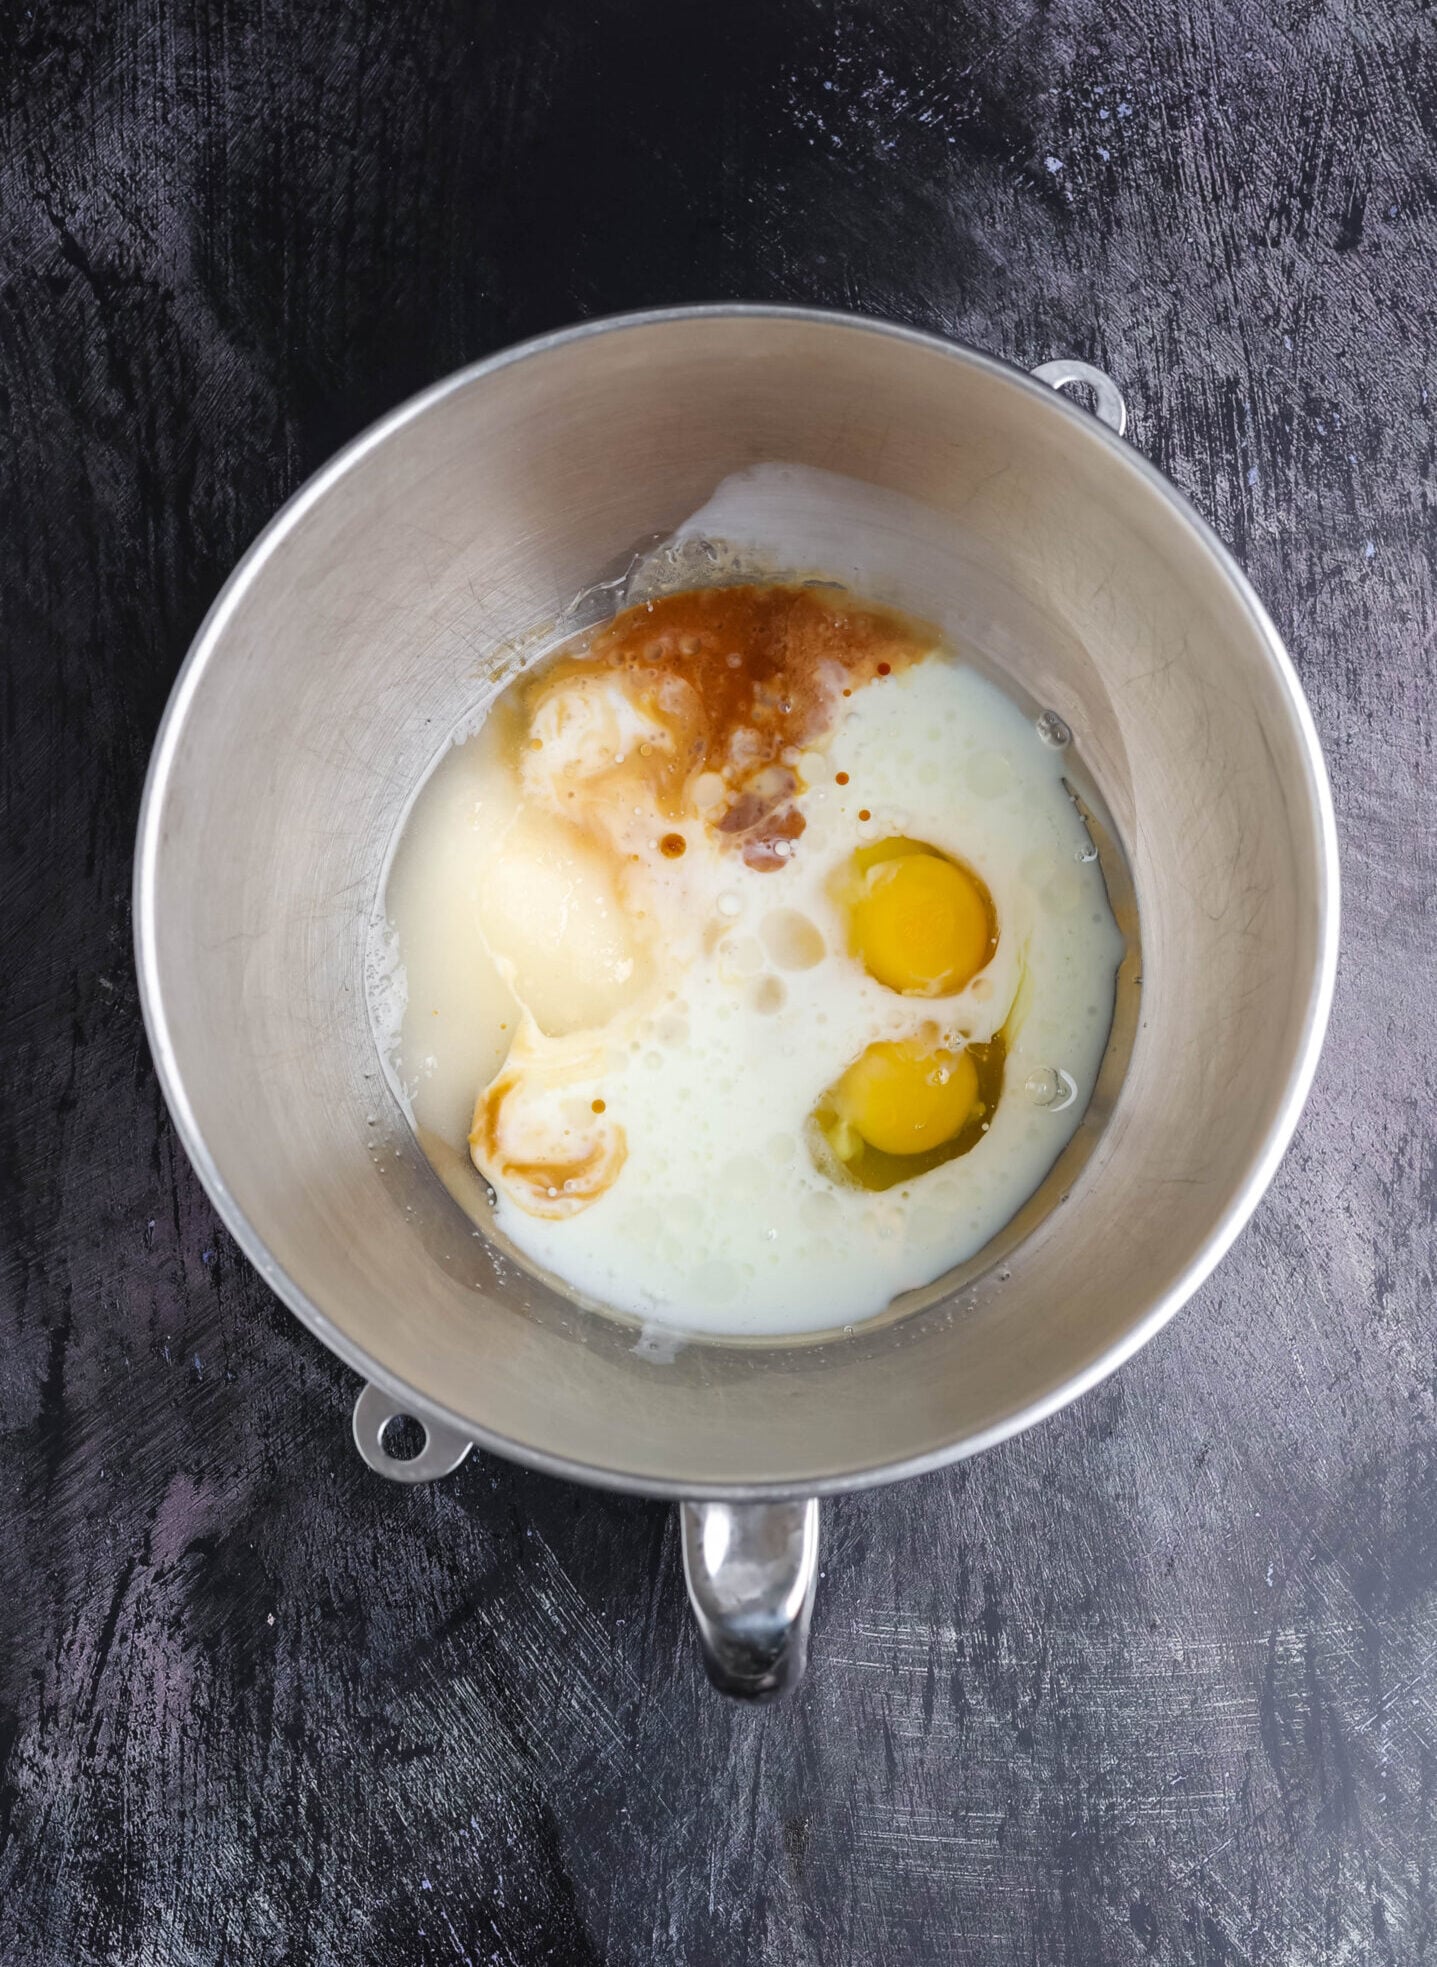
In the bowl of a stand mixer fitted with the paddle attachment, combine the eggs, granulated sugar, buttermilk, melted coconut oil, and vanilla. Mix on low to medium-low speed just until smooth.
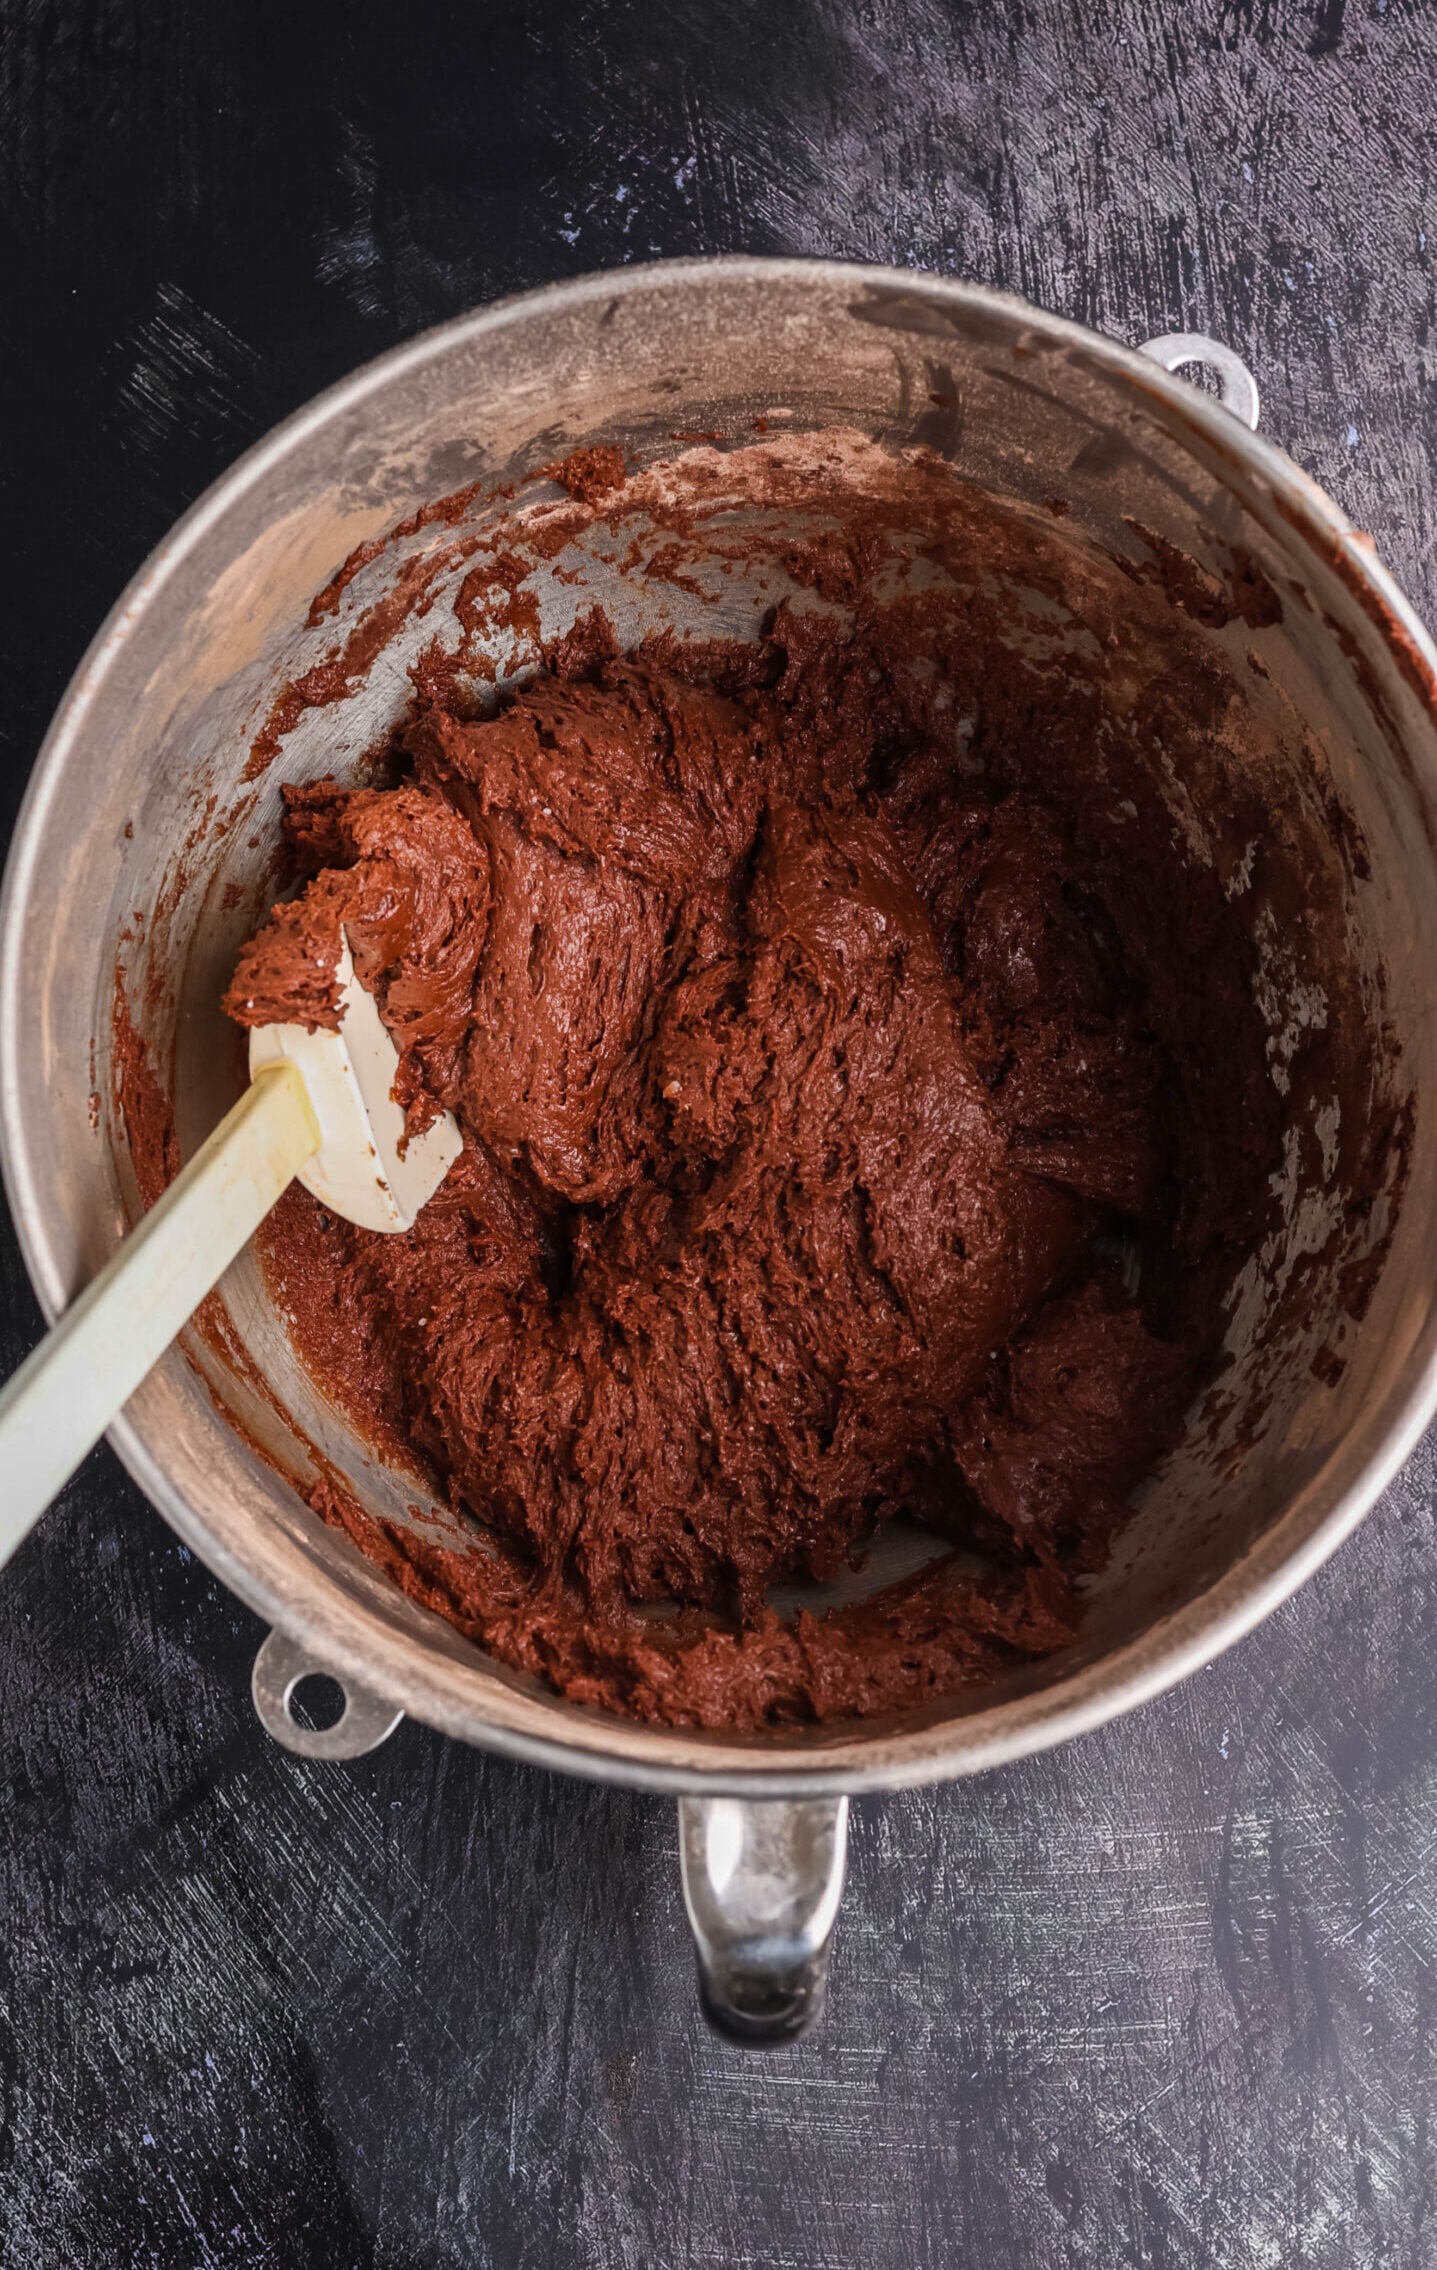
Slowly add the dry ingredients to the wet ingredients. Mix only until no dry streaks remain, then fold in the chocolate chips. The batter will be thick, and that is exactly how it should look.
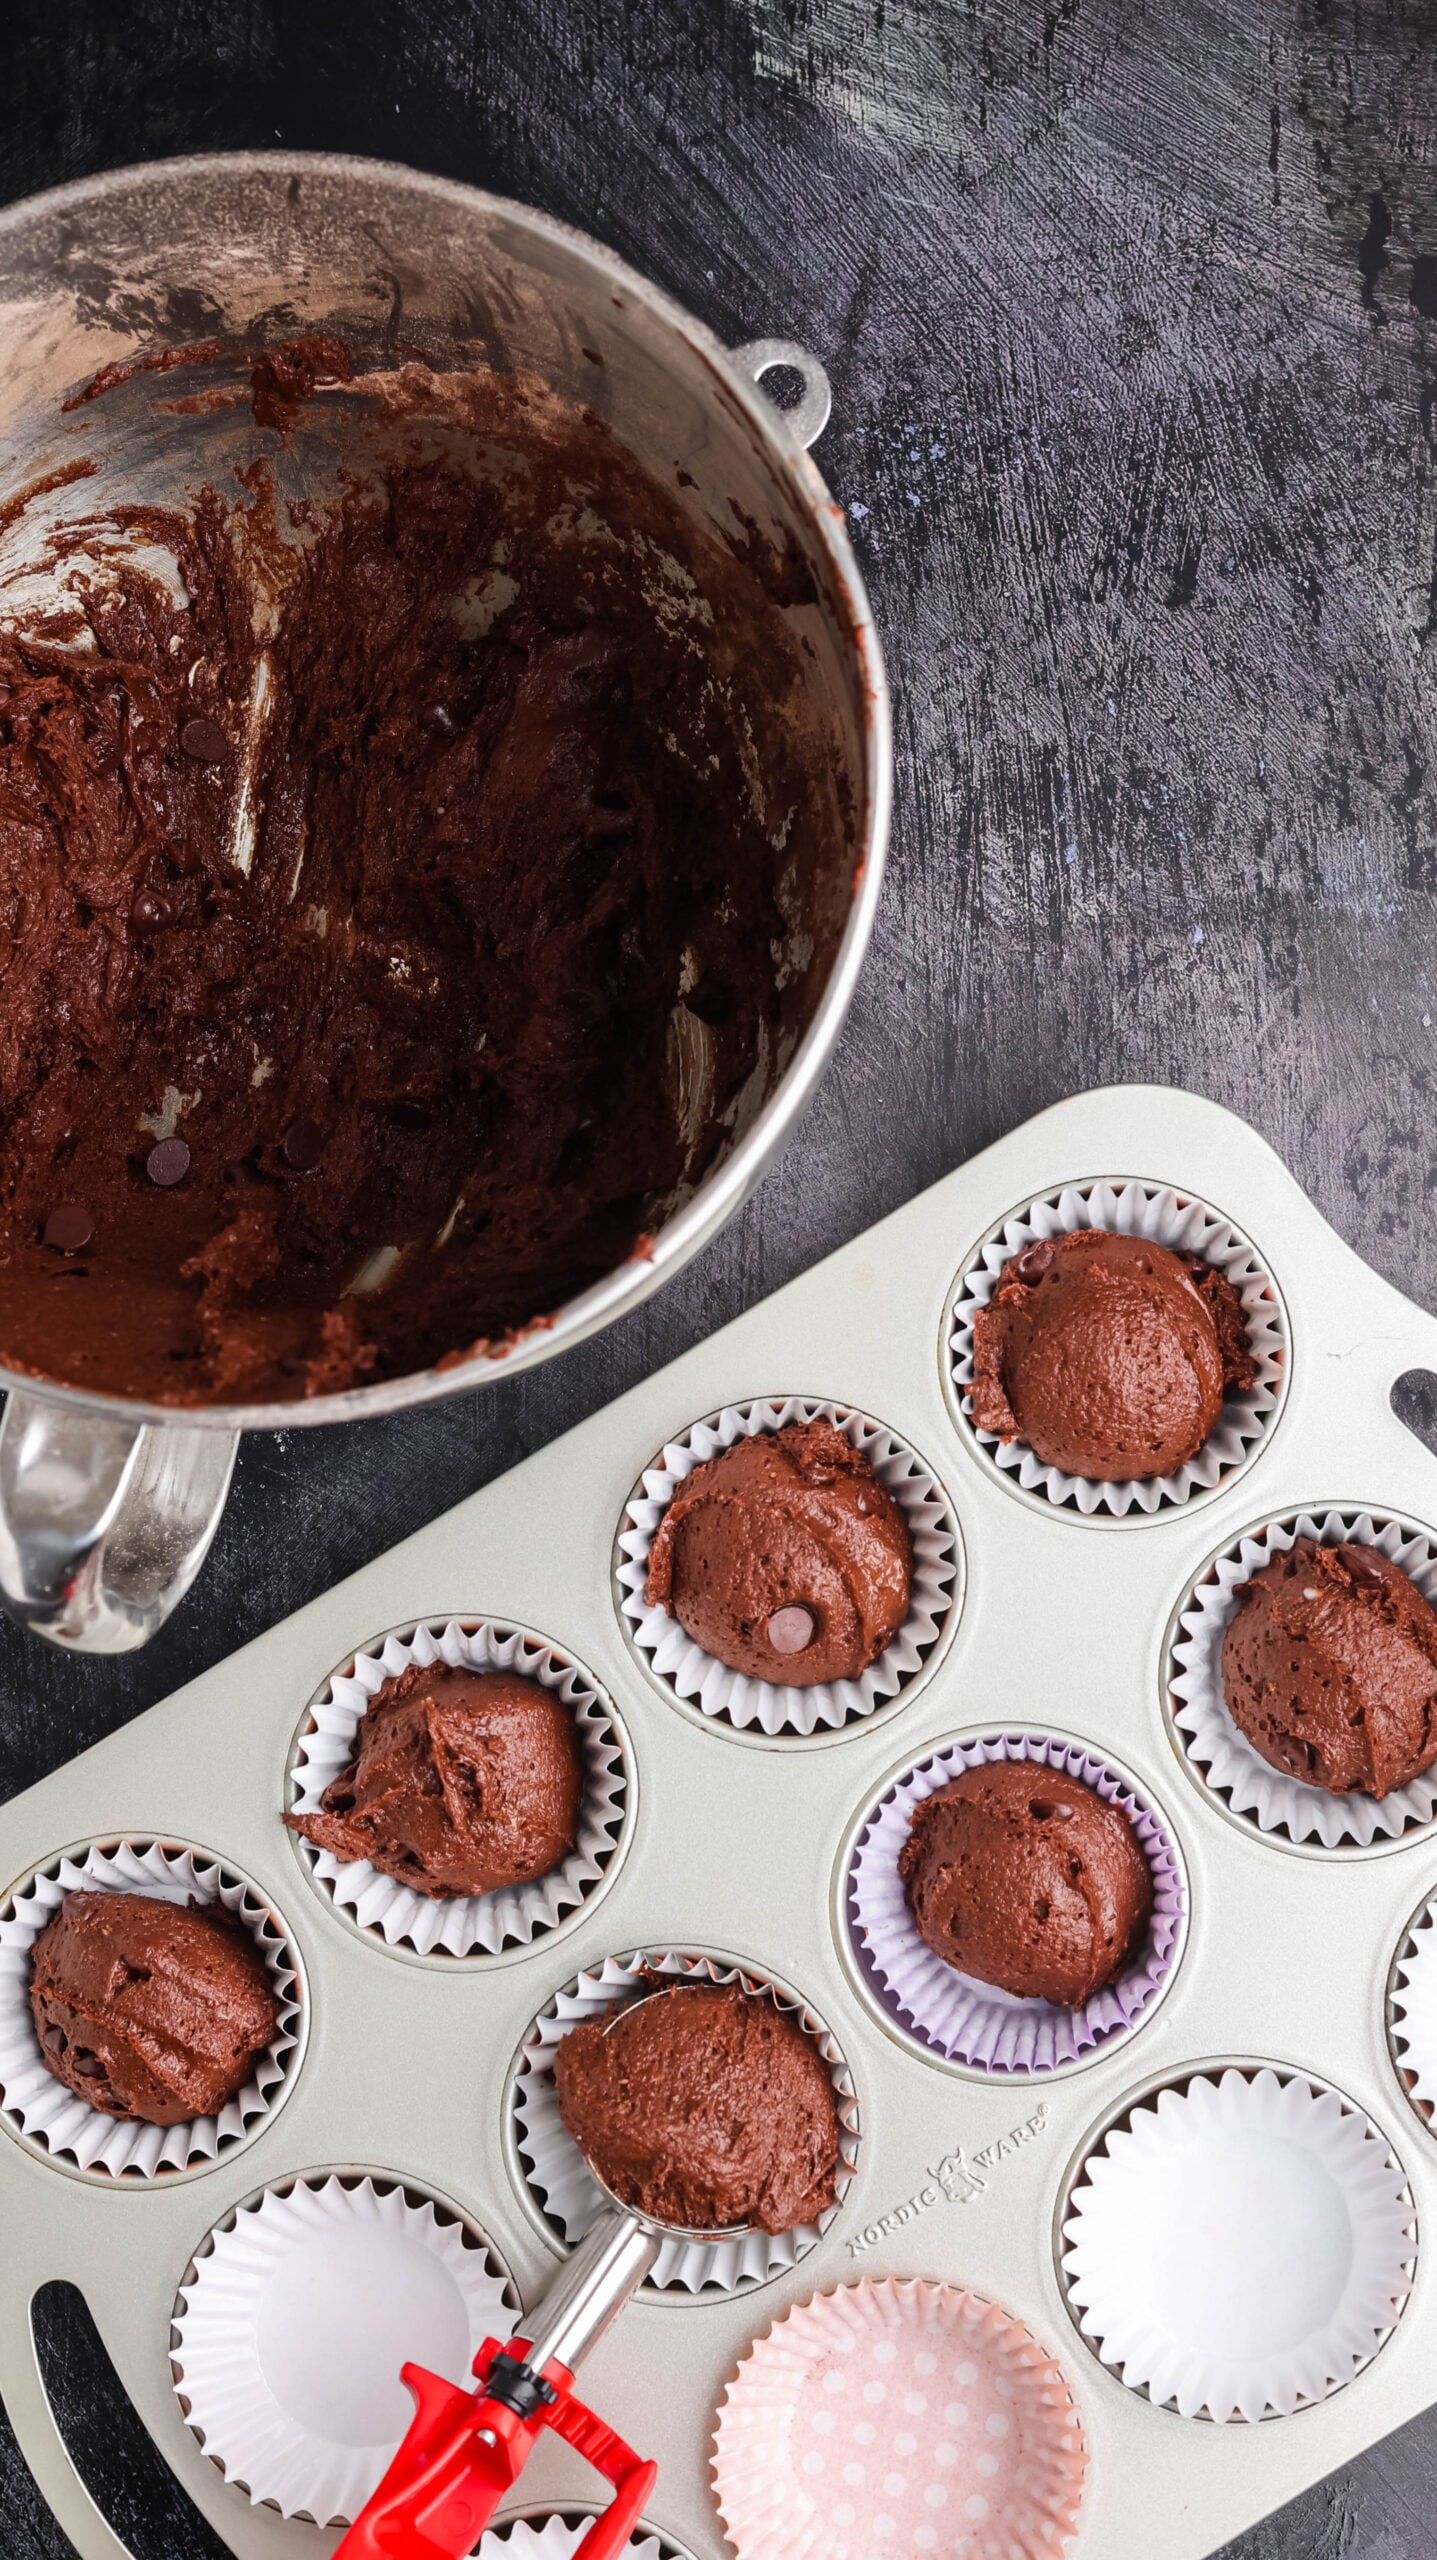
Use a medium cookie scoop to divide the batter among the liners, filling each about two-thirds full. Do not overfill them or the tops may spread over the pan and leave less room for the buttercream.
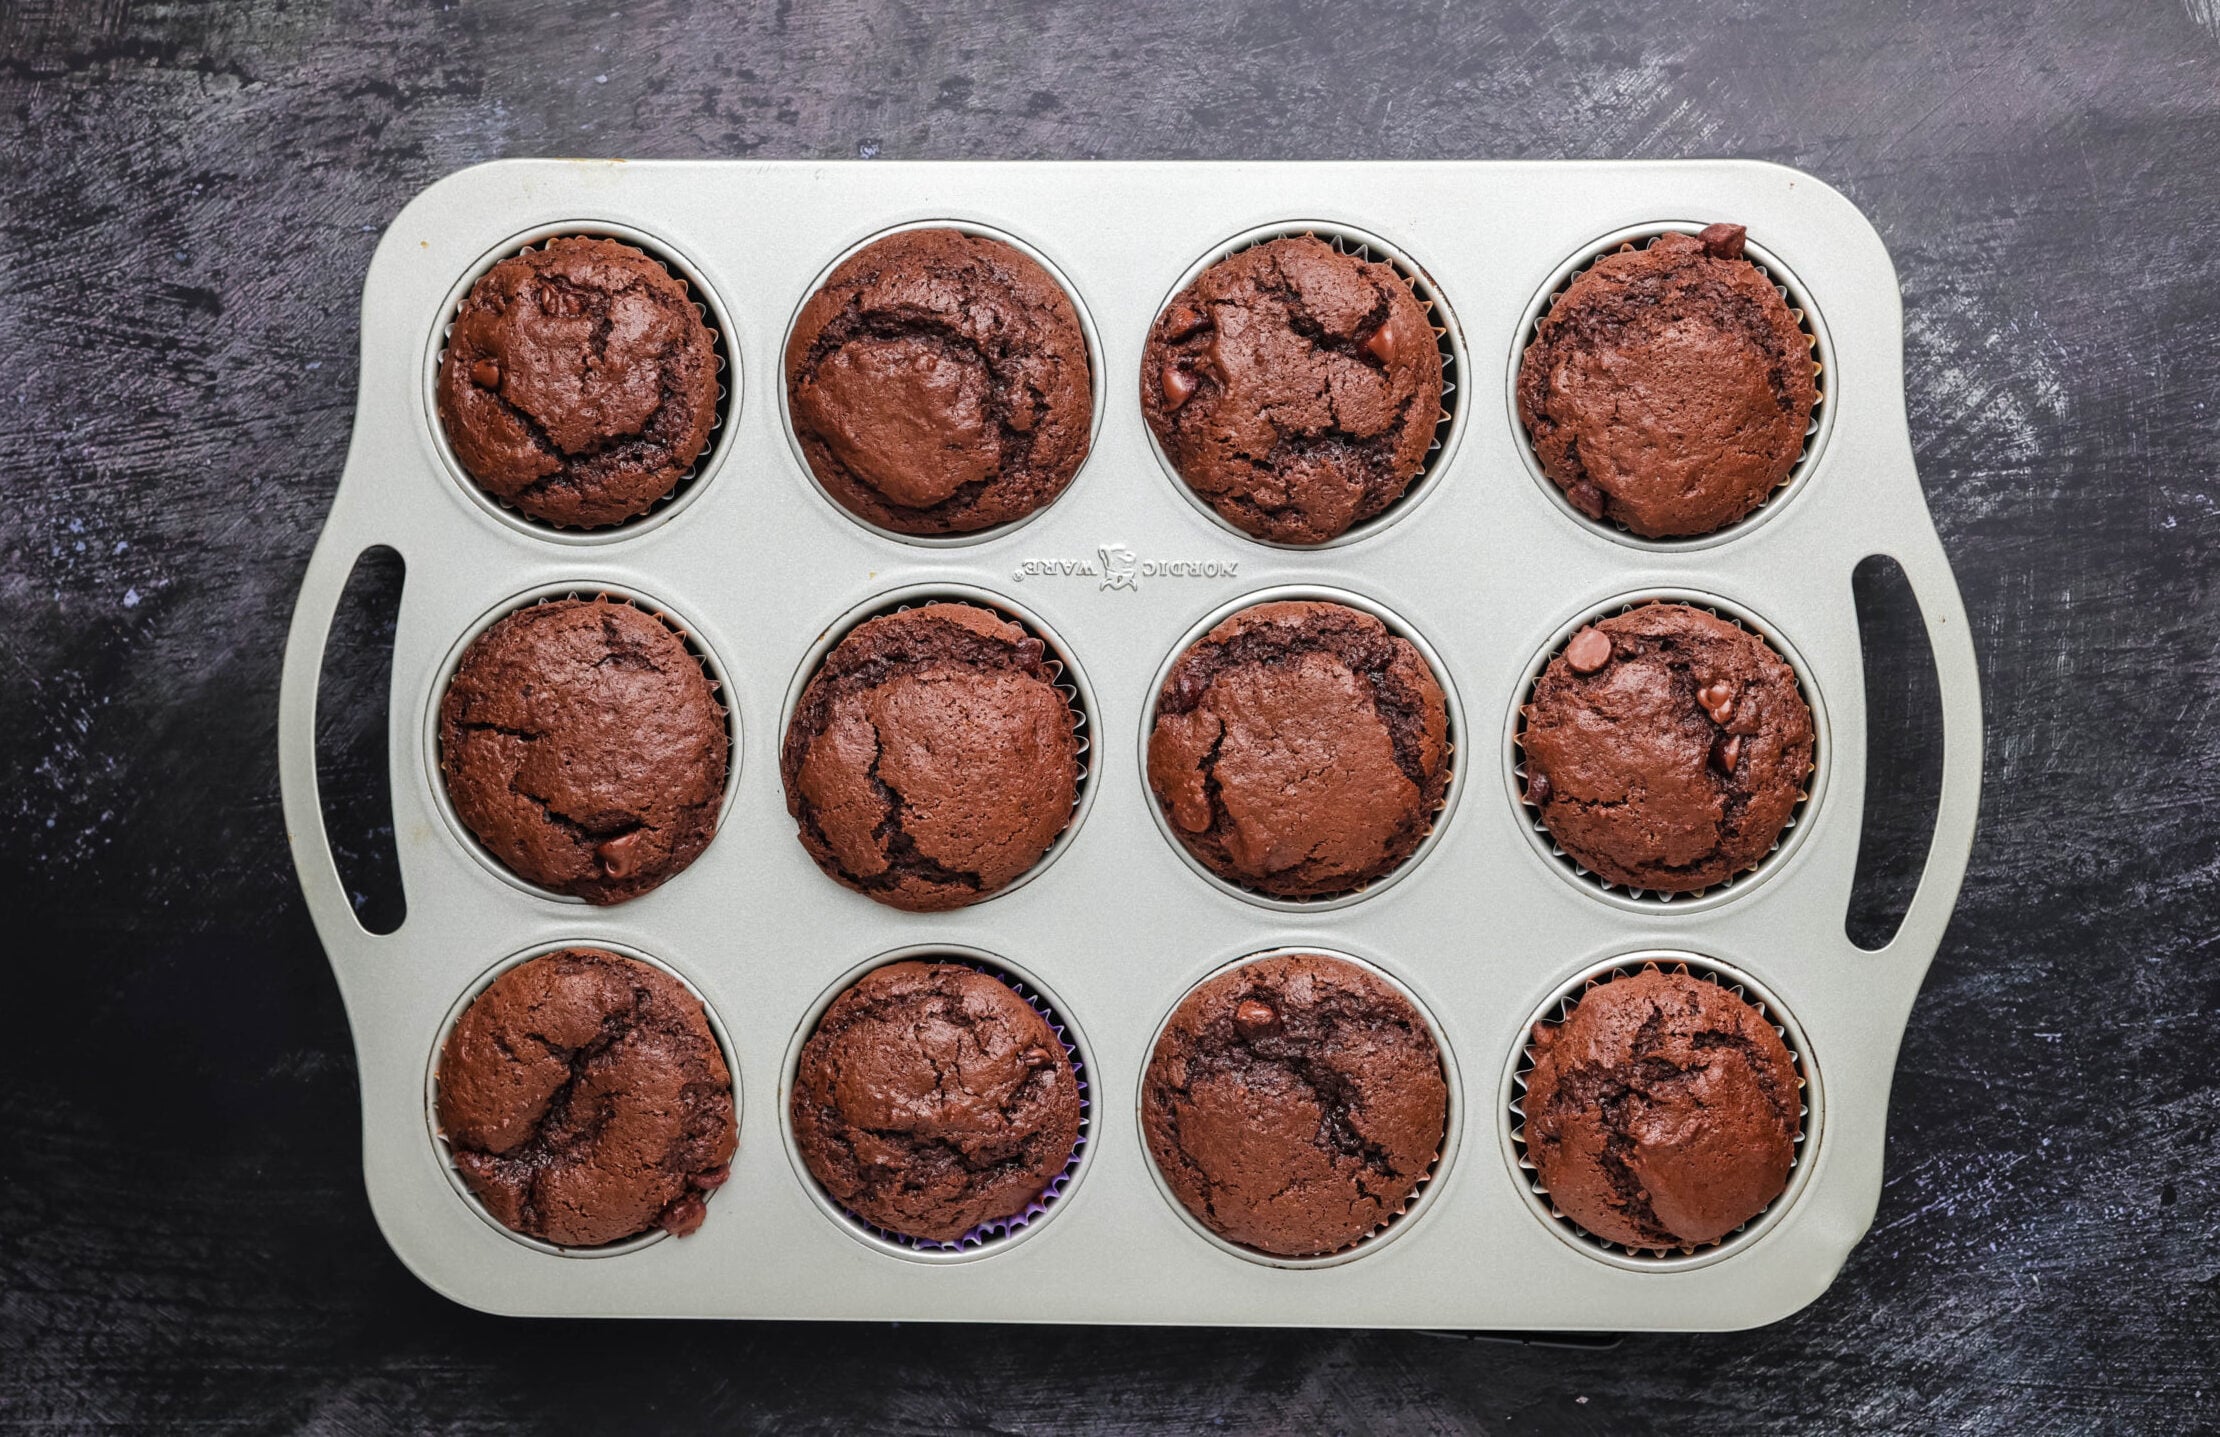
Bake on the center rack for 17 to 20 minutes. The cupcakes are done when the tops spring back lightly and a toothpick inserted in the center comes out clean or with a few moist crumbs. A streak of melted chocolate from a chocolate chip is fine.
Let the cupcakes rest in the pan for about five minutes, then transfer them to a wire rack. Cool completely before frosting. Even slightly warm cupcakes can melt buttercream and cause the witch hats to slide.
Make the Oreo witch hats
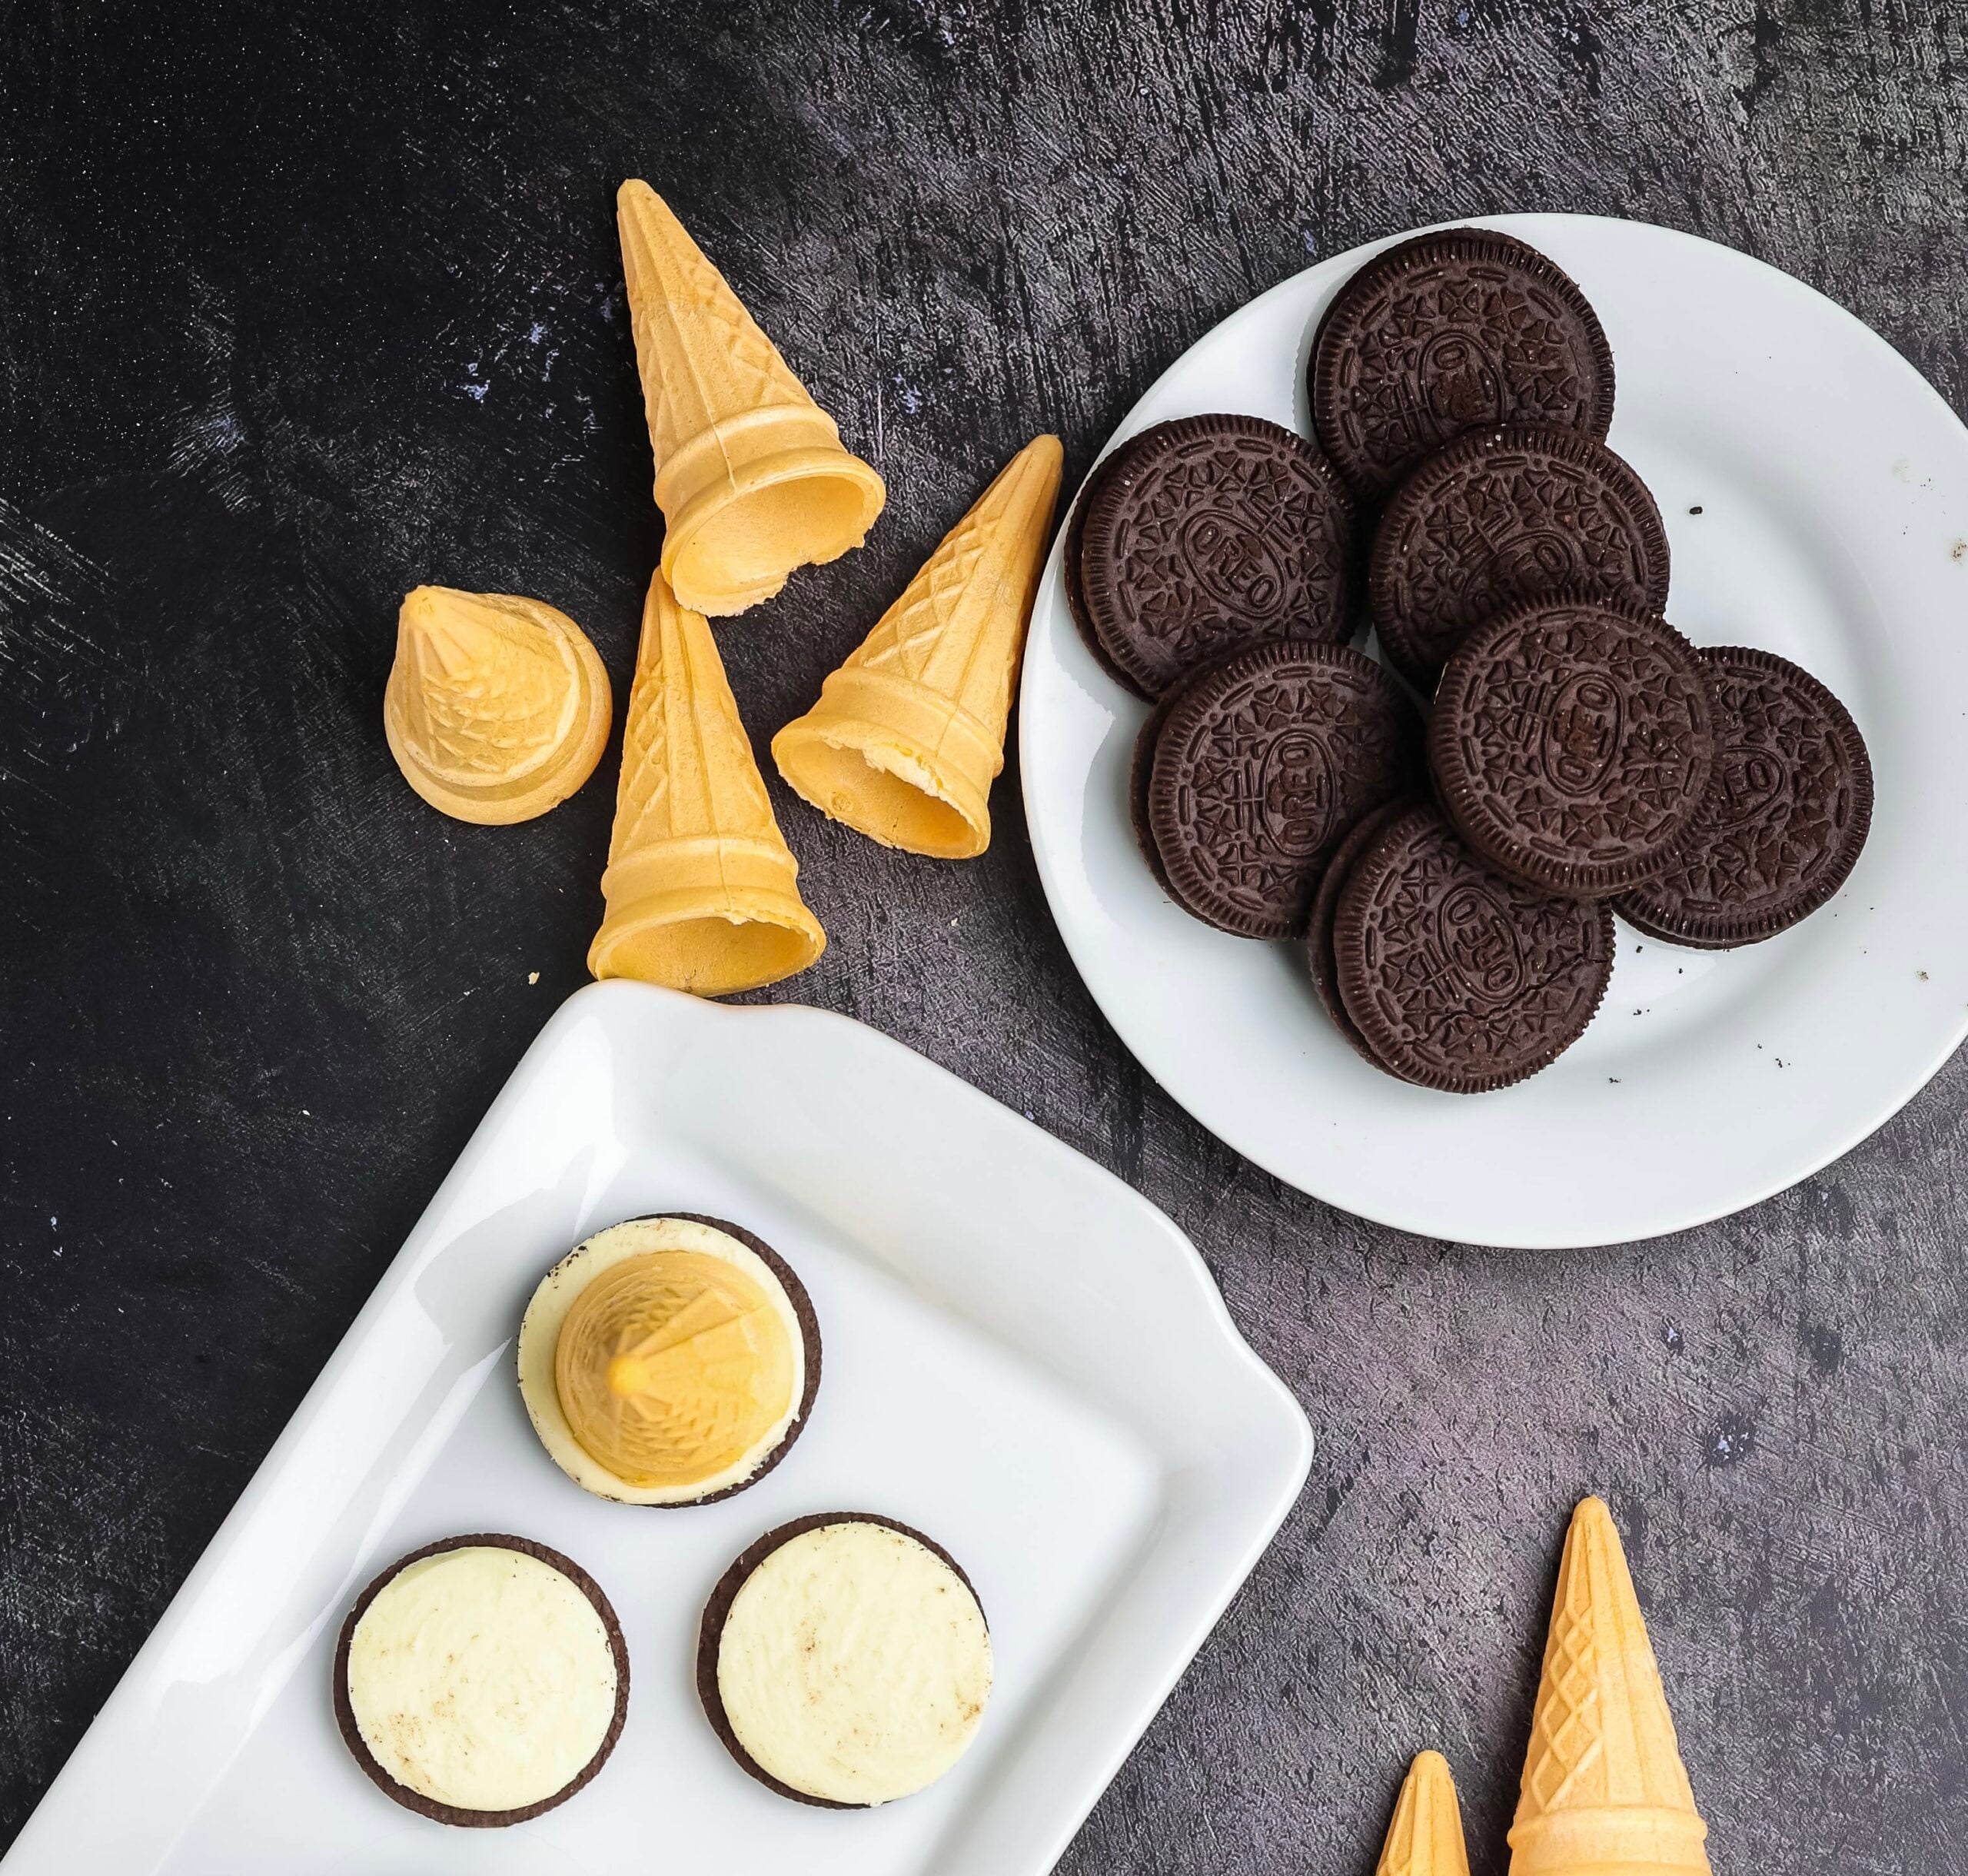
Separate 12 Oreos and place the cream-topped halves cream-side up. Firmly press one mini sugar cone into the cream on each cookie so it stands straight. These cookie-and-cone pieces will become the witch hats.
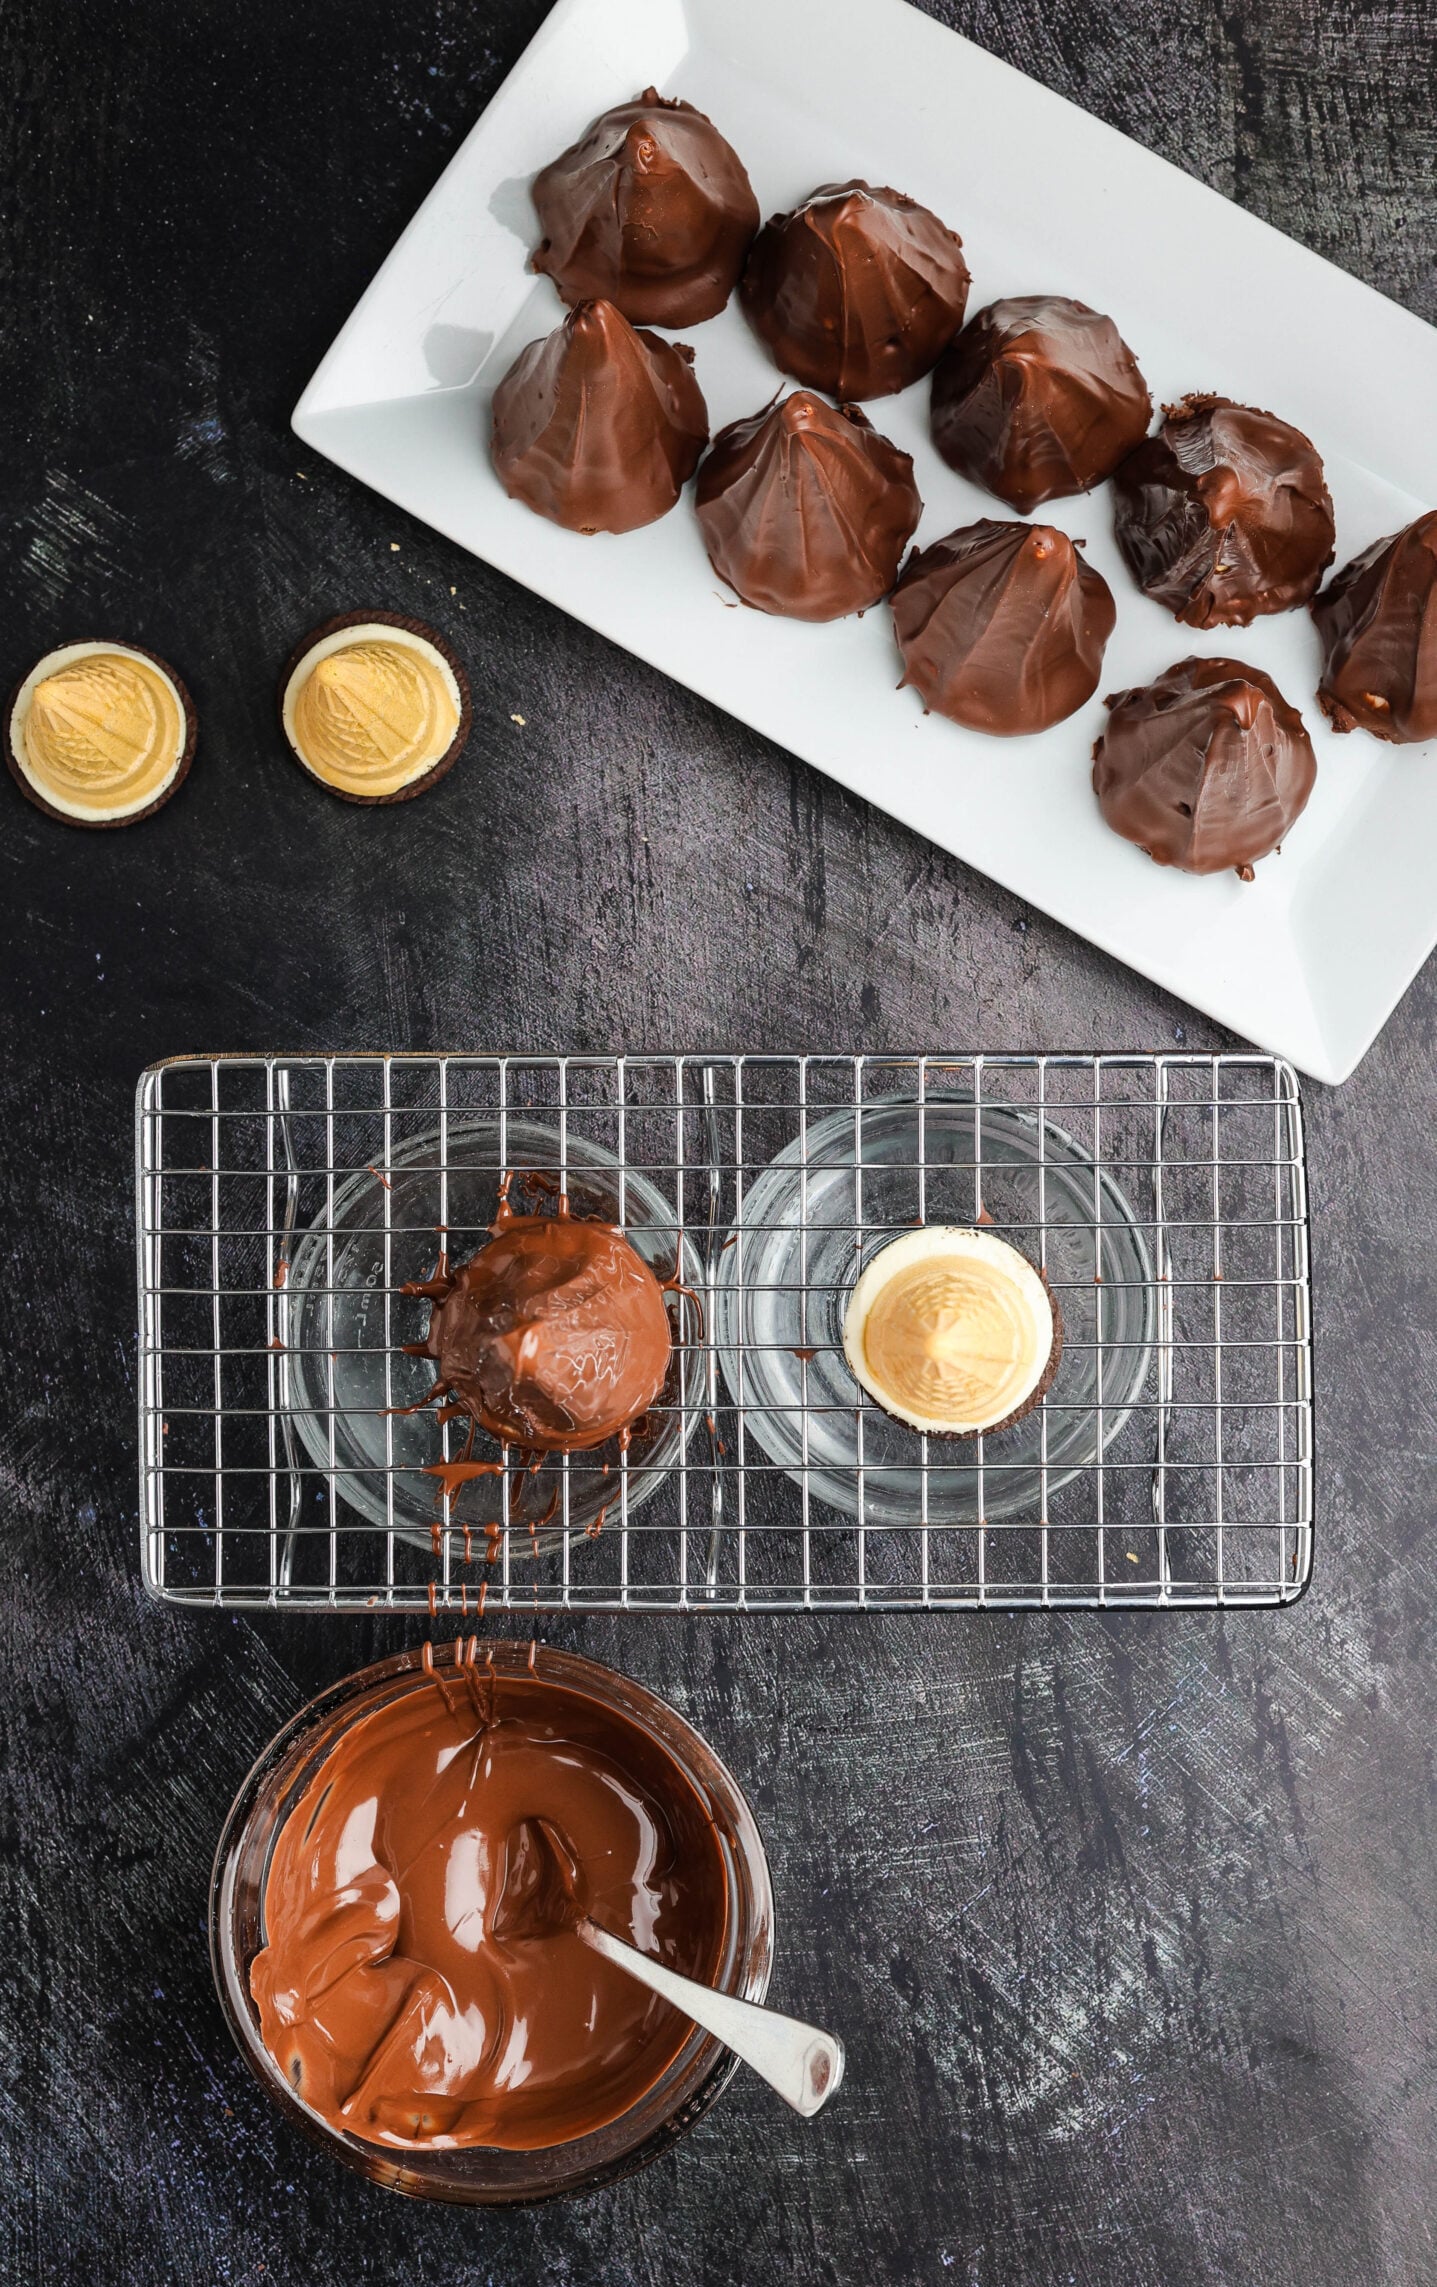
Set a small wire rack over a bowl or parchment-lined tray to catch the extra chocolate. Working with about three squares at a time, melt the chocolate almond bark in a microwave-safe bowl in 40-second intervals. Stir after each interval until smooth. Stop heating as soon as the final small pieces melt; overheated coating can become thick or seize.
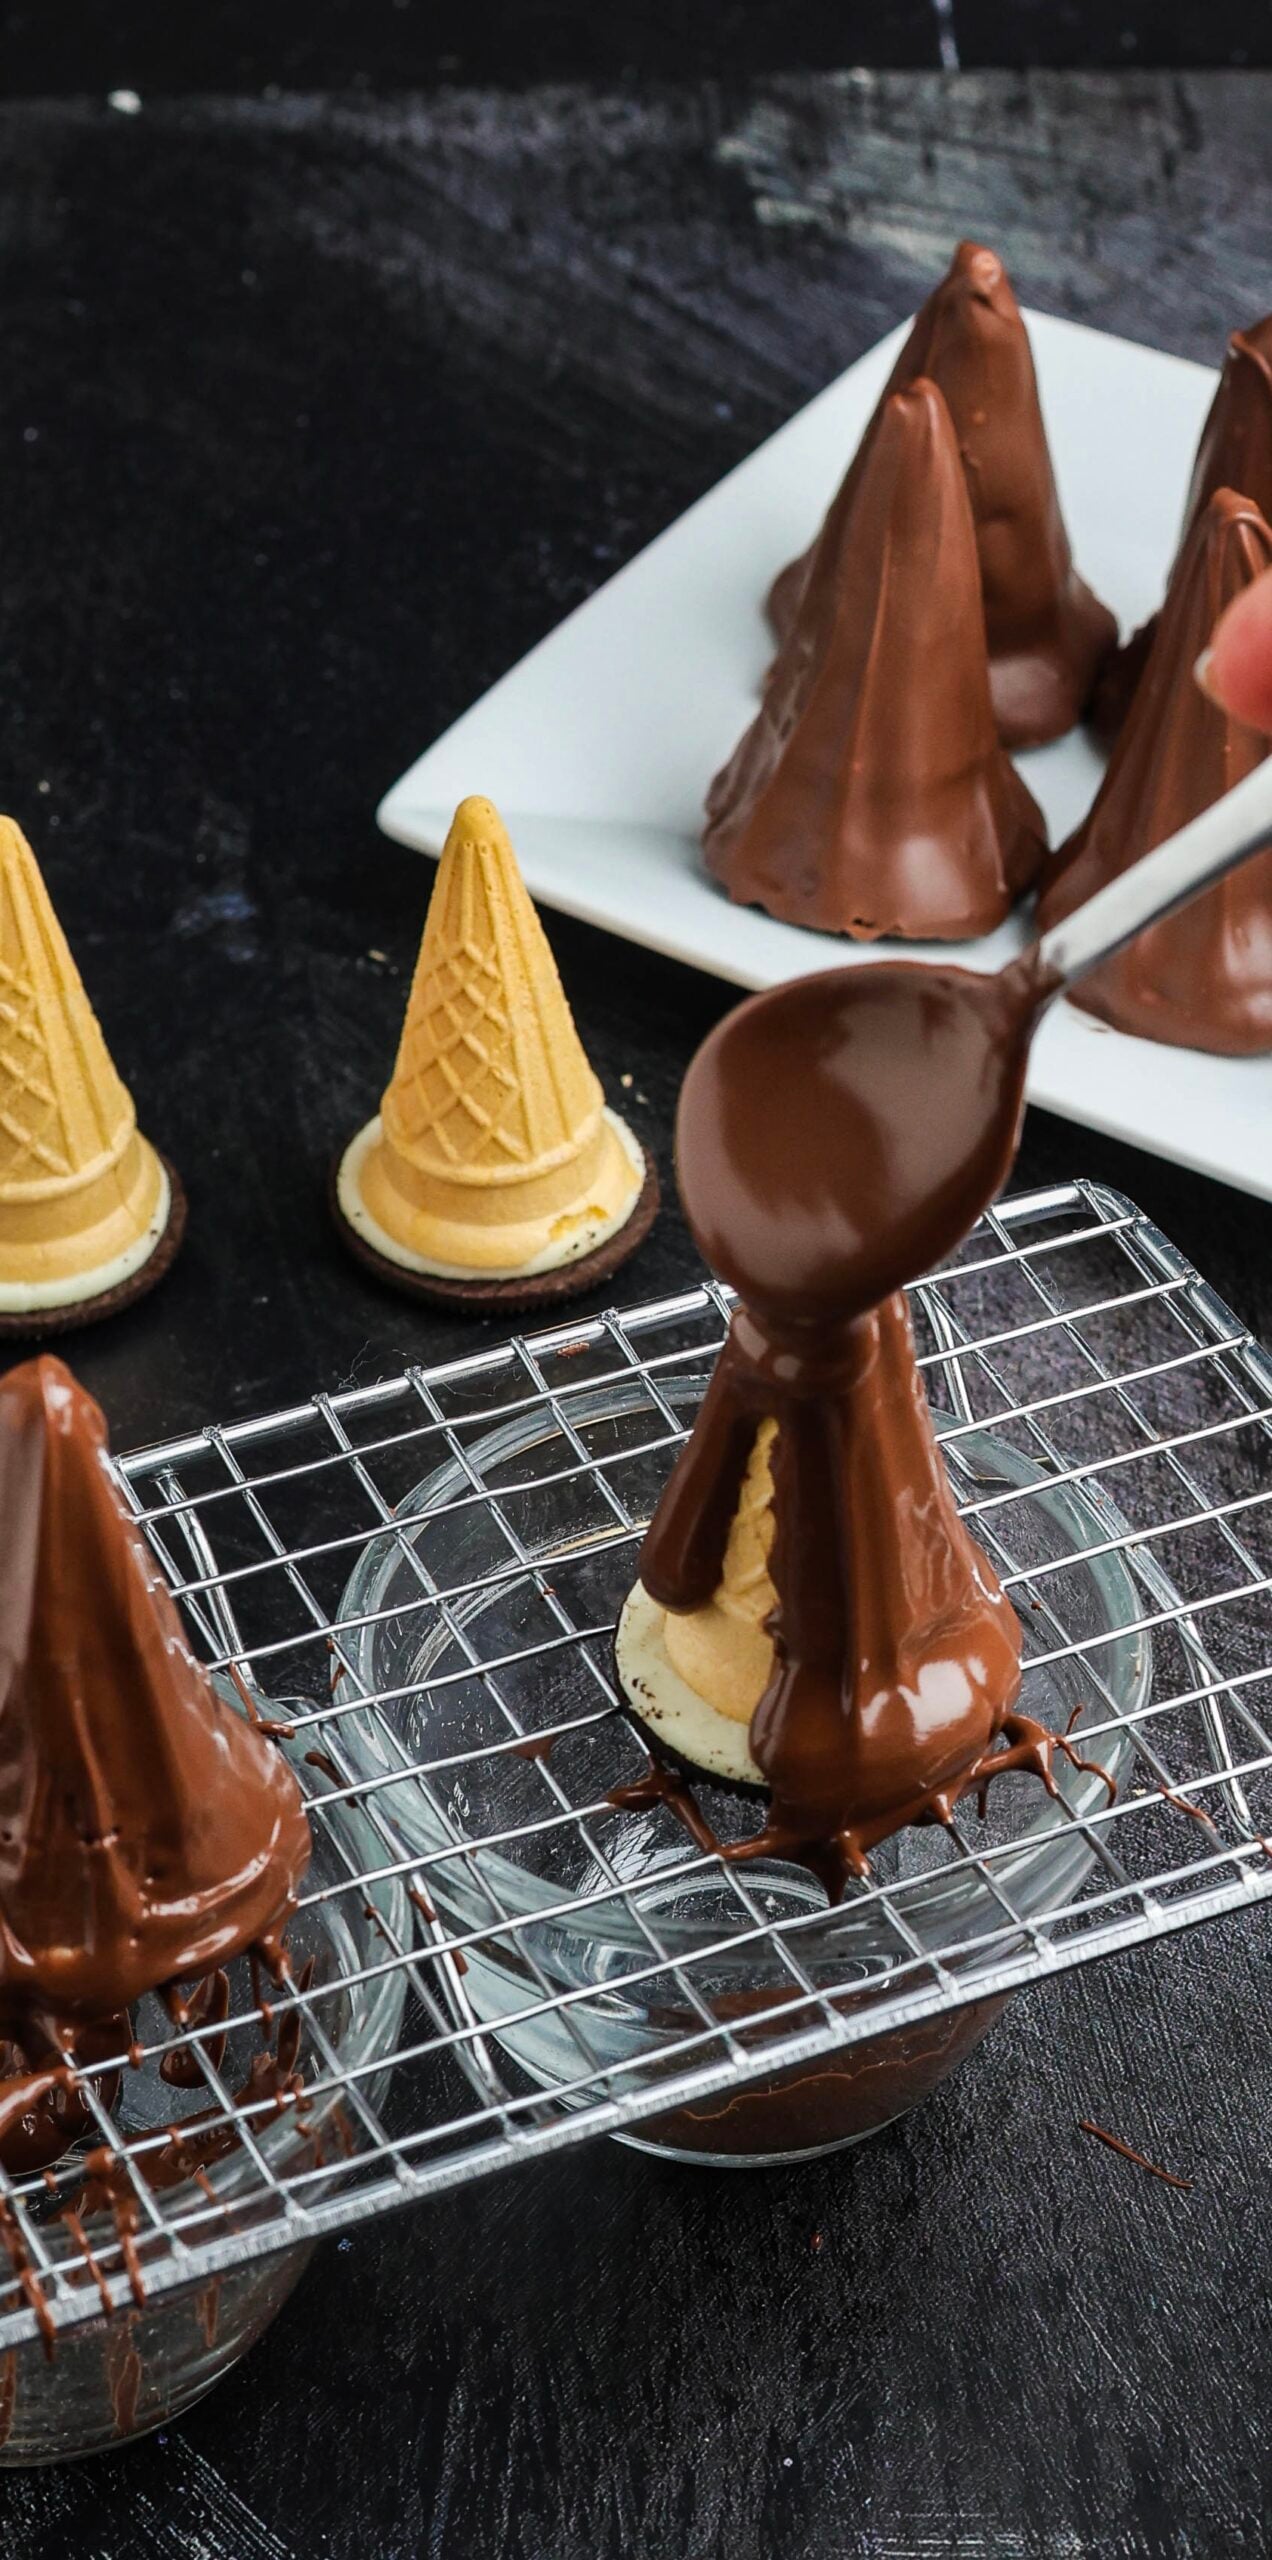
Place one cone-and-cookie assembly on the rack and spoon the melted chocolate over it. Use the back of the spoon to guide the chocolate up the cone and over the Oreo so every part is coated. Let the excess drip into the bowl below. Repeat with the remaining hats, reheating the collected chocolate gently when needed.
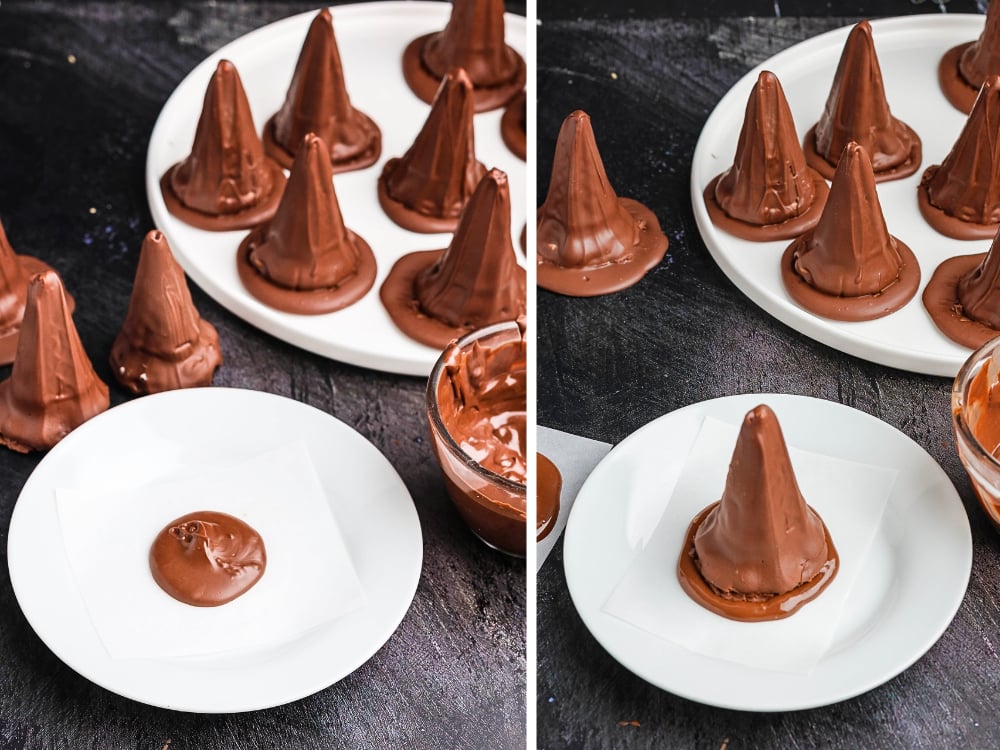
For a smooth, defined brim, spoon about one teaspoon of melted chocolate onto a parchment-lined plate or tray, making the circle slightly wider than the cone. Center the coated hat over the chocolate and gently press it down. Let the hats stand until completely firm.
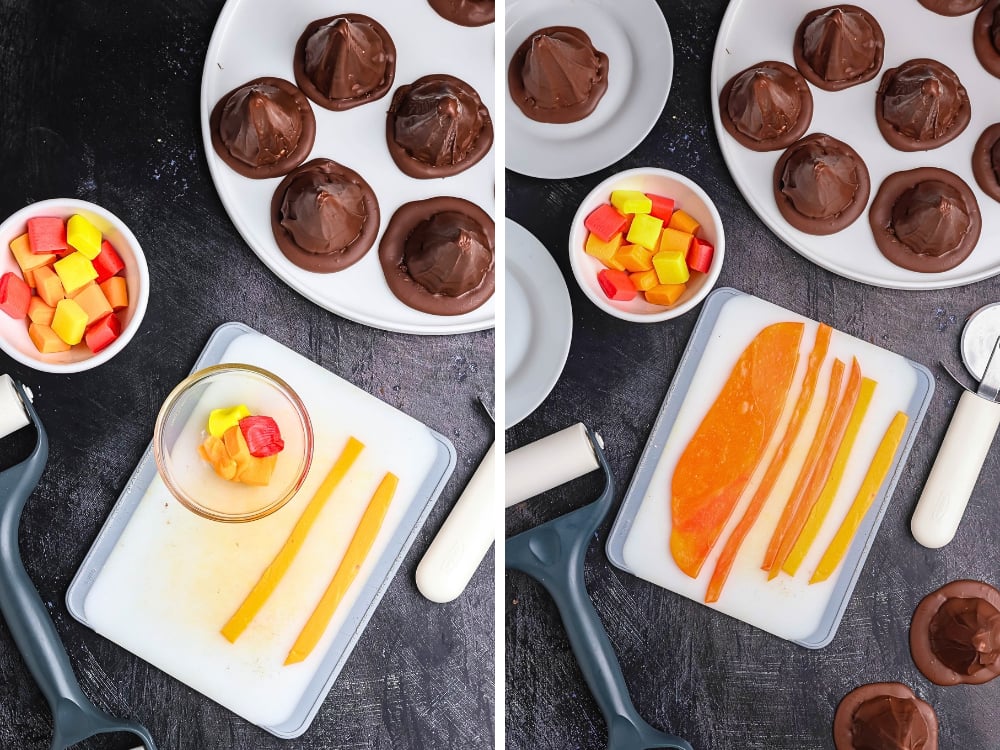
Warm four or five orange Starburst candies in a small microwave-safe bowl for 20 seconds at a time. They should be soft and pliable, not hot or bubbling. Carefully pinch the candies together and roll them into a thin sheet on a small cutting board. Cut the sheet into strips about ¼ inch wide and long enough to wrap around the base of a hat. Repeat in small batches until you have 12 strips.
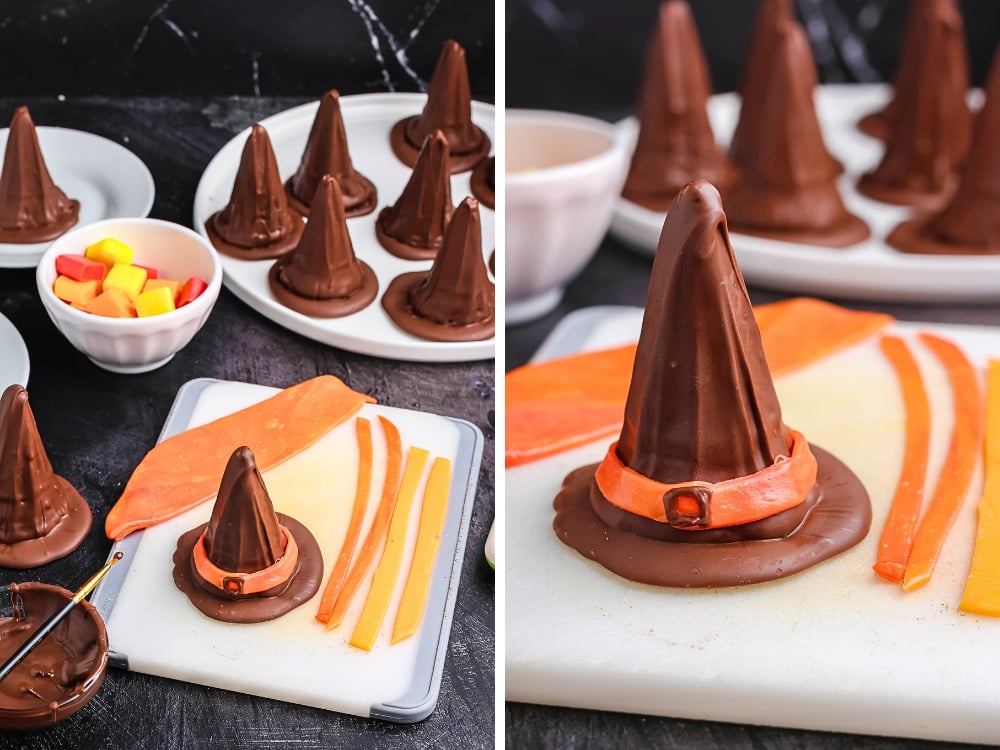
Wrap one orange strip around each hat and gently pinch the ends together. With a small food-grade brush, paint a tiny buckle on the front of the band using melted chocolate.
Make the orange and white buttercream
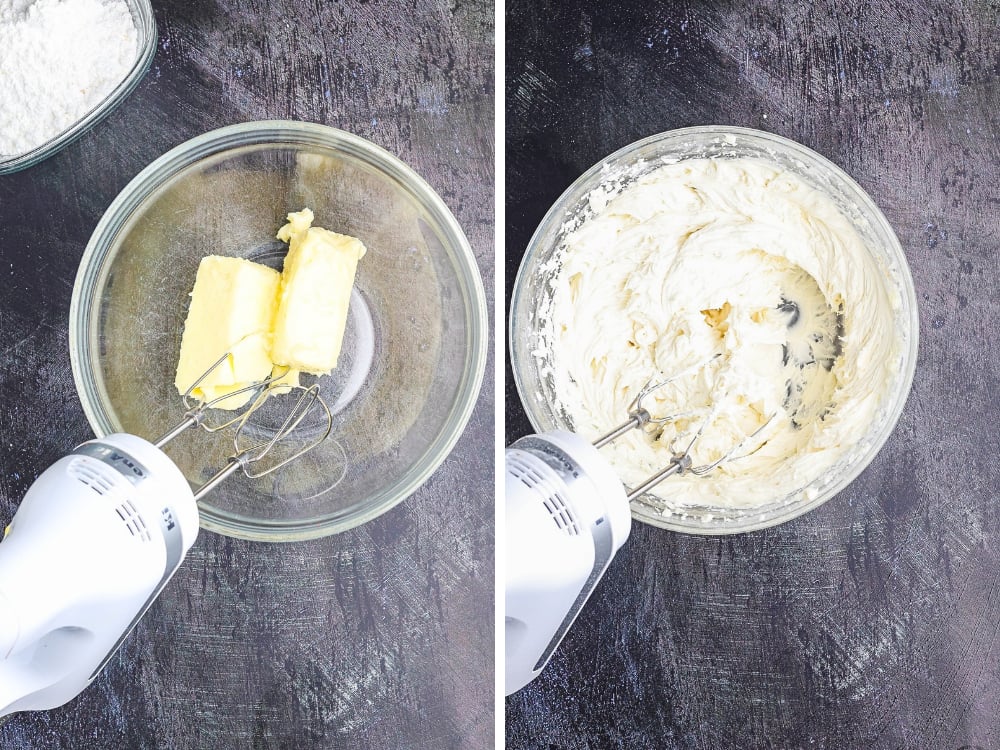
Place the softened butter in a medium bowl and beat with a hand mixer until light and fluffy. Slowly add the powdered sugar, mixing on low at first so it does not fly out of the bowl. Add the vanilla, followed by the milk 1 teaspoon at a time, until the buttercream is smooth but stiff enough to hold a tall swirl.
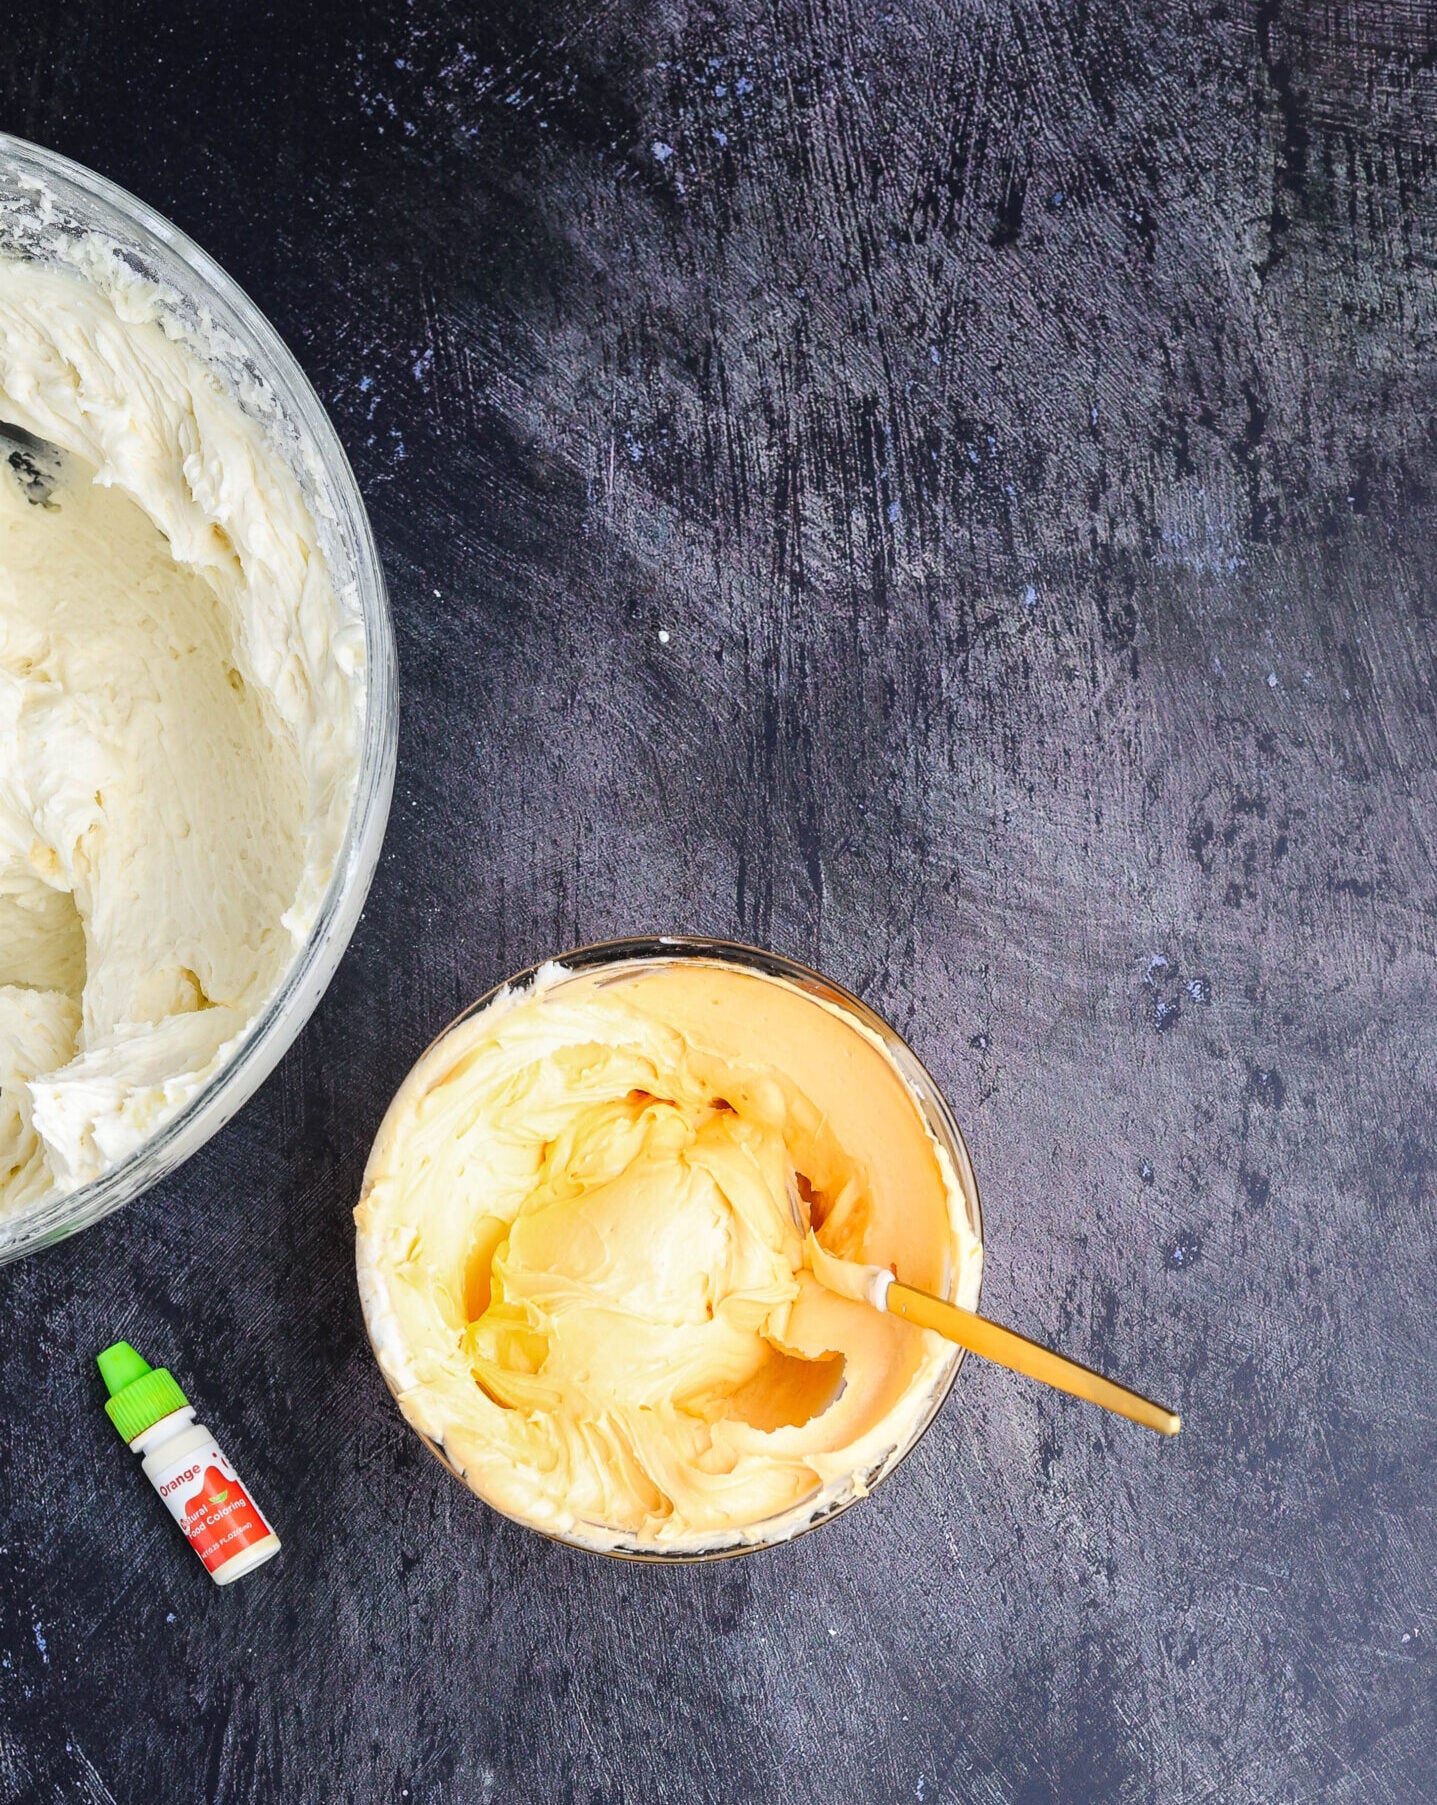
Transfer half of the buttercream to a second bowl. Tint that half orange with gel food coloring, stirring until the color is even.
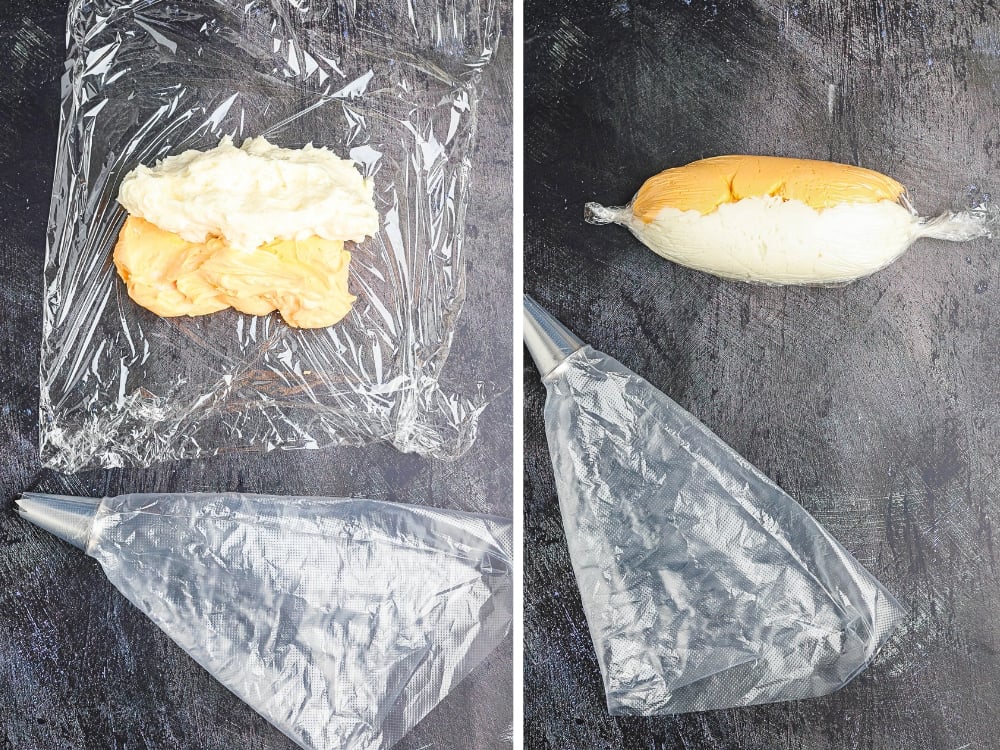
Lay an 18-inch piece of plastic wrap flat on the counter. Spoon the white buttercream into a long log down one side of the center, then place the orange frosting in a matching log directly beside it. Roll the plastic wrap tightly around both colors to create one snug cylinder. Twist the ends, then snip open one end.
Fit a piping bag with a large star tip and insert the wrapped frosting log cut-side down. Test the frosting on a piece of parchment paper until both colors flow together. If only one color appears at first, keep piping for another second or two.
Decorate the witch hat cupcakes
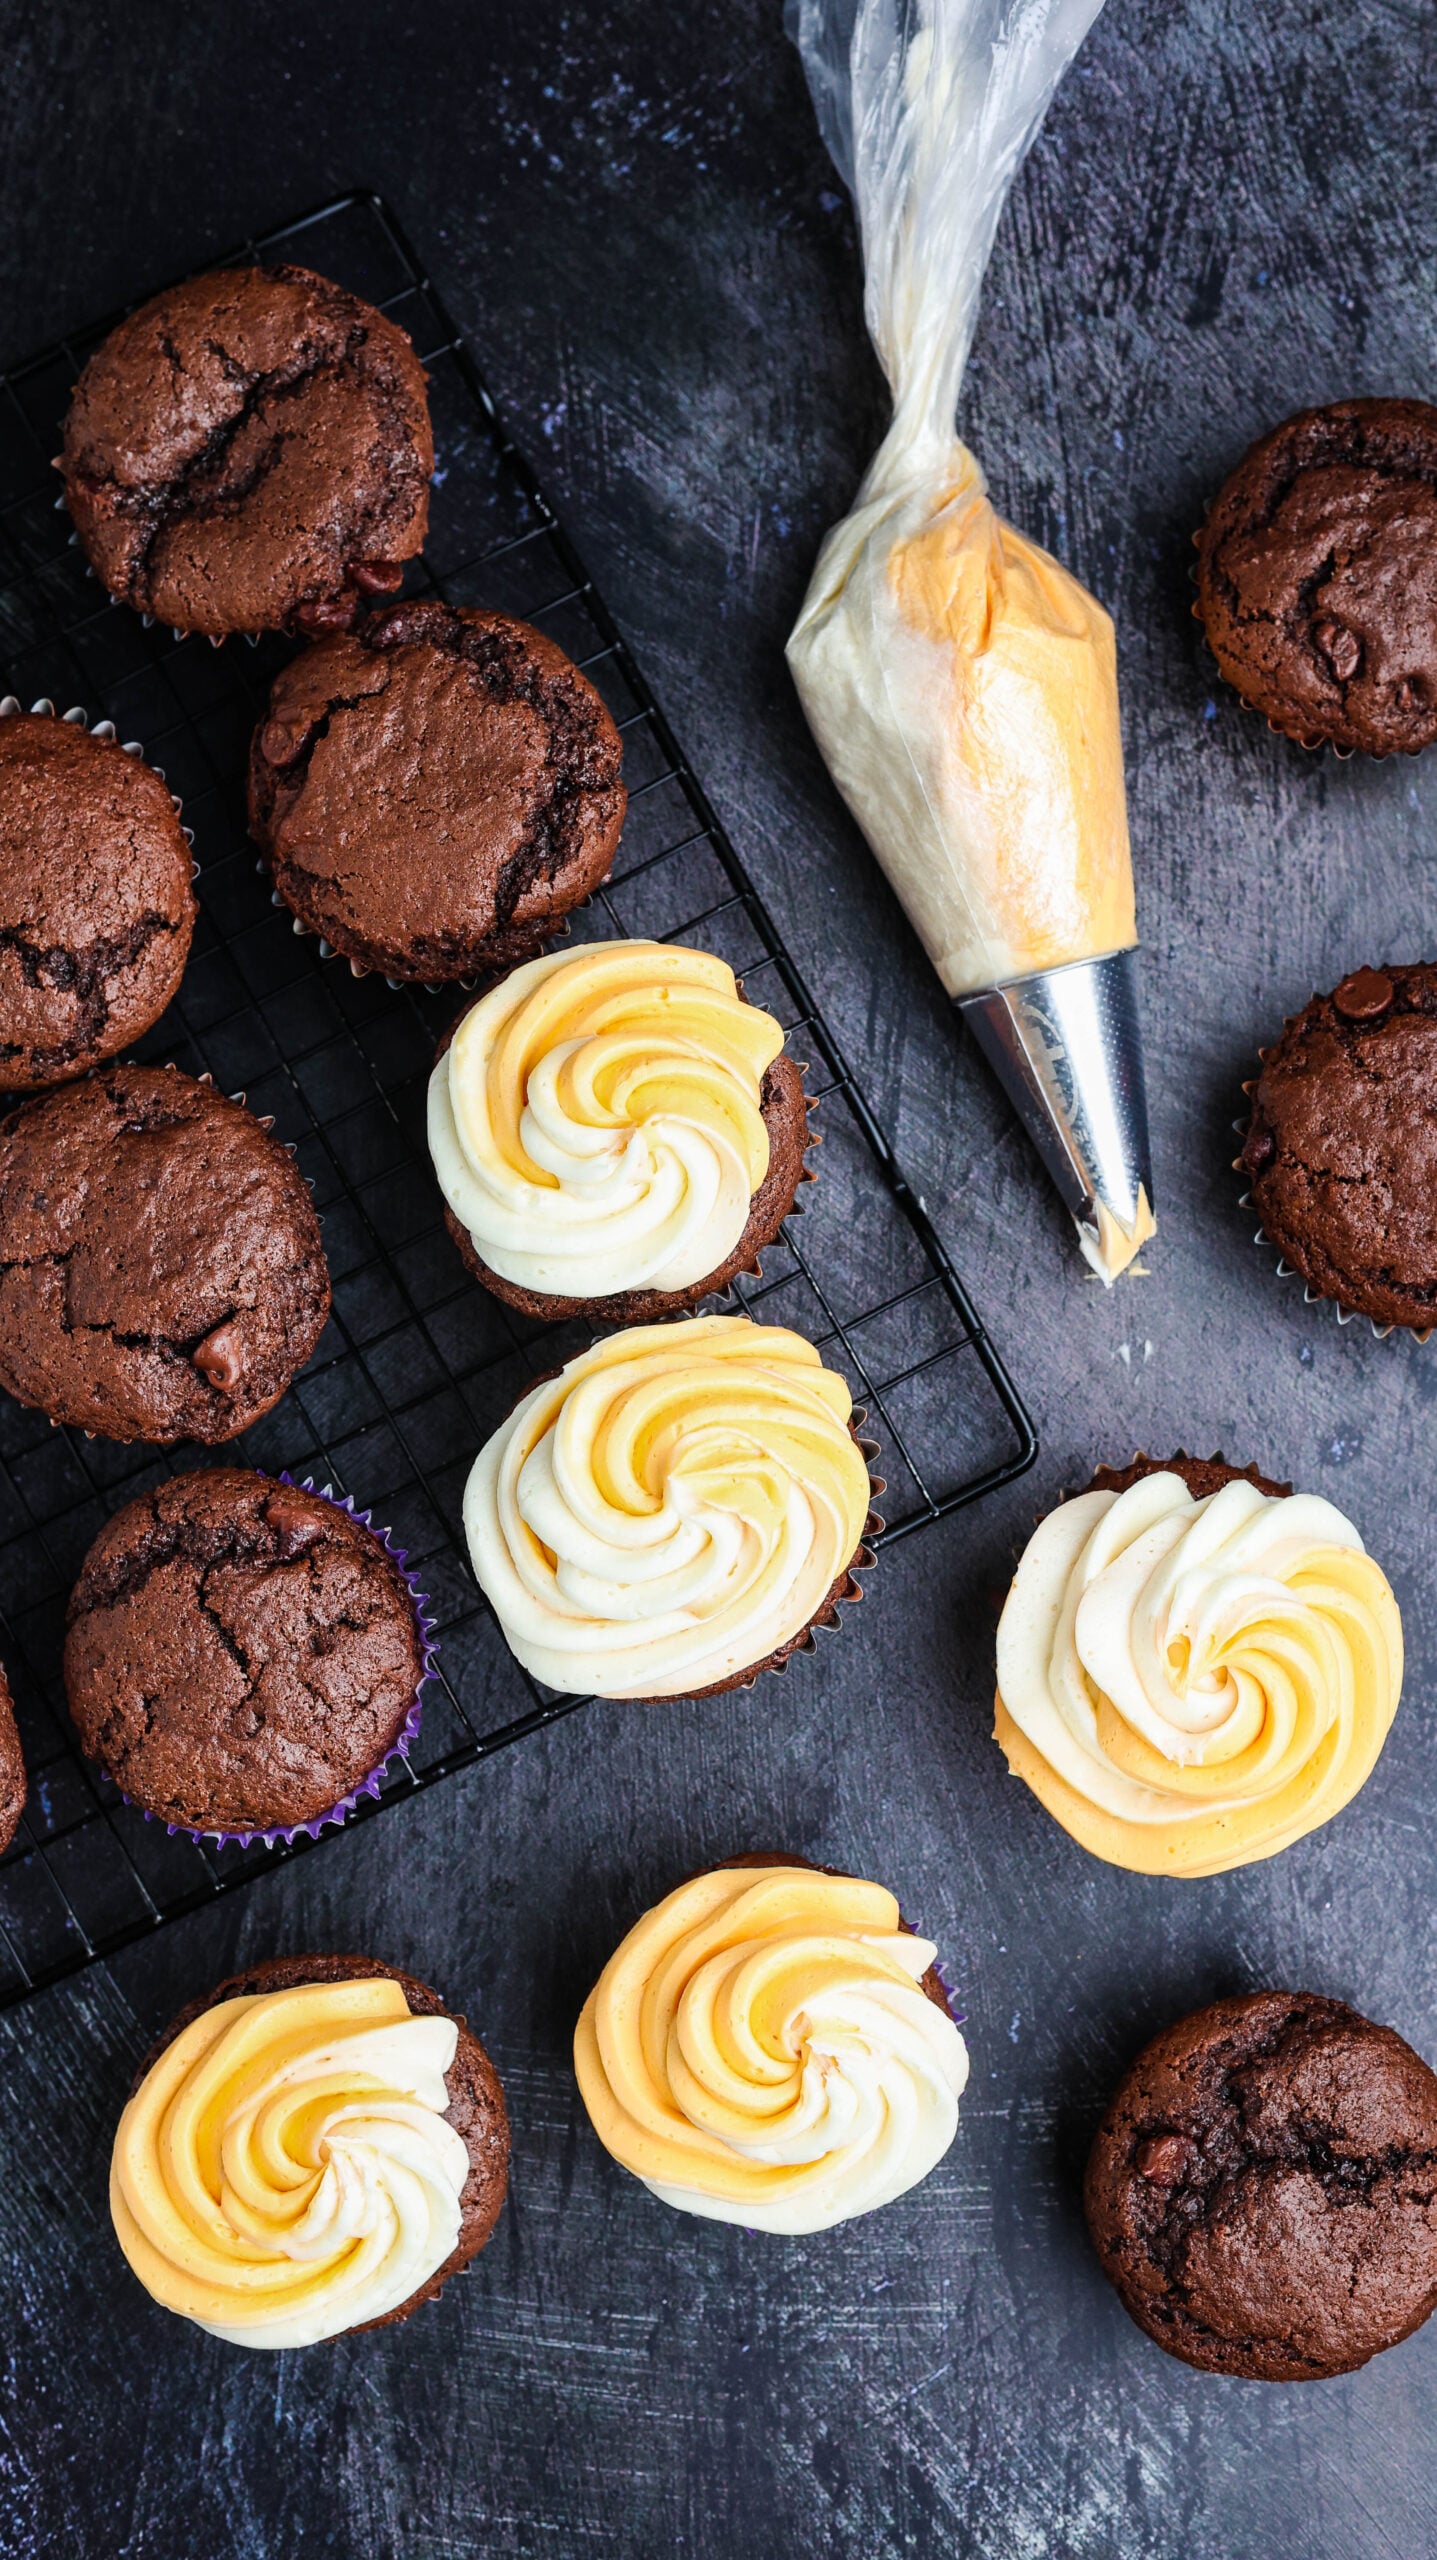
Pipe a generous two-tone swirl onto each completely cooled chocolate cupcake. Keep the center tall enough to support the hat, but do not take the frosting all the way to the edge.
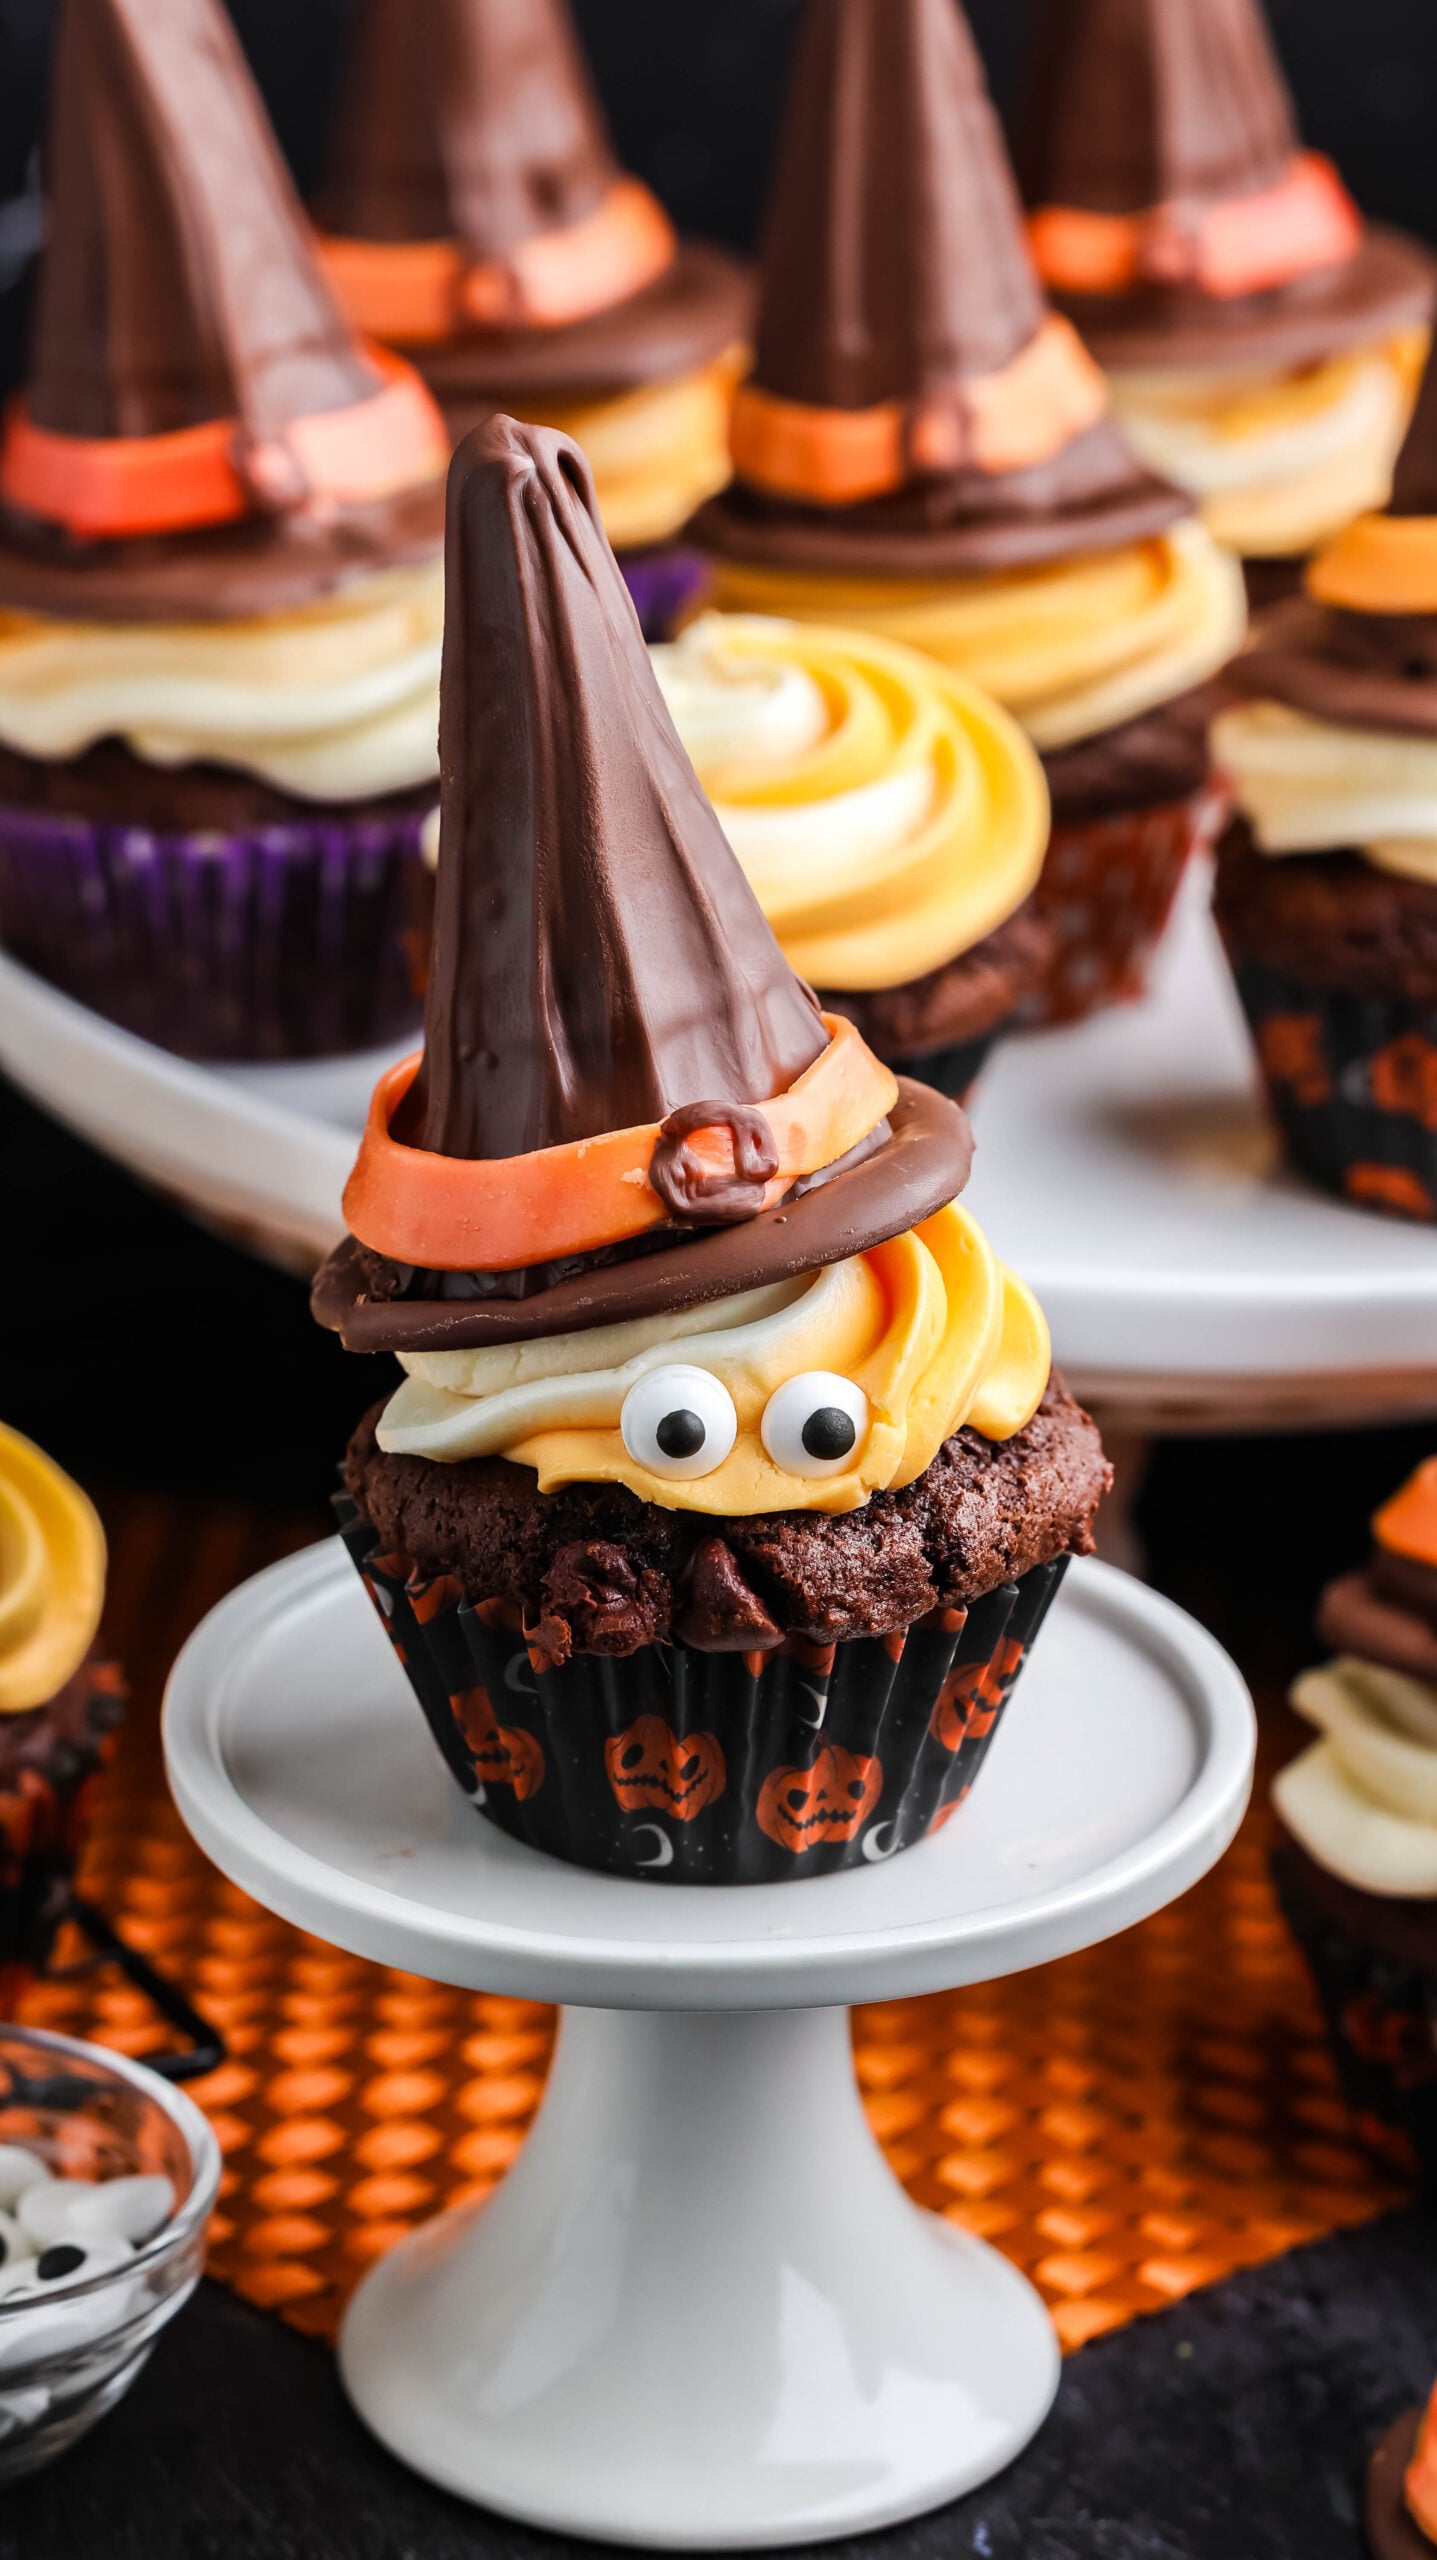
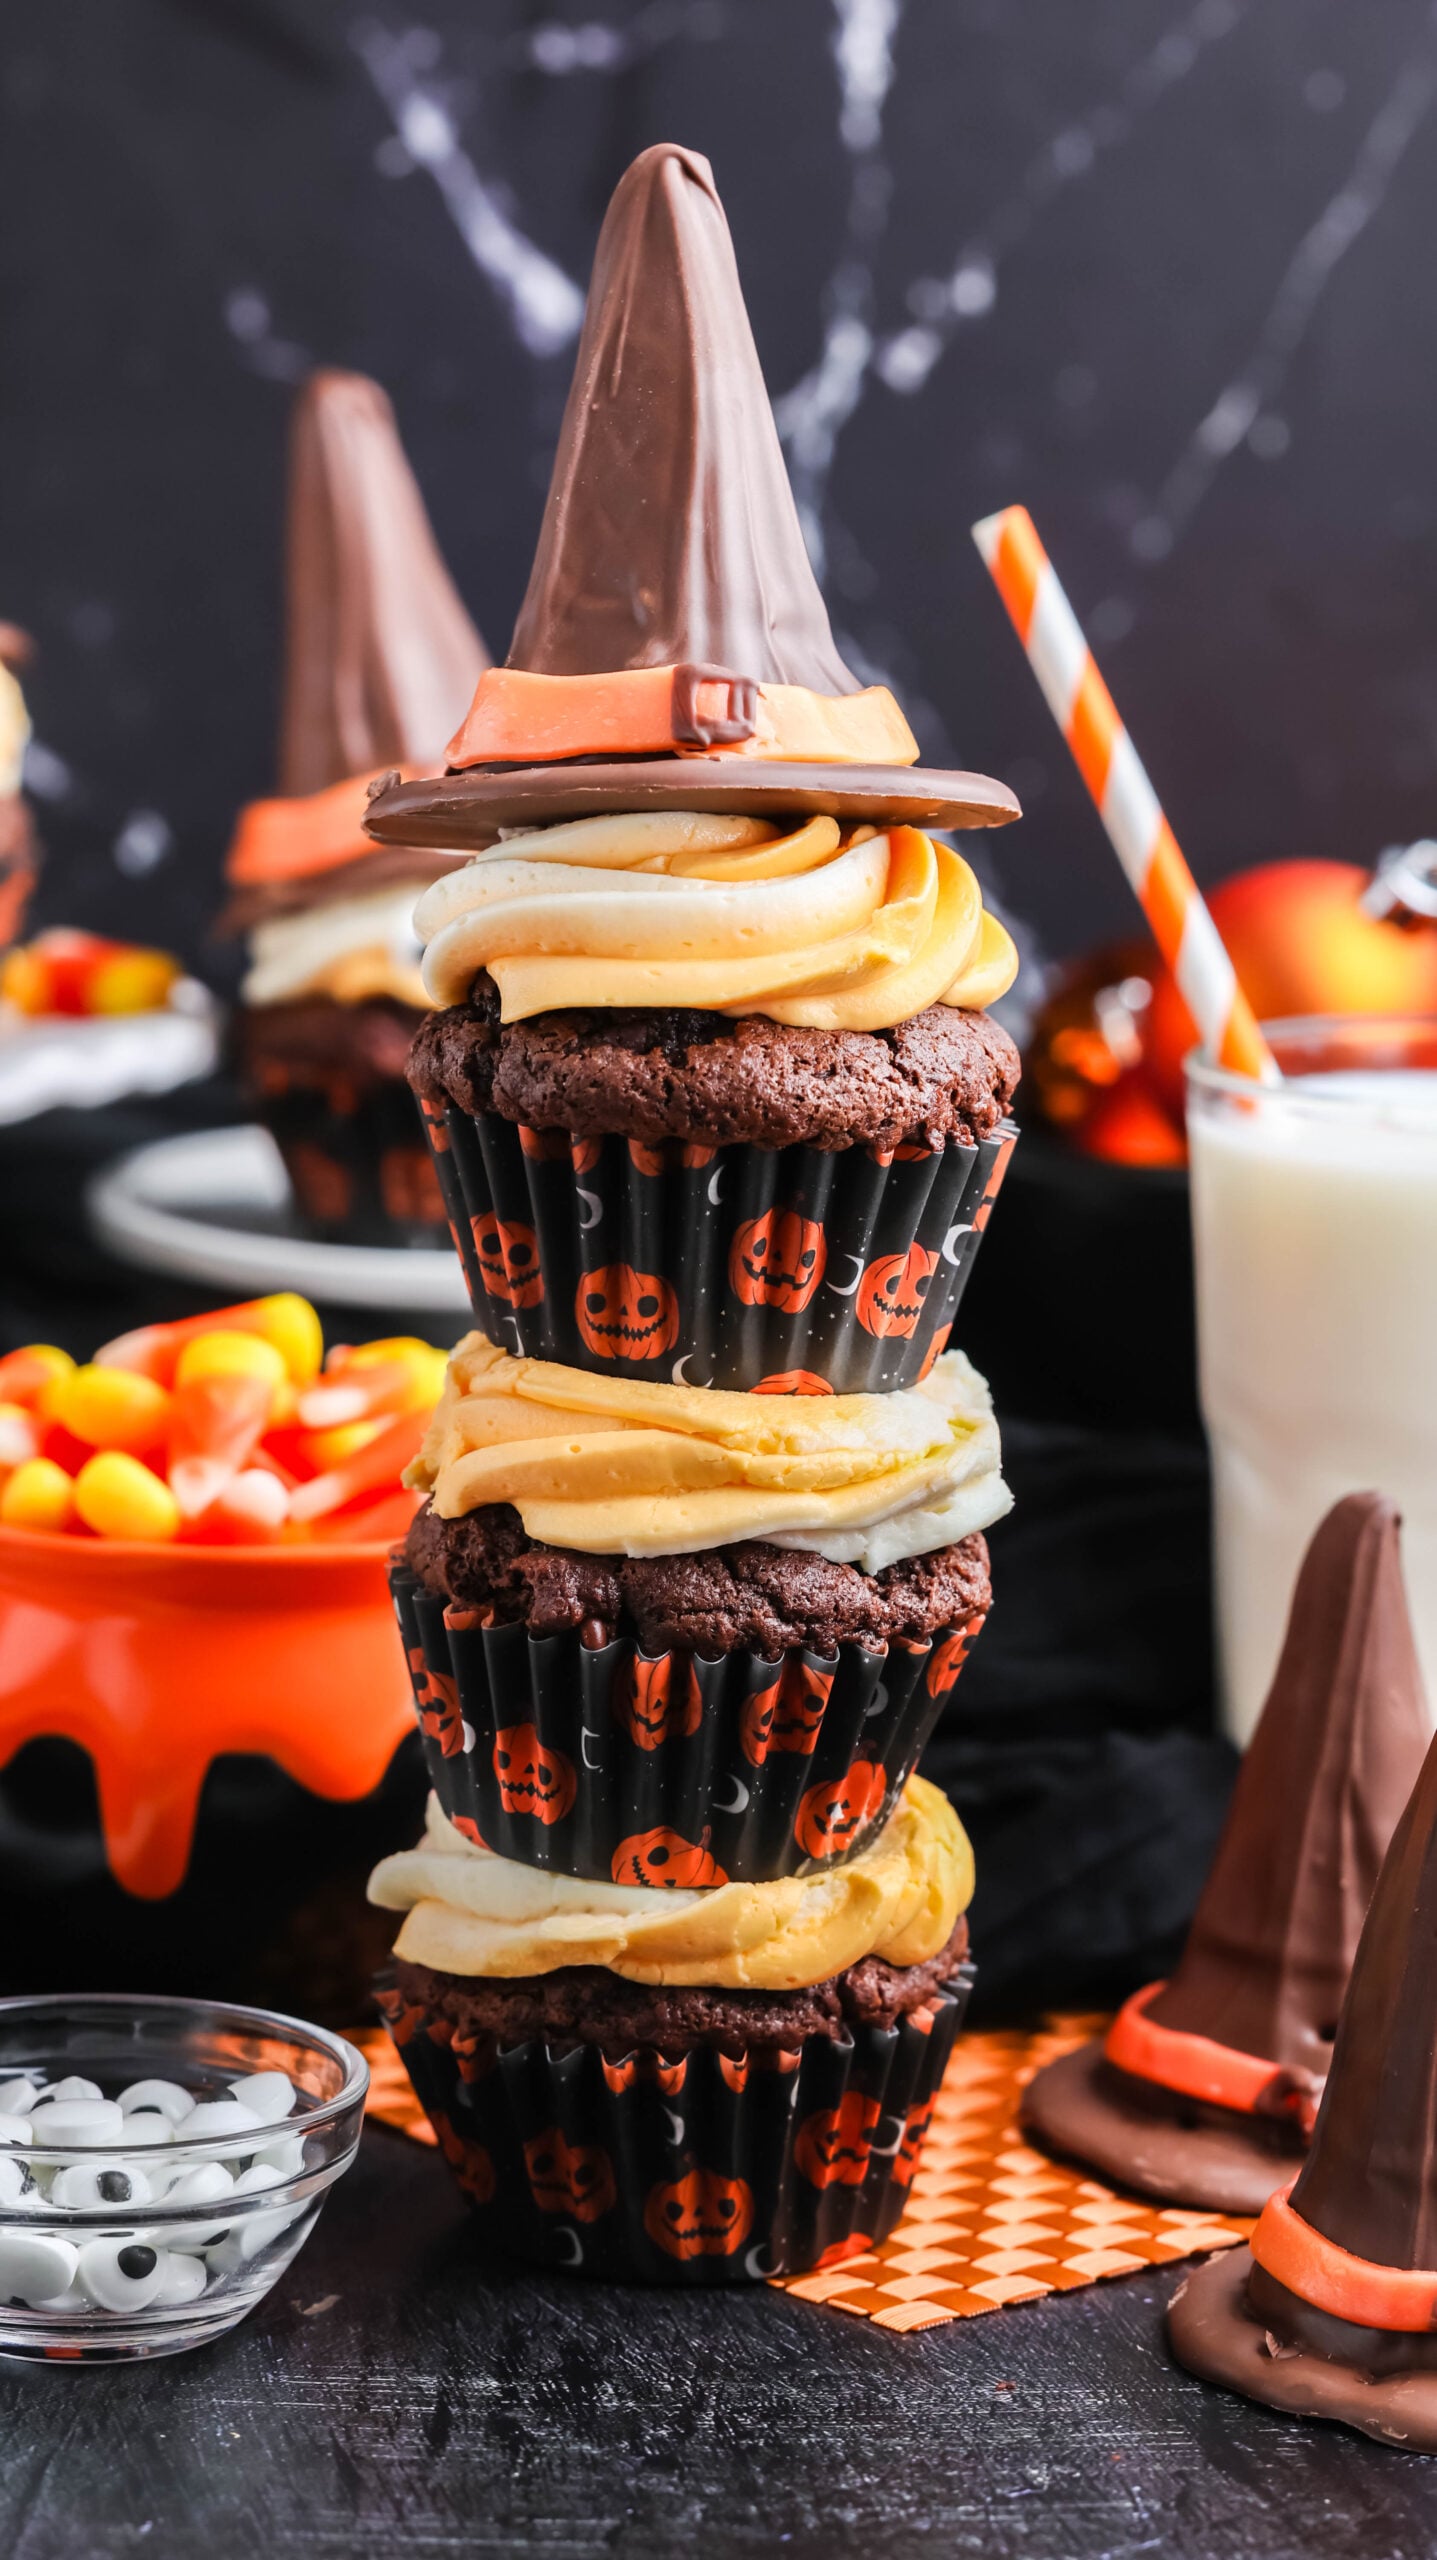
Gently place one edible witch hat on top of each frosted cupcake. Add candy eyes or Halloween sprinkles around the edge if desired. The cupcake batter may make 12 to 14 cupcakes depending on the size of the liners. Because the hat recipe makes 12, decorate any extra cupcakes with buttercream, sprinkles, and candy eyes-or prepare one or two additional hats.
My Best Tips for Perfect Witch Hat Cupcakes
Measure the flour carefully
Too much flour is one of the most common reasons homemade cupcakes turn out dry. Spoon the flour into the measuring cup, then sweep off the excess with the straight edge of a knife. For the most consistent results, weigh 2 cups of all-purpose flour at approximately 240 grams.
Use room temperature ingredients
Room-temperature eggs and buttermilk blend into the batter more evenly. If you forget to set out the eggs, place them in a bowl of warm-not hot-water for five to ten minutes.
Do not over-mix the batter
Once the flour is added, mix only until the ingredients come together. Overmixing develops too much gluten and can make the cupcakes dense or chewy.
Fill the liners only two thirds full
This gives the cupcakes room to rise without overflowing. A medium cookie scoop helps keep every portion even so they finish baking at the same time.
Cool the cupcakes completely
This is worth repeating! Warm cupcakes and buttercream are not friends. If the frosting begins to soften, chill the piping bag for 10 minutes before continuing.
Melt the almond bark gently
Microwave it in short intervals and stir well between each one. The bowl retains heat, so the last few pieces will often melt just from stirring.
Work with the Starbursts in small batches
The candy cools and firms quickly. Warm only four or five pieces at a time, roll them right away, and repeat as needed. An adult should handle the warmed candy and sharp cutter.
Make the hats ahead
This is my favorite time-saving trick. Once the hats are firm, store them in a covered container at cool room temperature for up to two days. Keep parchment between layers so the chocolate does not scuff.
Easy Substitutions and Decorating Ideas
- No coconut oil? Use an equal amount of neutral vegetable, canola, or avocado oil.
- No buttermilk? Add 2 teaspoons of lemon juice or white vinegar to a measuring cup, then add regular milk to reach ⅔ cup. Let it sit for five minutes before using.
- No espresso powder? Leave it out. The cupcakes will still be delicious, although the chocolate flavor will be slightly less intense.
- No almond bark? Use chocolate candy melts or melting wafers. Regular chocolate chips can work, but the coating may remain softer and may not look as smooth.
- Change the hatbands: Purple, green, yellow, and red Starbursts are all fun options.
- Change the frosting colors: Try purple and green, orange and purple, or black and orange. Use gel color so the buttercream stays thick.
- Make monster cupcakes: Skip the hats and cover the frosting with candy eyes and sprinkles.
- Save time: Use your favorite chocolate cake mix and prepared vanilla frosting, then focus on the homemade witch hats.
Want another cozy cupcake option on the same dessert table? These pumpkin cupcakes with cream cheese frosting bring all the warm fall flavor.
Make Ahead Instructions
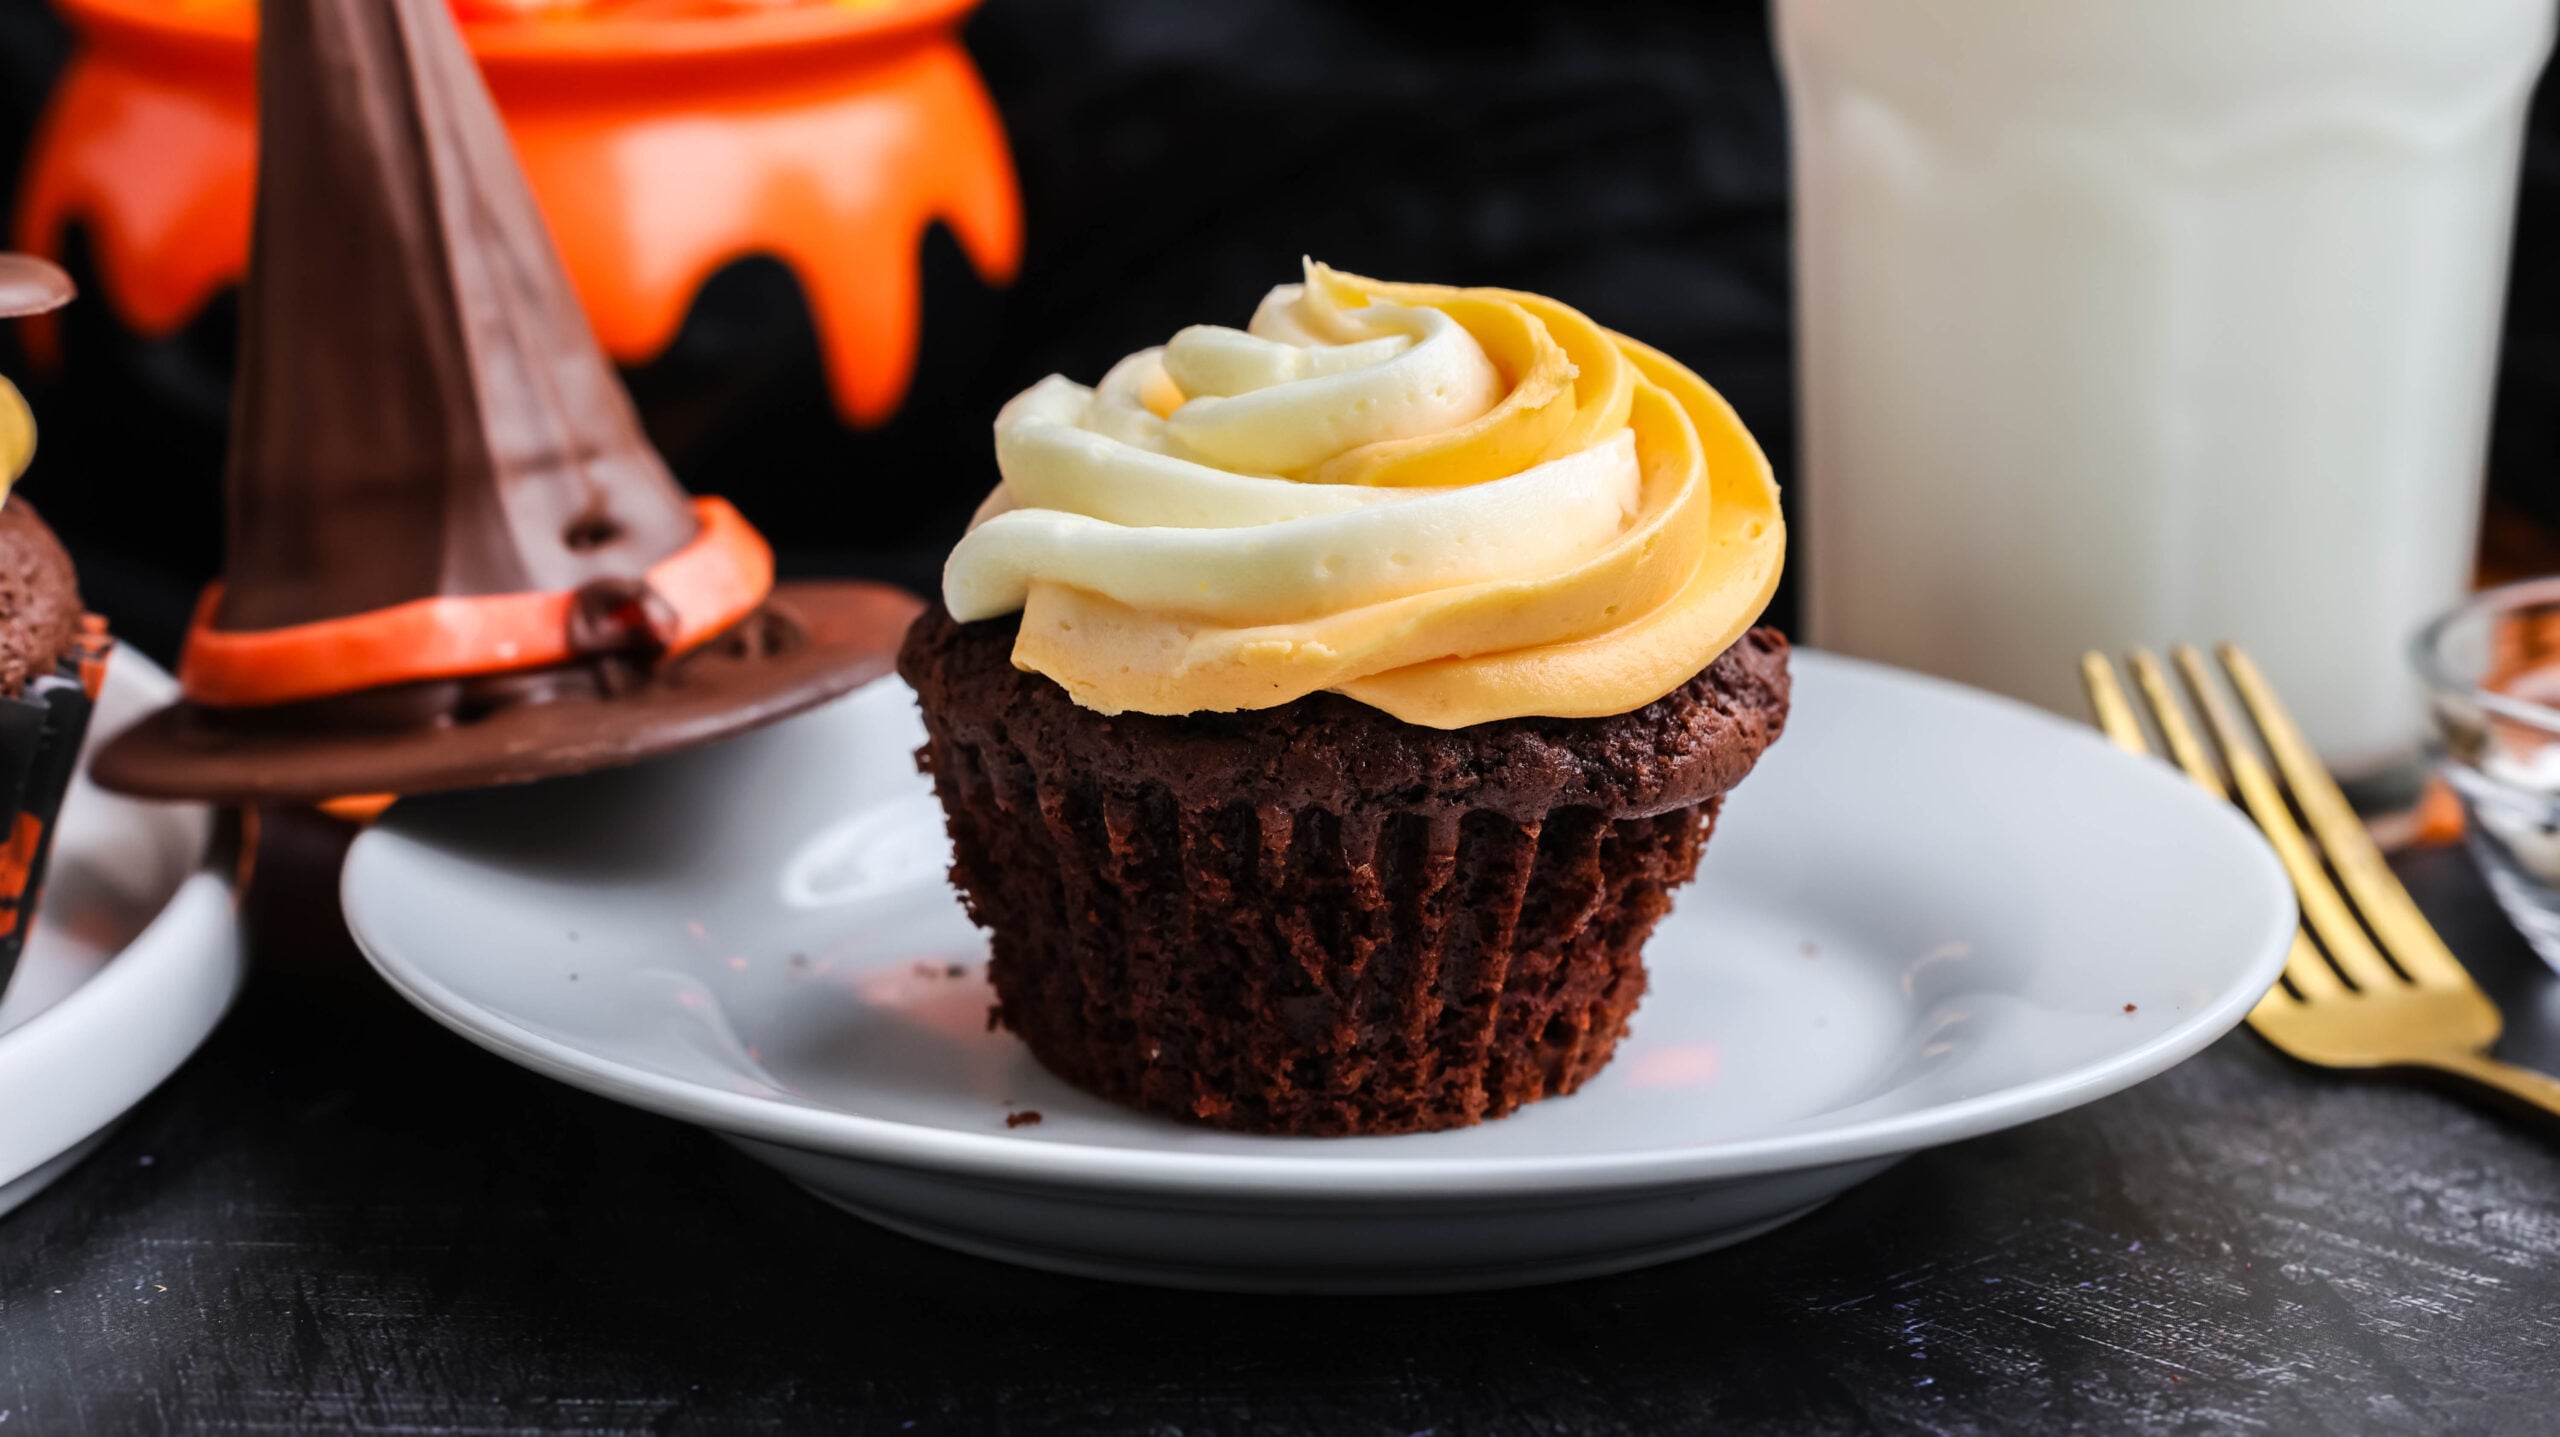
These Halloween cupcakes are much easier to manage when the components are prepared separately.
- Witch hats: Make up to two days ahead and store in a covered container at cool room temperature.
- Cupcakes: Bake one day ahead. Once completely cool, keep them in an airtight container at room temperature.
- Buttercream: Make one day ahead and refrigerate in an airtight container. Let it soften at room temperature, then whip it briefly before coloring and filling the piping bag.
- Fully assembled cupcakes: For the crispest hats and the cleanest finish, assemble them the day you plan to serve them.
How to Store Halloween Cupcakes
Store the finished cupcakes in a tall, airtight cupcake carrier at room temperature for up to three days, as long as your kitchen is cool. Keep them out of direct sunlight and away from the stove.
If the room is warm or the buttercream feels soft, refrigerate the cupcakes. Let them sit at room temperature for about 20 to 30 minutes before serving so the cake and frosting can soften. Refrigeration may make the sugar cones lose some crispness over time, so same-day assembly gives the best texture.
Undecorated chocolate cupcakes can be frozen for up to two months. Wrap each cooled cupcake tightly, place them in a freezer-safe container, and thaw at room temperature before decorating. I do not recommend freezing the completed witch hats or fully assembled cupcakes because condensation can spot the chocolate and soften the cookies and cones.
Halloween Party Serving Ideas
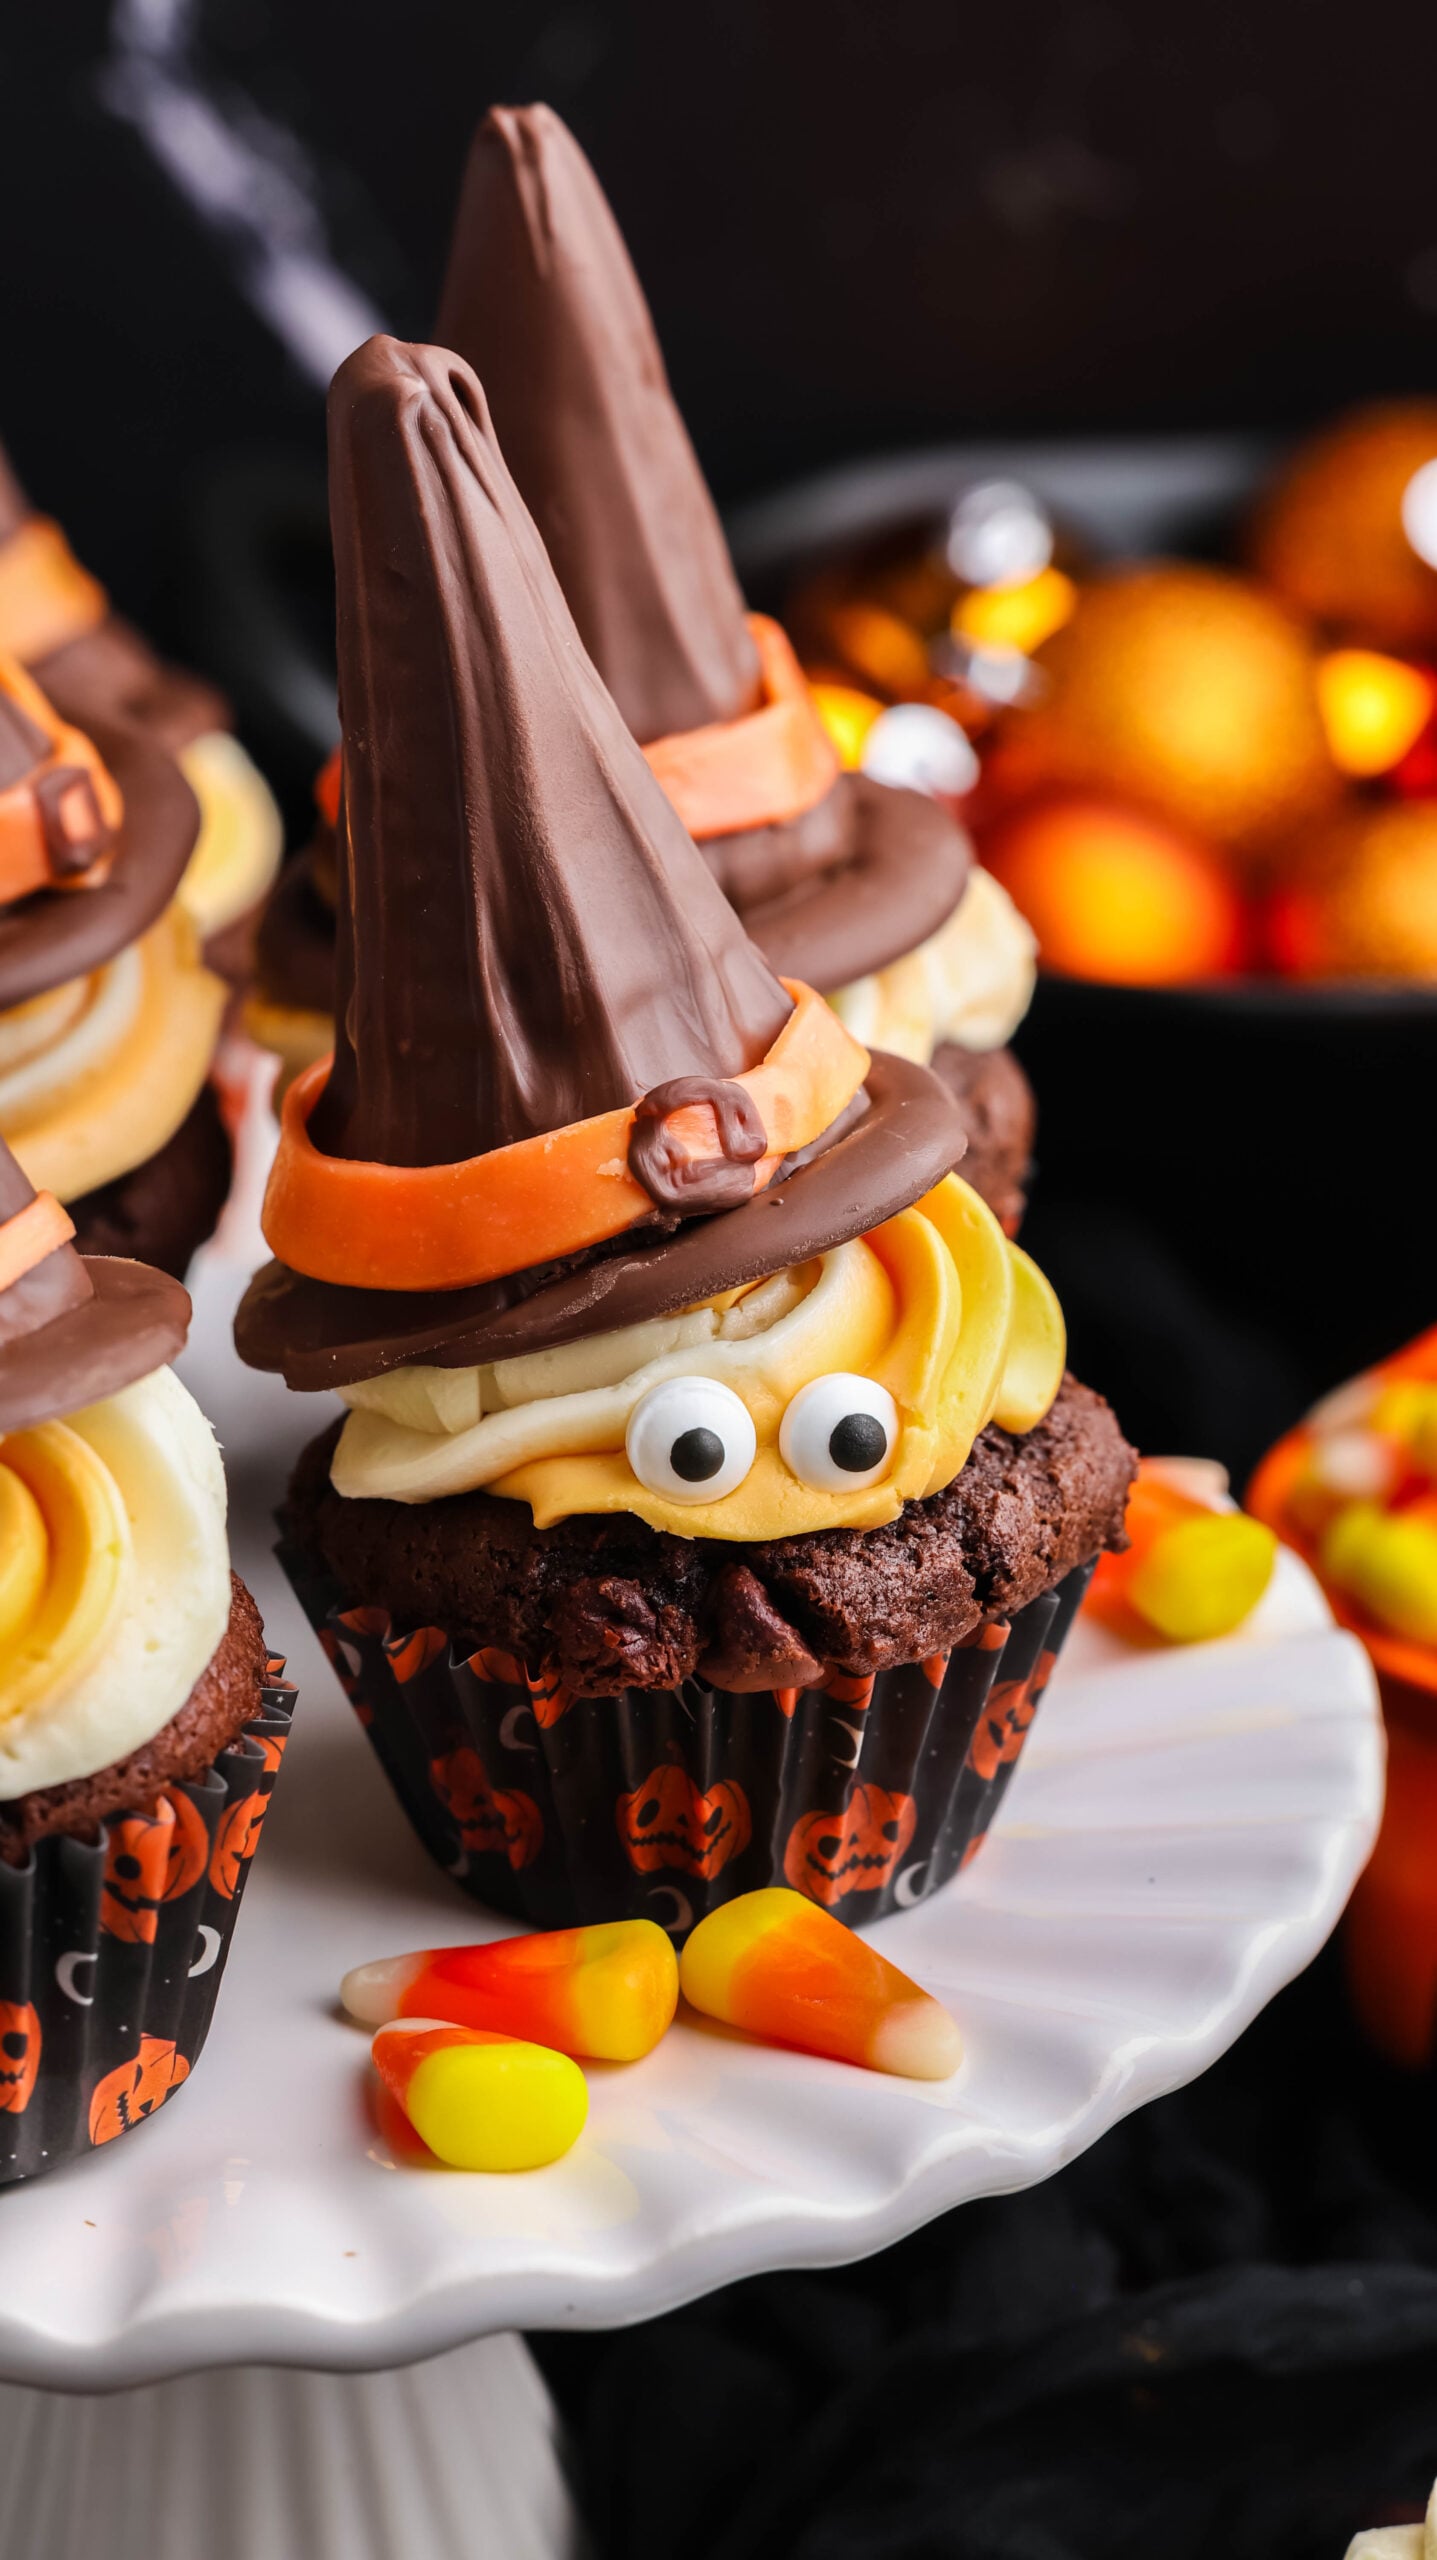
Arrange the cupcakes on a tiered stand and scatter a few plastic spiders or battery-operated tea lights around the base-well away from the food. Add a savory Halloween snack board so guests have something salty between sweets.
For a full dessert spread, add colorful Hocus Pocus fudge, Halloween monster popcorn balls, and these spooky monster ice cream sandwiches. A pitcher of this kid-friendly vampire blood drink finishes the party table in the most fun way.
Halloween Cupcakes FAQs
Can I make Halloween cupcakes the day before
Yes. Bake the cupcakes and make the witch hats one day ahead, storing both separately at room temperature in airtight containers. Make and refrigerate the buttercream, then bring it to room temperature and briefly rewhip it before piping. Assemble the cupcakes on the day of your party for the freshest texture.
Why is the cupcake batter so thick
This chocolate cupcake batter is supposed to be thick. Measure the flour correctly and stop mixing as soon as the dry ingredients disappear. Do not add extra milk to thin it unless an ingredient was accidentally measured incorrectly.
Can I leave out the espresso powder
Yes. Espresso powder enhances the chocolate but is not required for the structure of the cupcakes. Leave it out without making any other changes.
How do I keep the witch hats from sliding
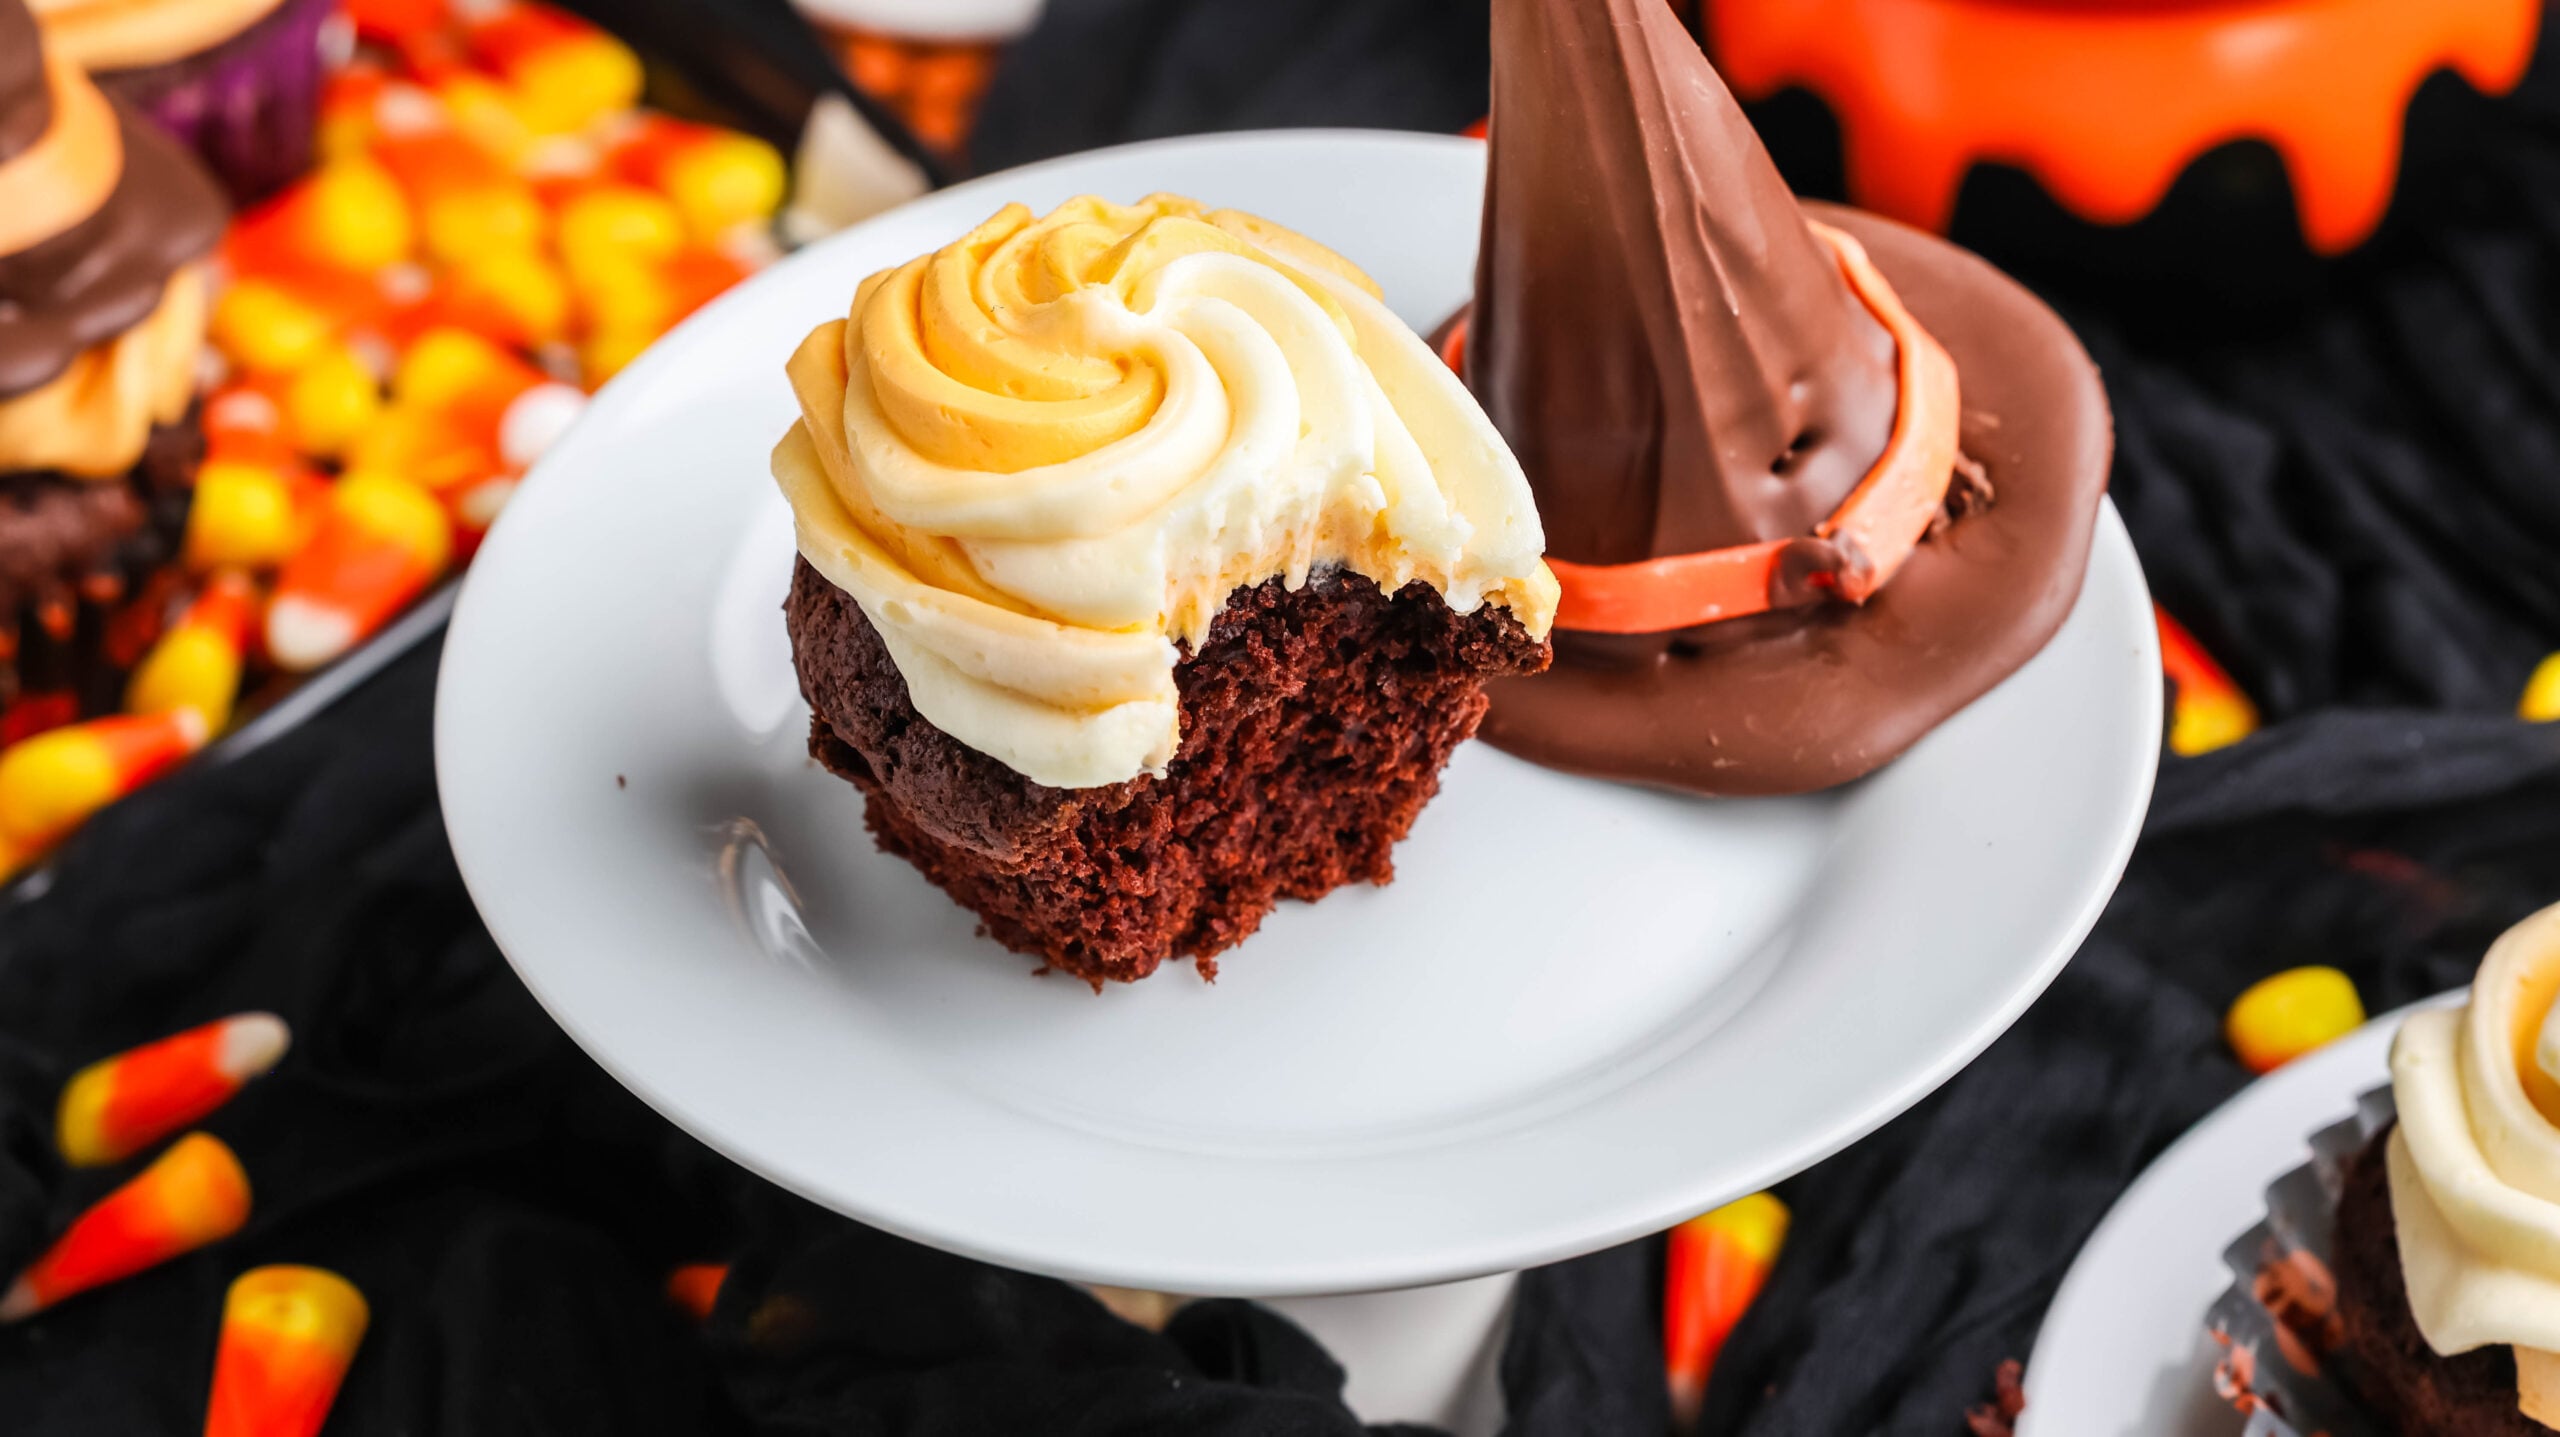
Make sure the cupcakes are completely cool and the buttercream is stiff enough to hold a peak. Pipe a sturdy mound in the center, then press the hat down very gently. If your kitchen is warm, chill the frosted cupcakes for 10 minutes before adding the hats.
Can kids help make these witch hat cupcakes
Absolutely. Kids can place cupcake liners in the pan, add sprinkles, attach candy eyes, and help set the finished hats on top. An adult should handle the oven, melted coating, warmed Starbursts, scissors, and sharp cutters.
Can I use regular size sugar cones
Mini sugar cones fit standard cupcakes best. A regular cone will usually look oversized and may be too heavy for the buttercream. If regular cones are your only option, trim them carefully and test one before decorating the entire batch.
Can I freeze chocolate Halloween cupcakes
Freeze the unfrosted cupcakes for up to two months. Thaw them completely before adding the buttercream and witch hats. The finished decorations should not be frozen because condensation may affect their texture and appearance.
More Halloween Treats to Try
- Halloween Muddy Buddies Snack Mix
- Hocus Pocus Fudge
- Spooky Halloween Monster Ice Cream Sandwiches
- Halloween Monster Popcorn Balls
- Vampire Blood Drink
- Easy Pumpkin Cupcakes with Cream Cheese Frosting
These homemade chocolate Halloween cupcakes bring everything I love about October baking into one fun dessert: rich chocolate, bright seasonal colors, a little creativity, and a decoration that makes everyone smile. Save the recipe for your Halloween party, and when you make it, tag @hipmamasplace so I can see your witchy cupcake creations!
Print
Halloween Cupcakes with Edible Witch Hats
- Total Time: 35 minutes
- Yield: 12-14 cupcakes 1x
Description
These moist, rich chocolate Halloween cupcakes are filled with chocolate chips, topped with swirled orange-and-white vanilla buttercream, and finished with edible witch hats made from Oreos and mini sugar cones. These fun witch hat cupcakes are perfect for Halloween parties, classroom celebrations, bake sales, and spooky family baking.
Ingredients
For the Cupcakes:
- 2 cups all purpose flour
- 1⁄2 cup cocoa powder
- 1 tsp. espresso powder
- 1 1⁄2 tsp. baking powder
- 1 tsp. baking soda
- 1⁄2 tsp. sea salt
- 2 large eggs
- 1 cup granulated sugar
- 2⁄3 cup buttermilk
- 1⁄2 cup liquid coconut oil
- 2 tsp. vanilla extract
- 1⁄2 cup chocolate chips
For the Witch Hats:
- 12 Mini Sugar Cones (I ordered them from Amazon)
- 12 Oreos (separated and you’ll just be using the side with the cream filling)
- About 8 Squares of Chocolate Almond Bark
- Starburst Candy (just the orange ones)
For the Buttercream frosting:
- 1 cup Softened Butter
- 2 1⁄2 cups Powdered Sugar
- 1 tsp. Vanilla
- 1-2 teaspoons Milk (any kind will work)
Instructions
To make the Cupcakes:
- Preheat the oven to 350 degrees f.
- In a medium size bowl mix together the flour, cocoa powder, espresso powder, baking powder, baking soda and salt. Set aside.
- In the bowl of a stand up mixer, fitted with the paddle attachment, add the eggs, sugar, buttermilk, coconut oil, and vanilla Mix until smooth but just till combined.
- Slowly add the flour mixture into the liquid mixture. Mix to combine but do not overmix. Add the chocolate chips and mix in. The batter will be thick!
- Line a cupcake pan with paper liners. (Halloween theme is perfect)
- Use a medium cookie scoop and fill the liners about 2⁄3 full. (Do not over fill)
- Bake on the middle rack for about 17-20 minutes or until a toothpick inserted in the center of a cupcake comes out clean.
- Remove from the oven and allow to sit for a few minutes before removing from the pan and transferring to a wire cooling rack.
- Frost the cupcakes, using the swirled frosting ( see below).
- Top each cupcake with a witch's hat. (See how to assemble below)
To make the Witch's Hats:
- With the Oreo cream filling side facing up, firmly place a mini sugar cone on top so it sticks together. Repeat with all 12
- Place these on top of a cooling rack that is sitting on top of a bowl. (This will make more sense with the photos) I use a small one and only cover two at a time.
- Place about 3 squares of the chocolate almond bark in a microwave safe bowl and microwave at intervals of 40 seconds until it is melted. Stir until it is smooth.
- Pour the melted chocolate over the sugar cone, covering it and allowing the excess chocolate to drip into the bowl below. (You can re-melt this for later.)
- I use the back of a spoon to run up the sides of the cone, making sure everything gets coated. Repeat this for all 12.
- To get the brim of the hat, I pour about 1 teaspoon of melted chocolate onto a parchment lined dish. (The chocolate needs to exceed the size of the cone by a little) and place the chocolate coated cone in the center. Gently press the cone into the chocolate and allow it to set for a few minutes.
- In a small, microwave safe bowl, microwave about 4 or 5 orange starbursts at 20 second intervals. You want it to be soft and pliable, not cooked! (Do not cook any longer).
- Carefully pinch all of the heated starbursts together to form a pliable texture. Using a small rolling pin, roll it out onto a flat surface to about 6” or whatever length will fit around your chocolate coated cone. I use a small cutting board. Using a sharp knife or pizza cutter, cut strips about 1⁄4” wide. Repeat this method until you have 12 strips.
- Attach the orange strip around the bottom portion of the hat, securing the end by carefully pinching it together.
- Using a small food grade artist's brush, paint a little buckle with melted chocolate in the front of the orange band around the hat.
To make the Buttercream Frosting:
- In a medium size bowl, place the softened butter and whip until light and fluffy with a hand mixer. Slowly add the powdered sugar and continue beating. Add the vanilla and a little milk at a time until desired consistency. (You want stiff peaks for piping)
- Remove half of the frosting and place in a separate bowl. Add desired food color (I’m using orange)
- Mix by hand with a spoon until the food color is fully incorporated.
- Lay a piece of plastic wrap (about 18”), flat on the counter.
- Add the two frostings, next to each other in a log shape.
- Roll up with the plastic wrap so the two colored frostings are snug next to each other and snip one end with scissors.
- Attach the star tip to a pastry bag and insert the bag of frosting, cut side down.
- Test out the frosting on a piece of parchment paper to make sure that both colors come out together to give you a swirl effect.
- Prep Time: 15 minutes
- Cook Time: 20 minutes
- Category: Desserts
- Method: Baking
- Cuisine: American