
Here is an adorable DIY craft, just in time for the holidays, by guest blogger Danielle Larkins. Danielle is a mom of two boys who mostly writes about her family experiences, parenting tips, and DIY creations in hopes her readers feel inspired (and normal). Go check out her blog, tiny-trots, when you have a chance!
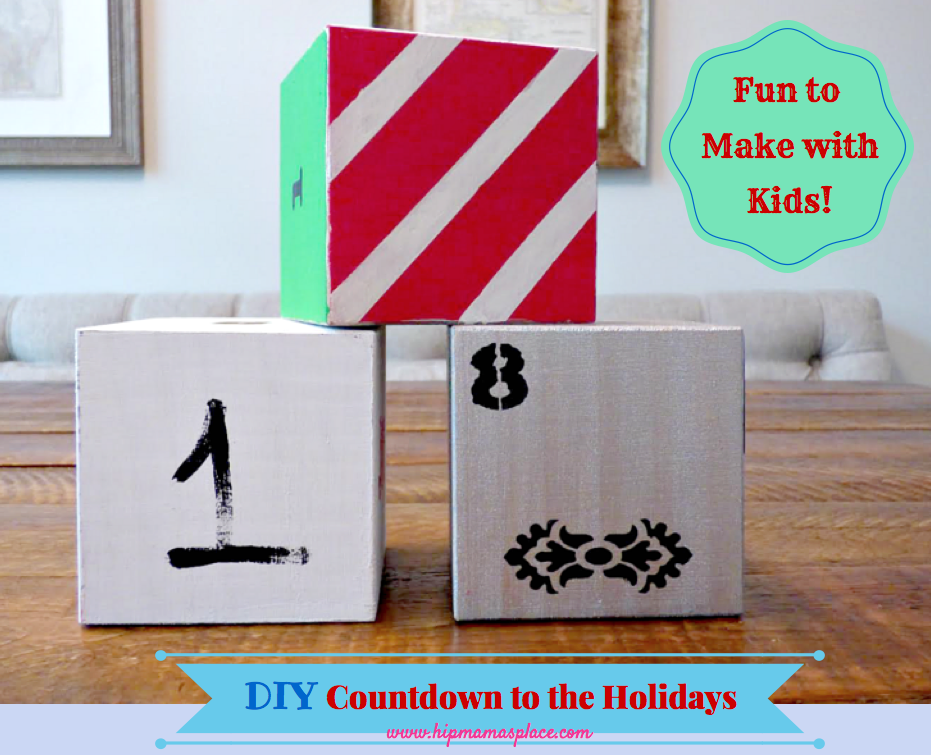
As Christmas quickly approaches, and my two preschoolers eagerly await its arrival, I thought it would be a fun idea to make a holiday countdown craft using three wooden cubes. Each side has a different number or image, and the side is changed each day to correspond with the number of days left until the holiday. For this countdown, I made it so you can countdown starting at 30 days, but that arbitrary number is up to you. Also, this is a craft that adults can do solo or with the help of little hands. Just be aware that acrylic paint is involved, and it can stain if it gets on fabric!
What You'll Need:
* Three wooden cubes IF you're doing 30 days (first cube has numbers 0,1,2,3; second cube has numbers 0,1,2,3,4; third cube has numbers 5,6,7,8,9)
* Acrylic paint (red, green, black, white, gold, silver, and brown)
* Paint brushes
* Doilies
* Sticker stencils with numbers and patterns
* Patterning tape (for candy cane stripes or to make number stamps or images)
STEPS
How many cubes do I need? My first cube has numbers 0-3 because remember I'm starting at 30 days. If you're only doing 25, then you only need two cubes. The first would have numbers 0-2, and the second cube would have 0-5. But, if you're doing 29 days, for example, then you would still need three cubes because you would need to include numbers 6-9, after your 0-5.
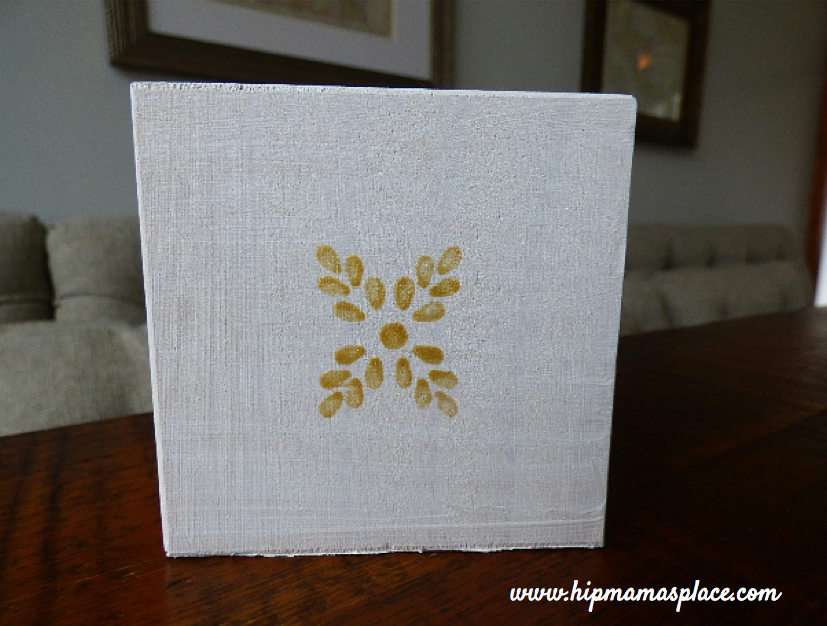
Step 1: Paint the sides of your cubes. One of my two has a different color, and the other two are either white or silver.

Tip: Be careful with the acrylic paint. I recommend covering your table well with newspaper/magazines. Also, after I finished with a color, I'd quickly take the brush to the sink and wash it off with water. It comes out easily if it doesn't dry.
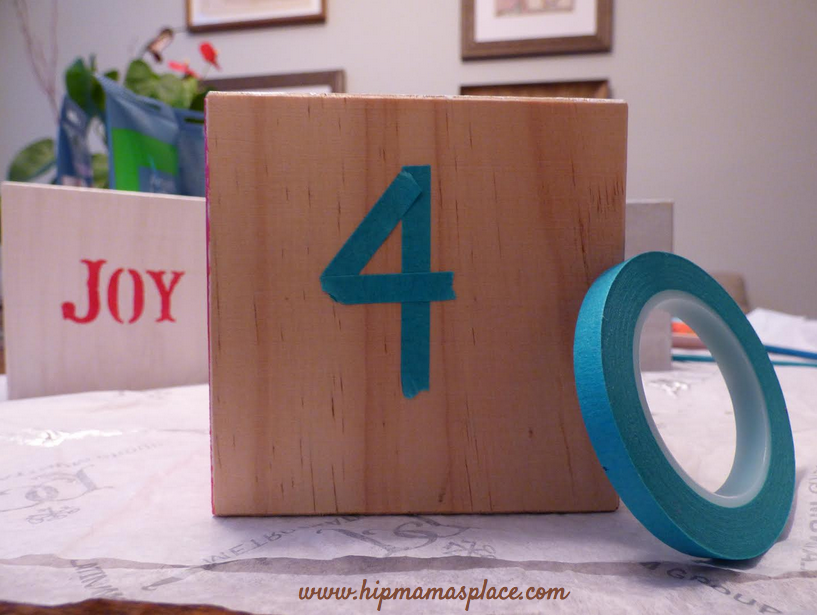
Step 2: After the sides have dried, think about which number you want on each side and place your sticker stencil. Paint the numbers in.
Tip: I recommend waiting a minute or two to allow the paint to dry a bit before removing the stencil. This minimizes the smudging that can happen.
Step 3: Paint your images, if you're including any. I used stencils, doilies, and patterning tape. For the doilies, I simply placed it over the side of the cube and painted in the holes.

You can also use patterning tape to get the candy cane image. The tape is the area that will NOT be receiving the paint. All you need to do is paint that side of the cube red or white. Let it dry, and then place strips of tape diagonally and equidistantly.
Step 4: Patience. I know it's tempting to place one side down on the table while you work on another side, but it may stick to the newspaper and smudge your paint. Once it dries, you're all done!
Remember, like many crafts, you can get creative and use other colors or tools to create the look and images you'd like. For example, instead of painting, you can glue tissue paper or other patterned paper with Mod Podge. Or you can use chalkboard stickers and write the numbers in instead. The goal is to have fun while creating your style!


Ooh I should do this with my son starting school!! He's so excited and asks me every day if its time lol!! This he could help me make too!! Super fun!! Thanks for the great idea!
Looks great, Jocelyn! Thanks so much for having me! It was fun 🙂