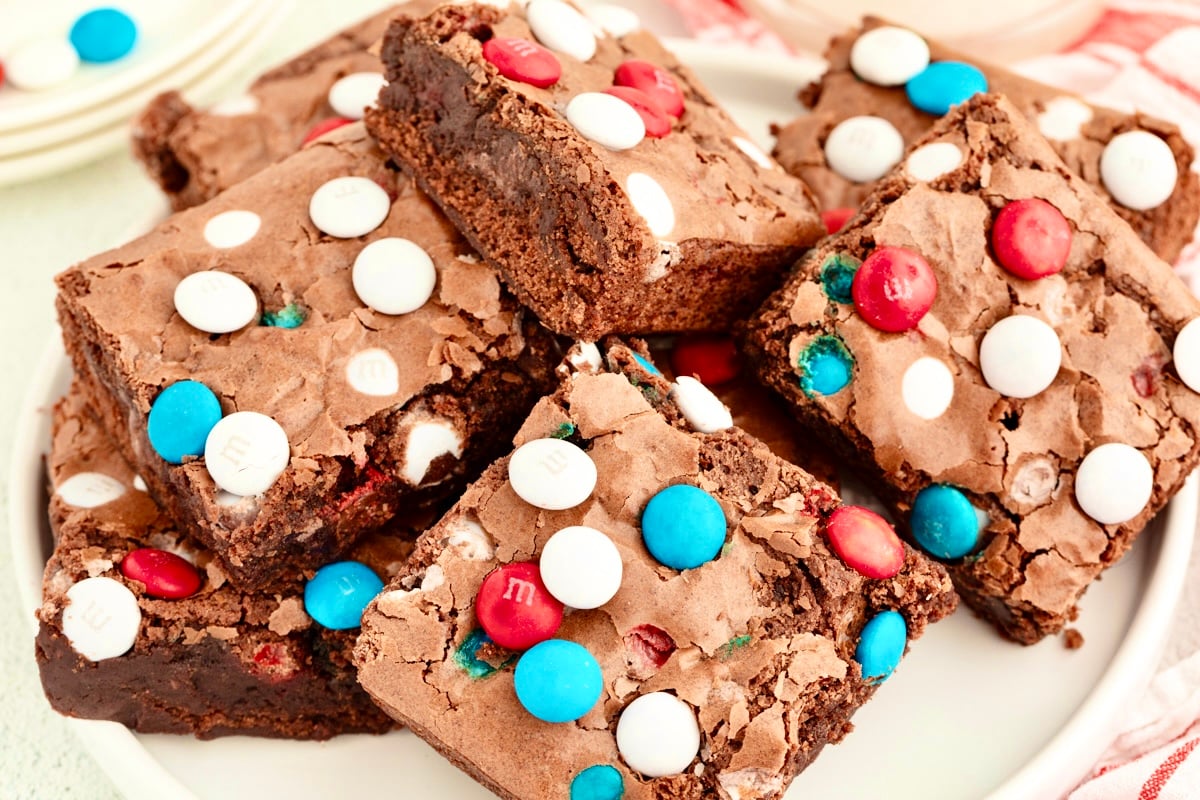
Make this easy 4th of July M&M brownies with a box mix, butter, eggs, and red, white, and blue candies. A moist, patriotic brownie recipe perfect for summer parties!
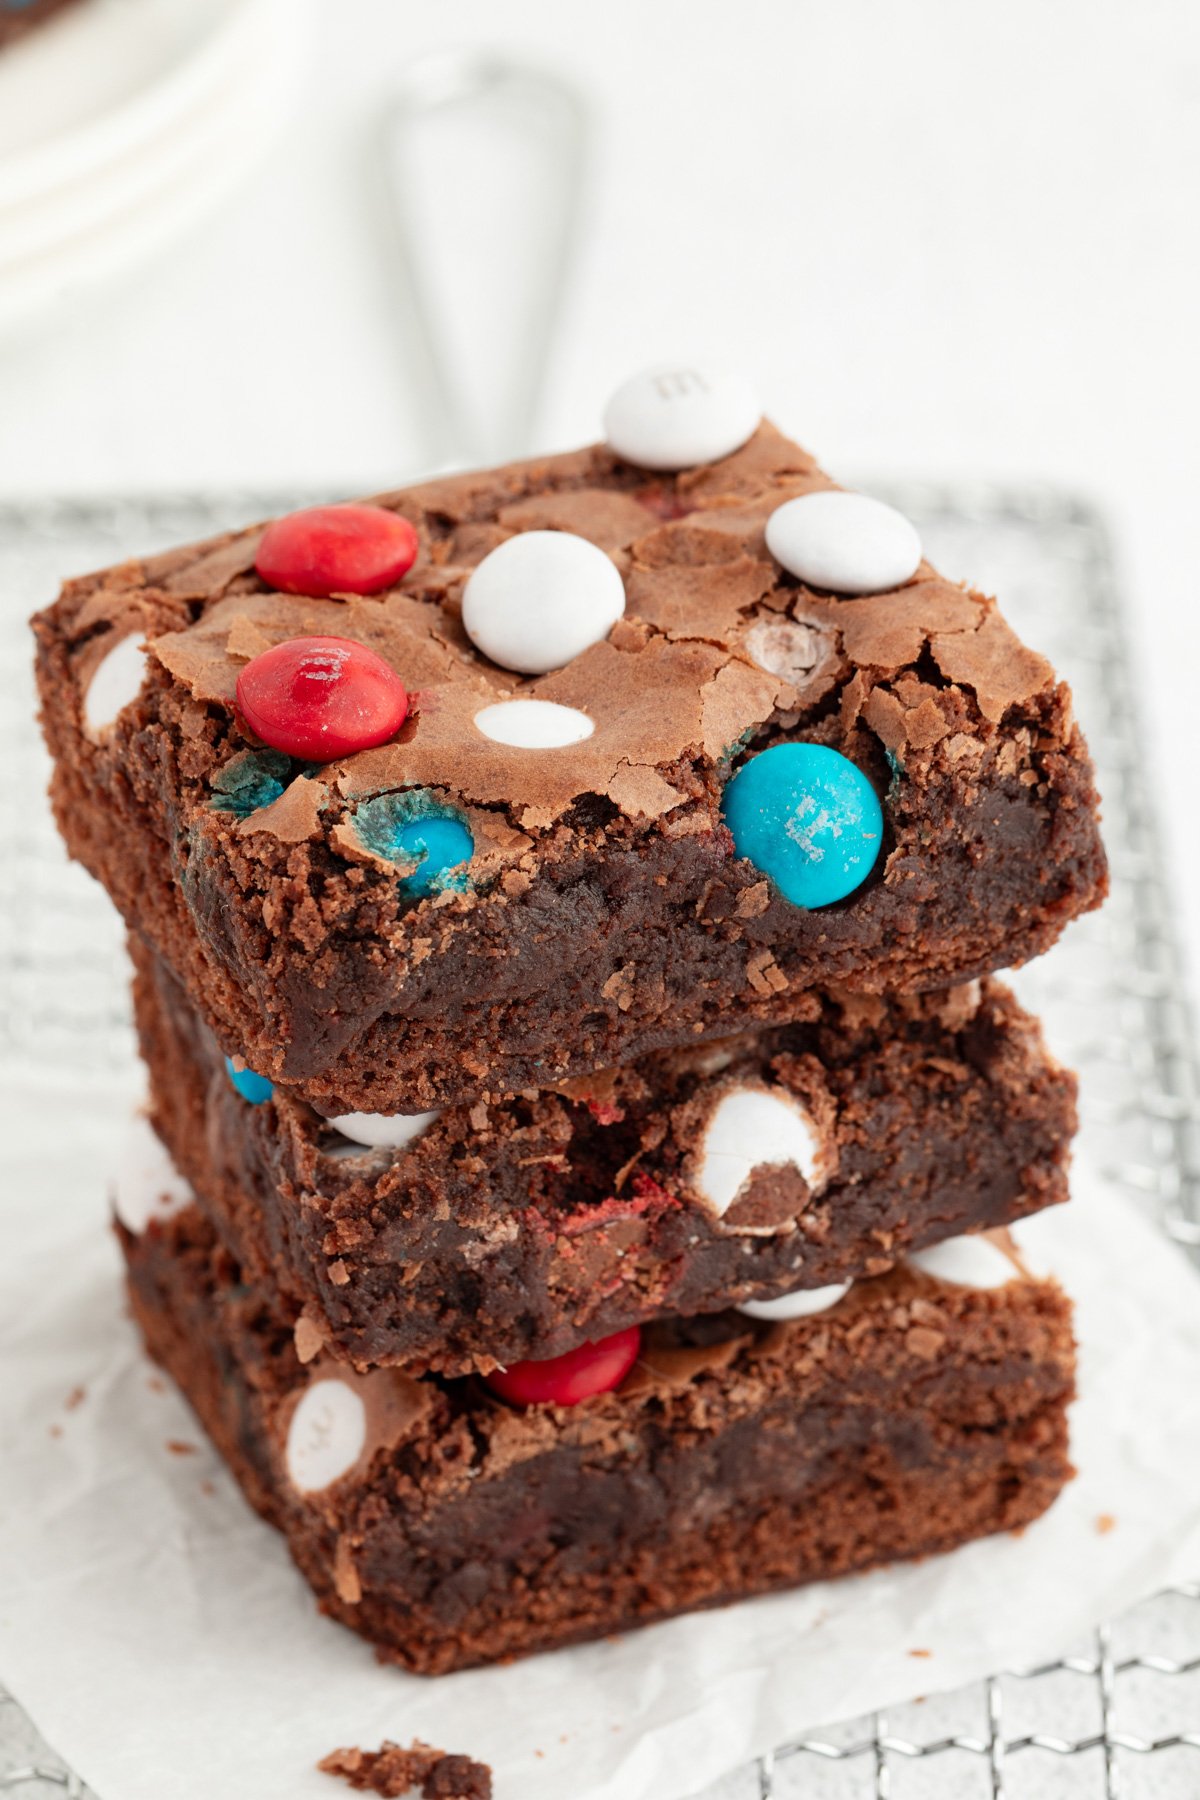
Looking for a fun, festive dessert that screams red, white, and blue? These 4th of July brownies are the ultimate treat to bring to your Independence Day BBQs, pool parties, or fireworks gatherings. Made from a simple box brownie recipe, these patriotic brownies are soft, fudgy, chocolatey, and loaded with colorful M&M candies. And the best part? They come together in just about an hour—prep to plate!
Whether you call them M&M brownies or brownies with M&M candies, one thing’s for sure: this is the moist brownie recipe your summer celebration needs.
Ingredients You’ll Need
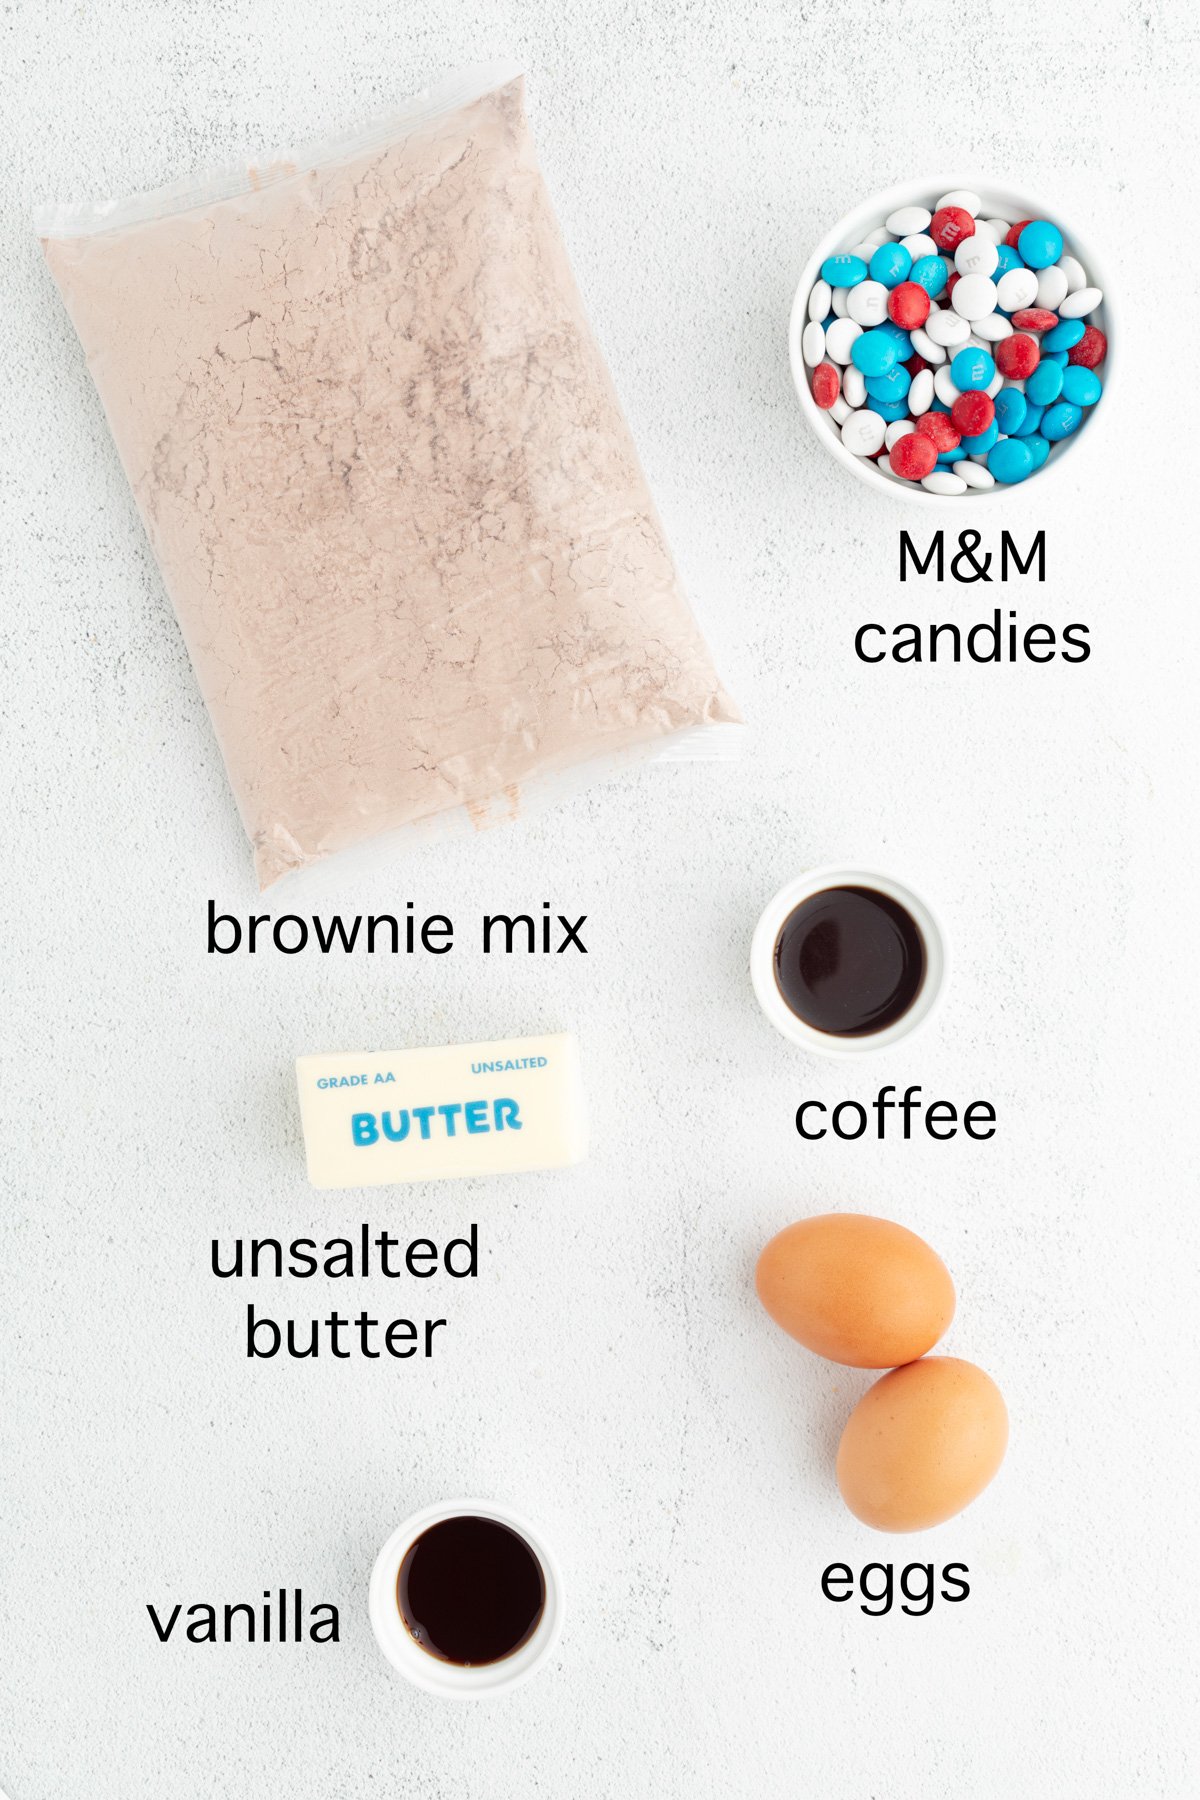
This recipe is simple, but there are a few key ingredients that really elevate the flavor. Here’s what you’ll need:
- 1 box brownie mix (I recommend Betty Crocker Fudge Brownie Mix)
- 2 tablespoons black coffee (room temperature)
- ½ cup unsalted butter (melted and cooled)
- 2 large eggs (room temperature)
- 2 teaspoons vanilla extract
- ⅔ cup red, white, and blue M&M candies divided
Kitchen Hack: Adding coffee deepens the chocolate flavor without making your brownies taste like coffee.
Step-by-Step Instructions
1. Prep Your Pan
- Preheat your oven to 350°F.
- Grease and line an 8×8 baking pan with parchment paper (it makes cleanup easier and keeps the edges from sticking!).
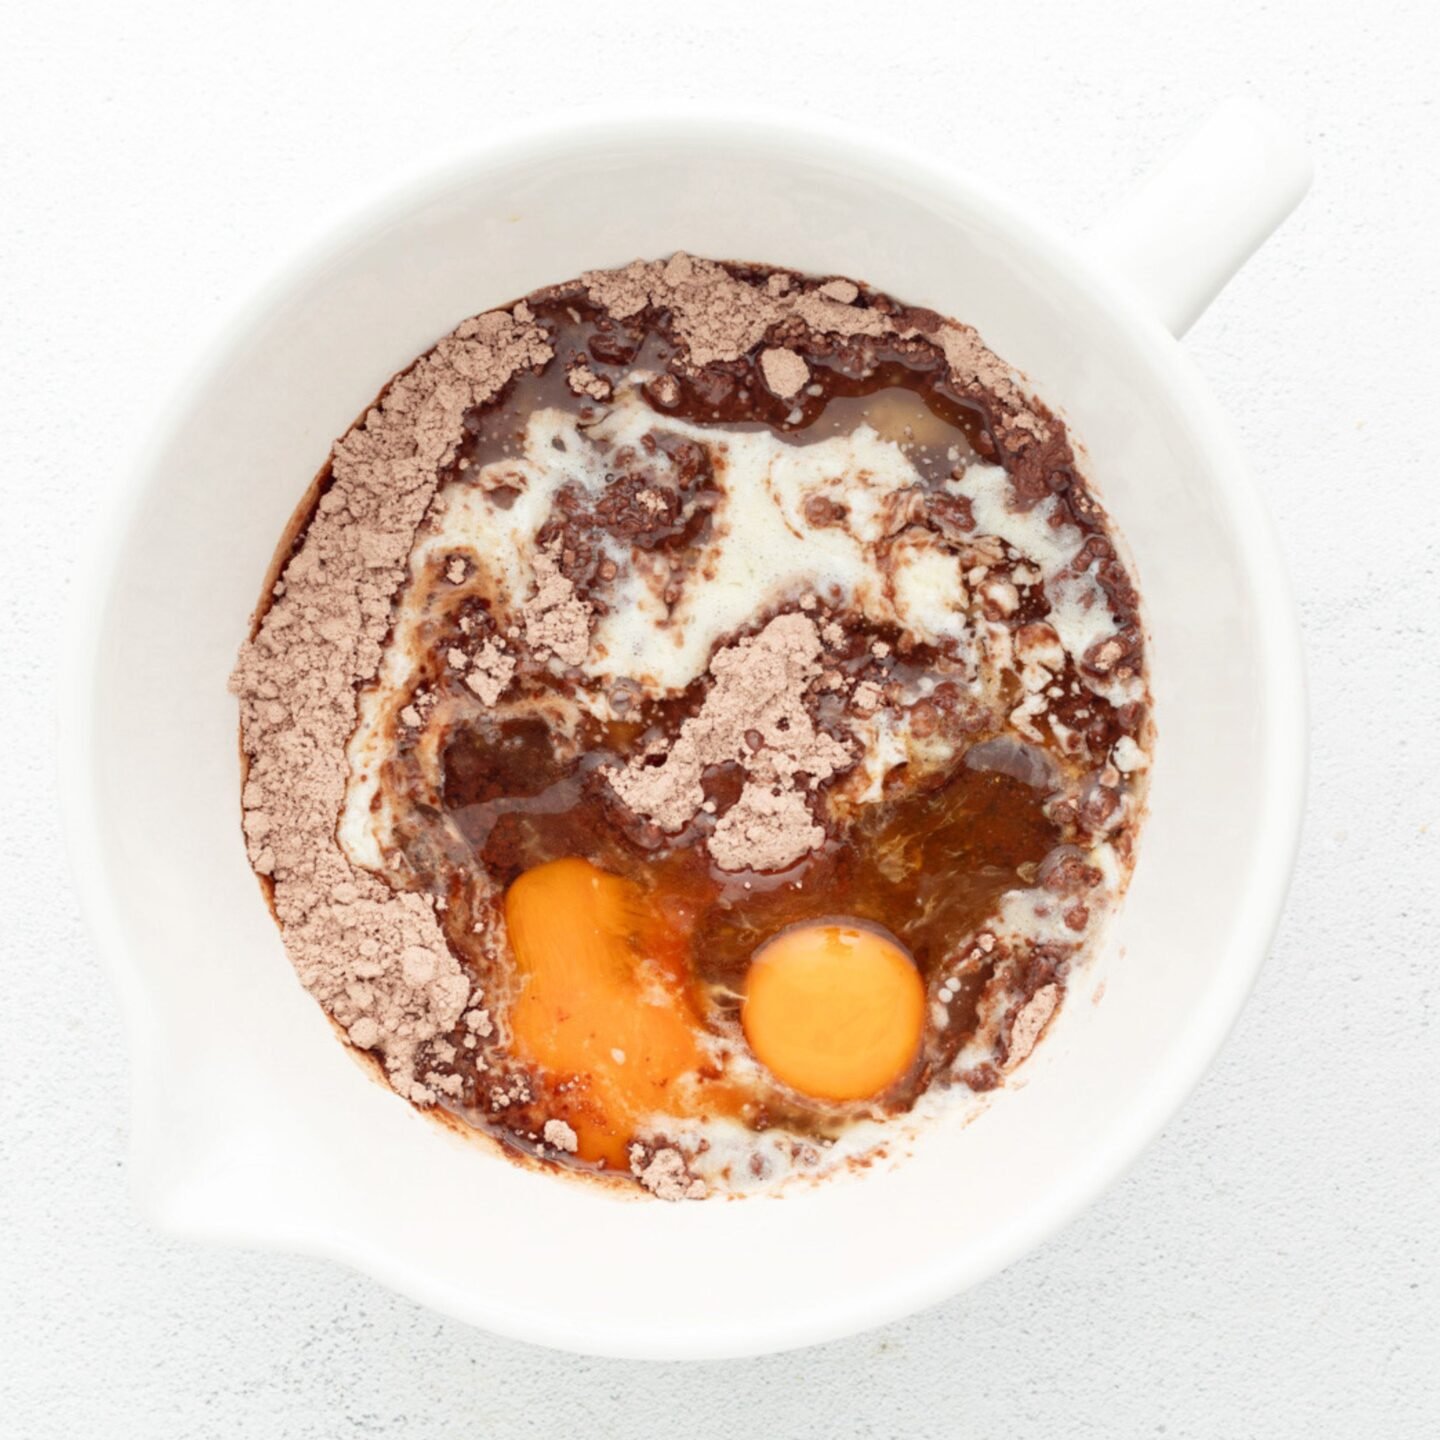
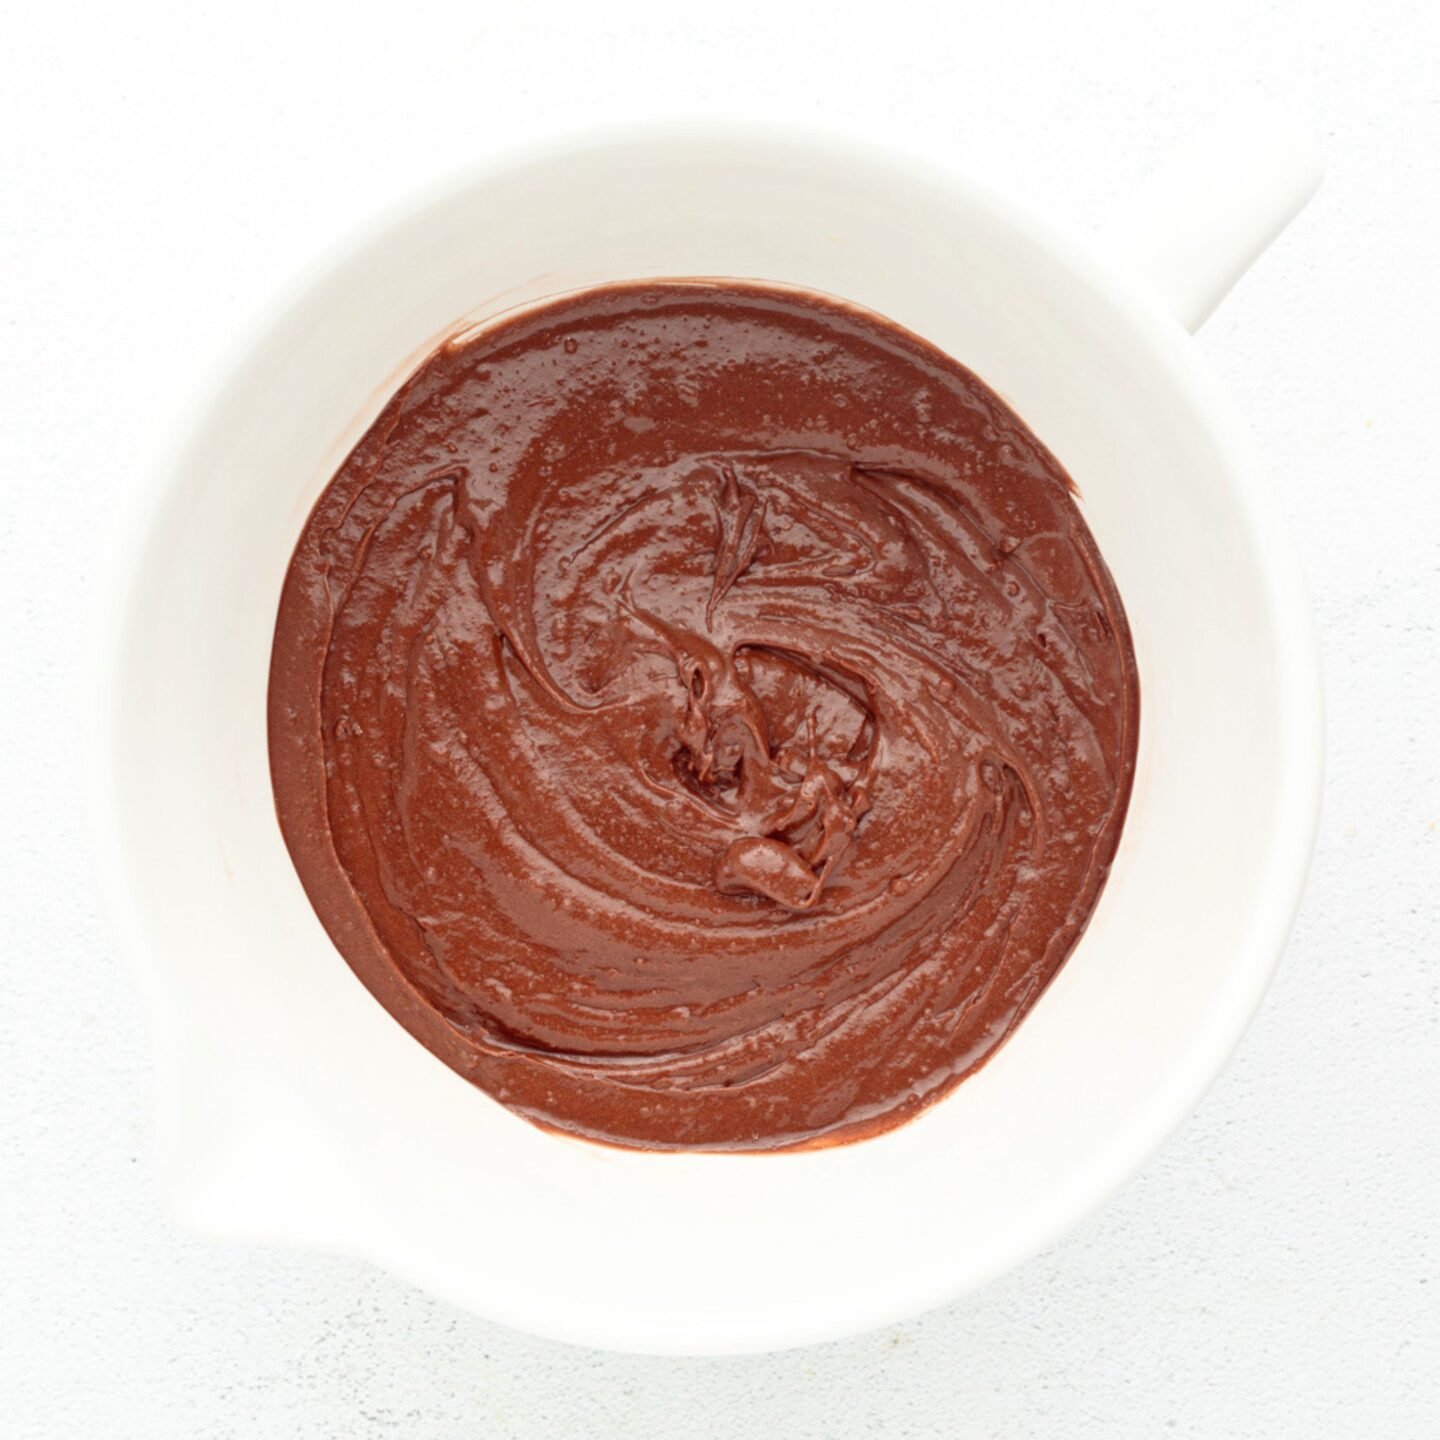
2. Mix the Batter
- Combine the brownie mix, coffee, melted butter, eggs, and vanilla extract in a large bowl.
- Whisk or use a hand mixer until the batter is smooth and lump-free.
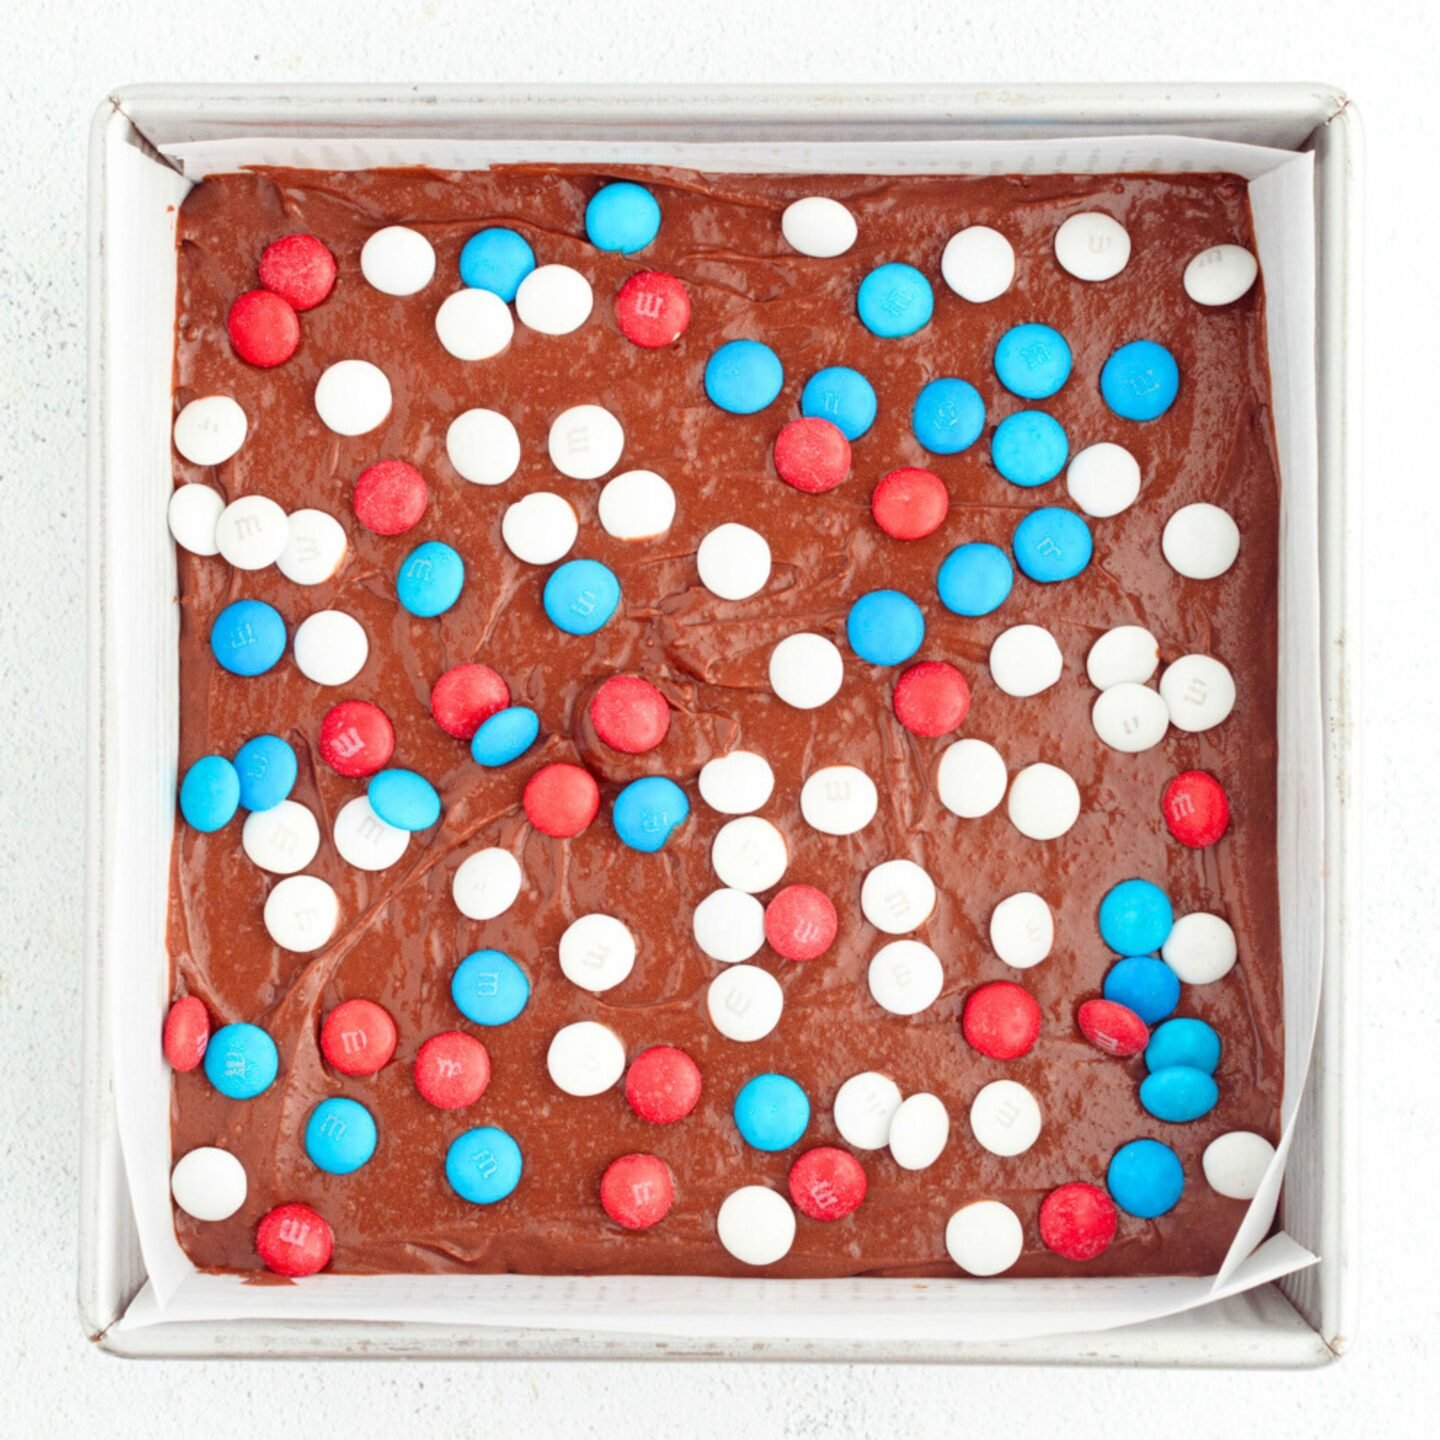
3. Pour & Decorate
- Pour the brownie batter into your prepared baking pan.
- Smooth the top with an offset spatula or the back of a spoon.
- Sprinkle ½ of your M&M candies (⅓ cups) over the top—just scatter them, don’t press them in.
4. Bake
- Bake in the preheated oven for 45–50 minutes.
- Check for doneness by inserting a toothpick about 2 inches from the edge—it should come out with a few moist crumbs (not wet!).
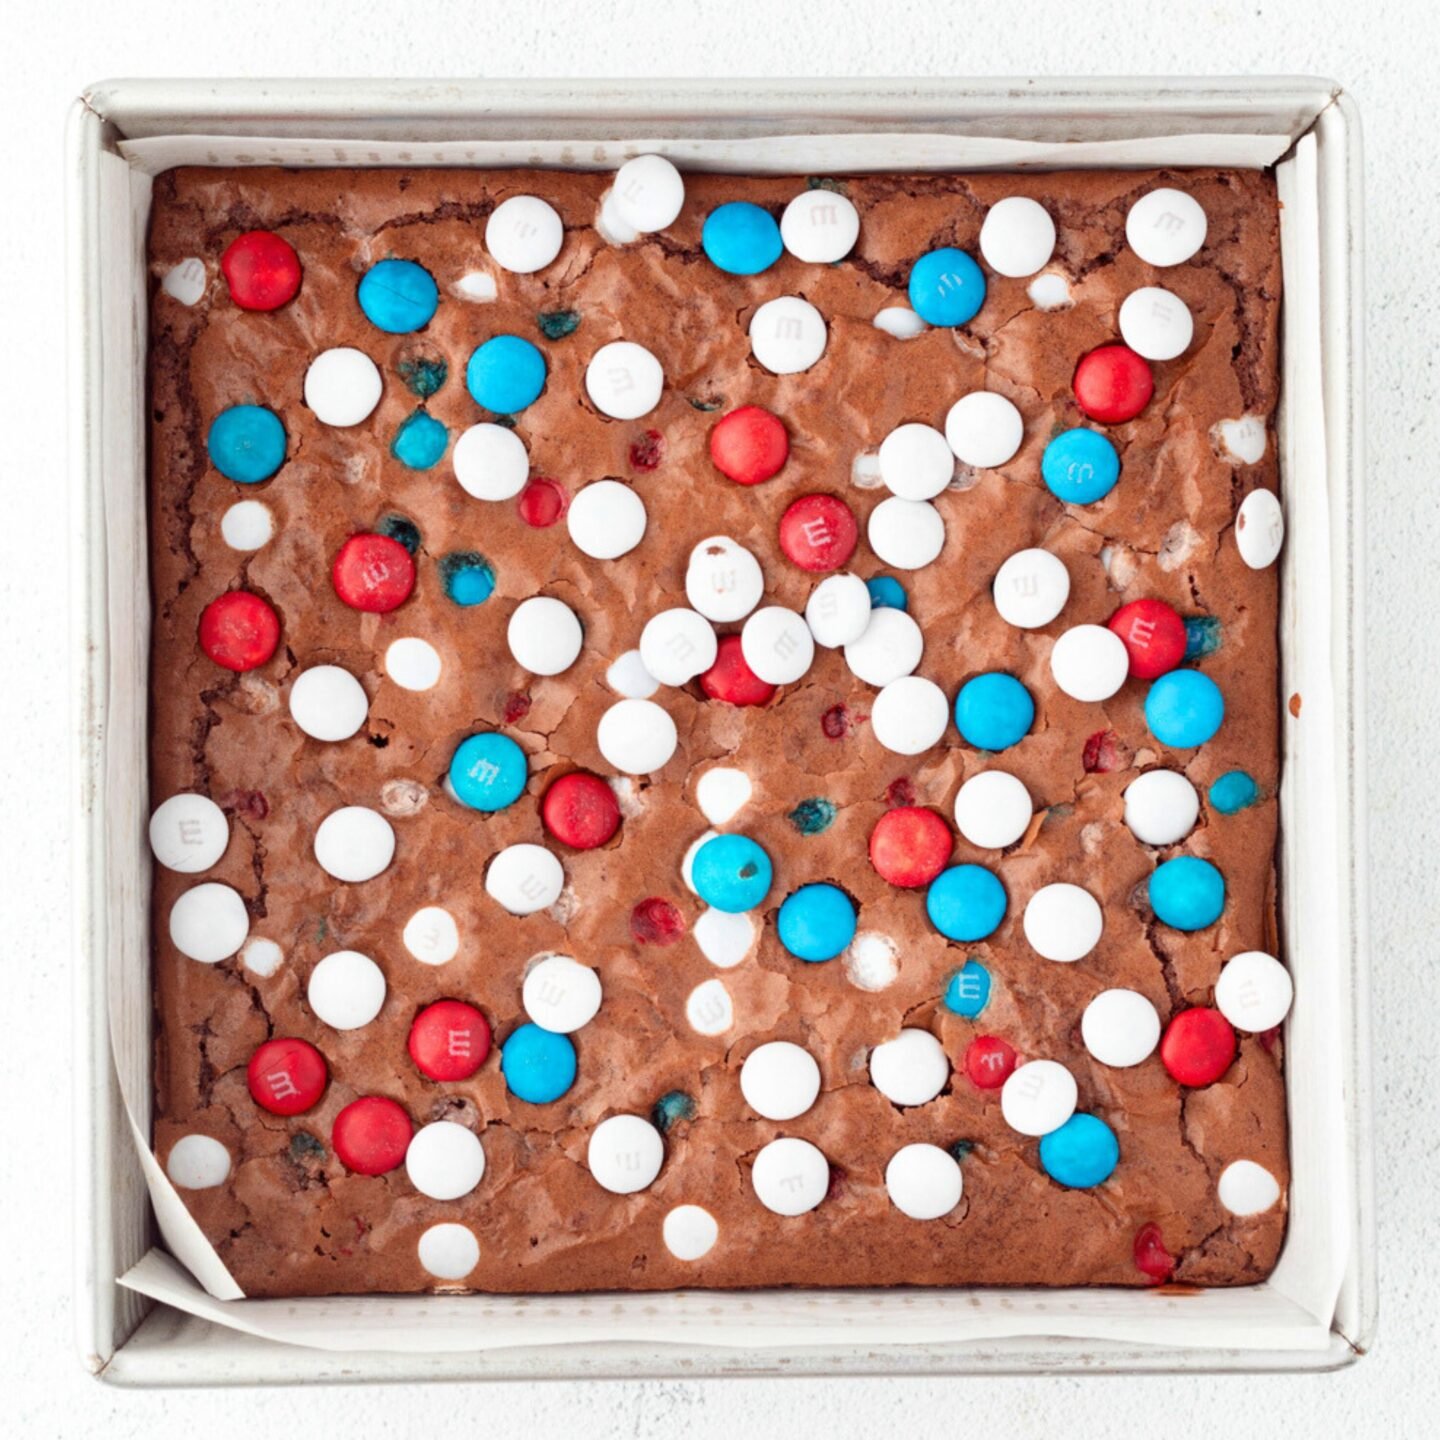
5. Add More M&Ms
- When you take the brownies out of the oven, sprinkle the remaining ⅓ cups of M&Ms on top. This keeps them looking vibrant and prevents cracking.
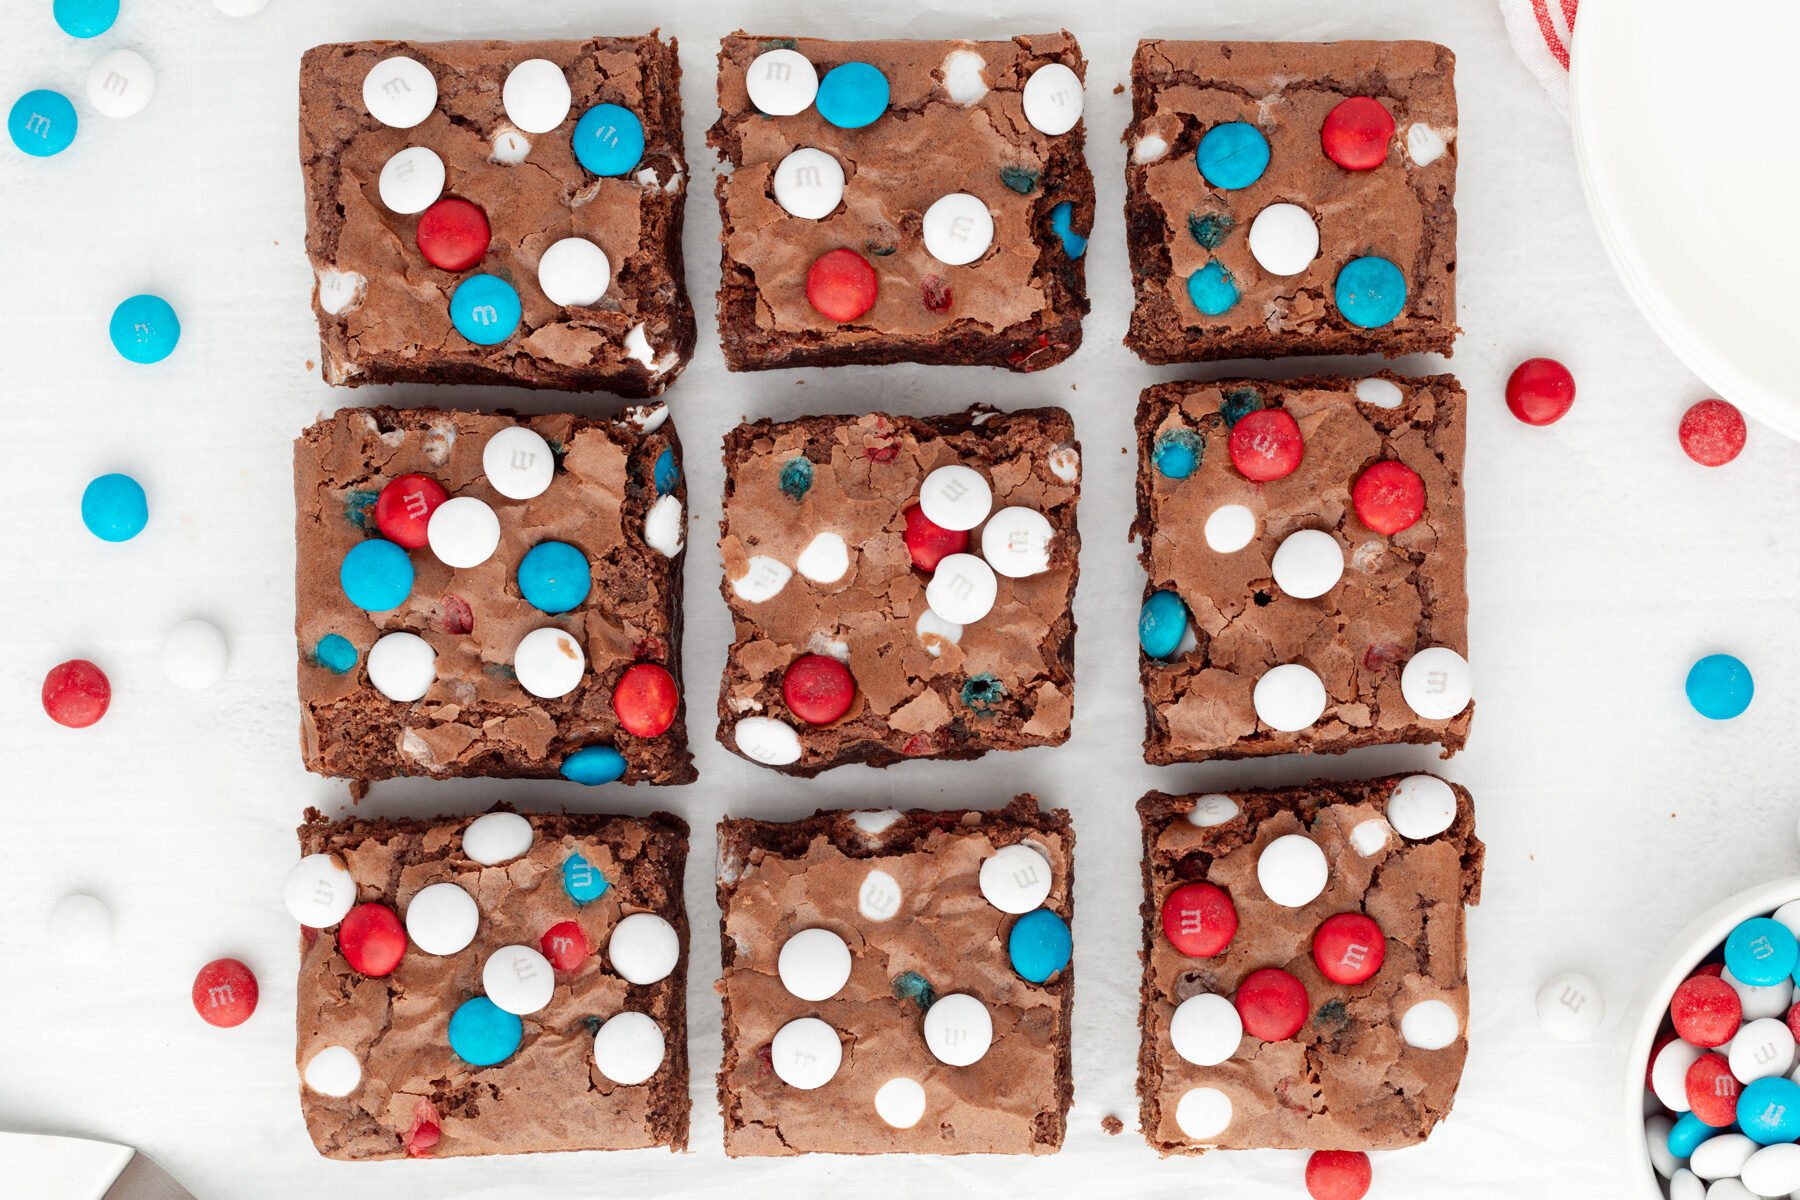
6. Cool & Slice
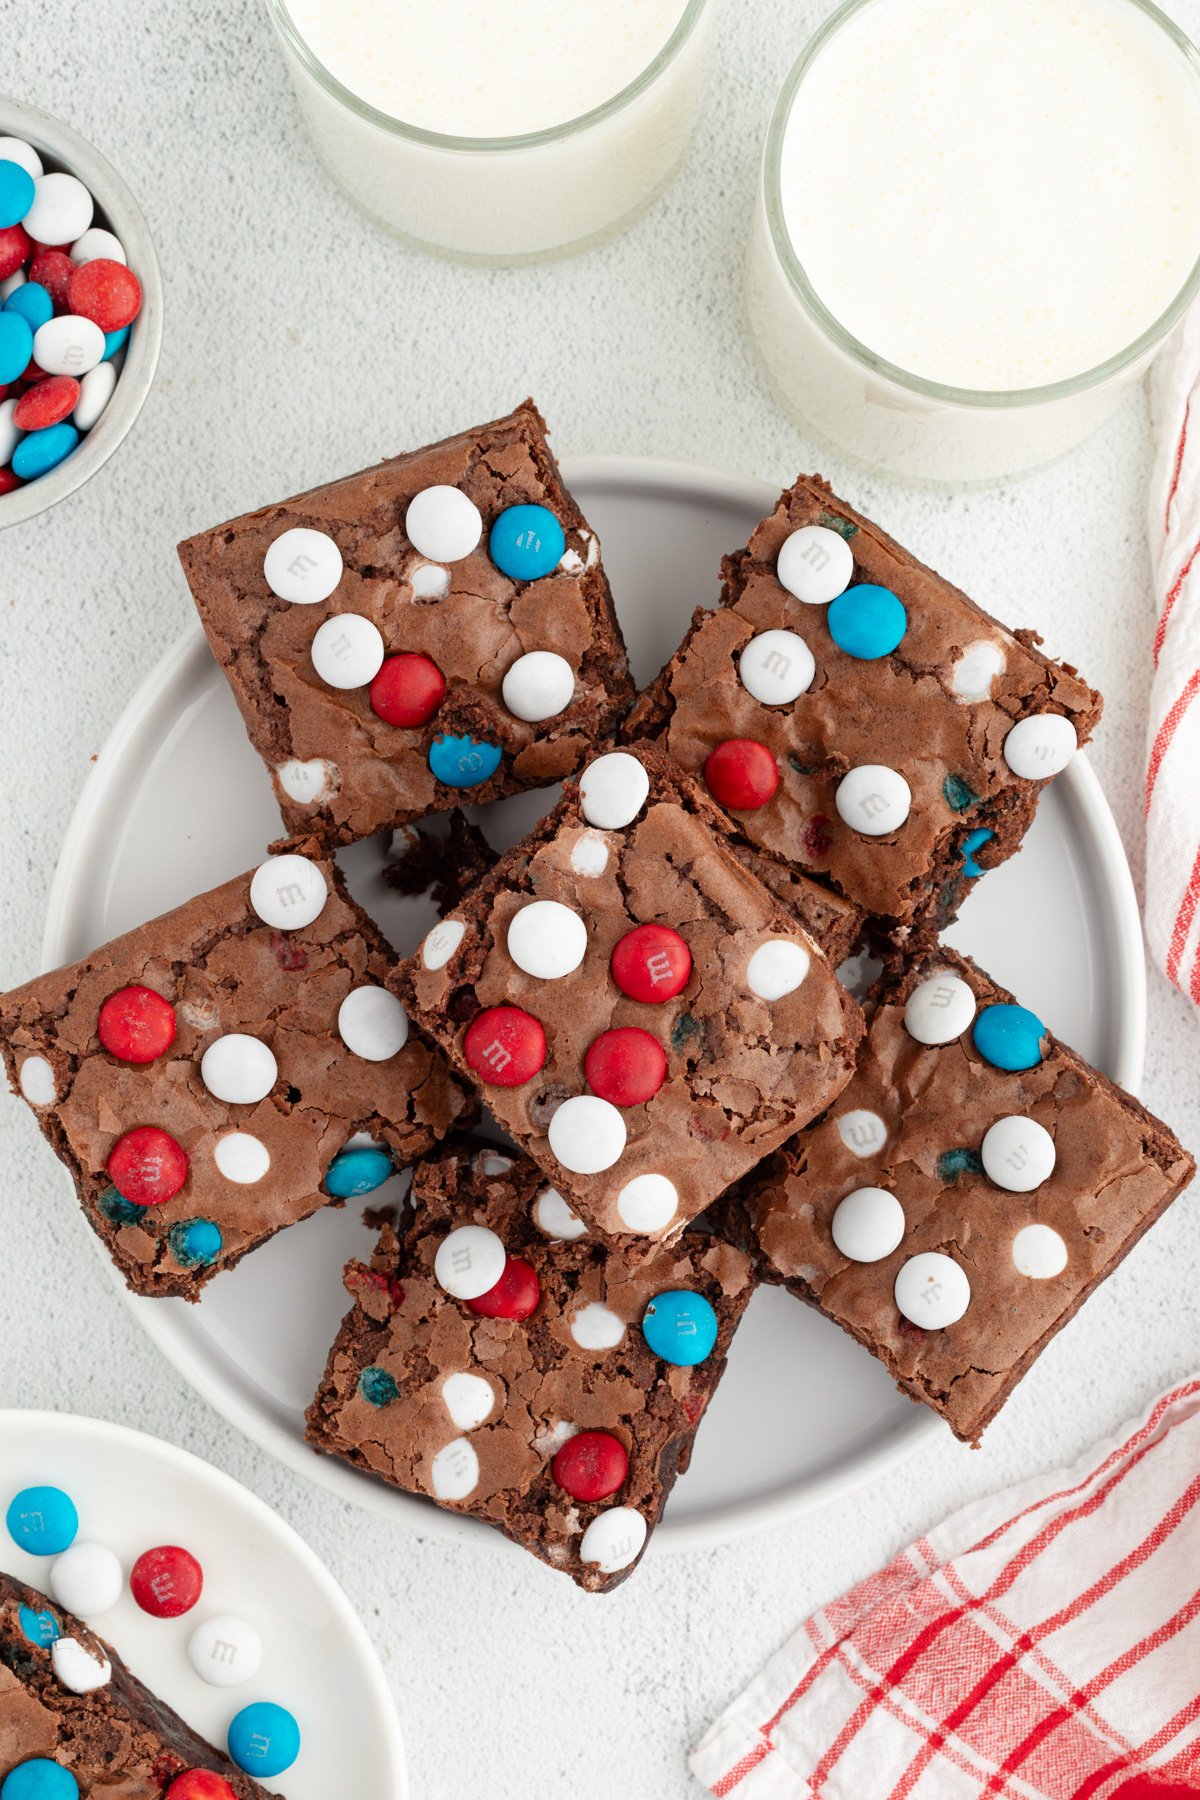
- Let the brownies cool completely in the pan before slicing into 9 large or 12 small squares.
Expert Tips for the Best M&M Brownies

- Why use coffee in brownies? It doesn’t make them taste like coffee—it just makes the chocolate flavor deeper and richer.
- Want extra gooey brownies? Bake for the lower end of the time range and use slightly underbaked as your cue.
- To make them thicker, Double the recipe and use a 9×13 pan. Adjust the bake time to 50–55 minutes.
- Fudgy vs. cakey: This box brownie recipe is fudgy because of the butter and egg ratio. Don’t skip the coffee for maximum moistness!
FAQ: All About Patriotic Brownies
What will I need to complete this recipe?
Ingredients:
- Brownie mix
- Coffee
- Unsalted butter
- Eggs
- Vanilla extract
- Red, white, and blue M&M candies

Supplies:
- Mixing bowl
- Measuring spoons
- Whisk or hand mixer
- 8×8 baking pan
- Offset spatula
- Parchment paper
- Toothpicks
How do I store these brownies?
- Store in an airtight container at room temperature for up to 3 days.
- To freeze, wrap individually in plastic and store in a freezer bag for up to 2 months. Thaw at room temp.
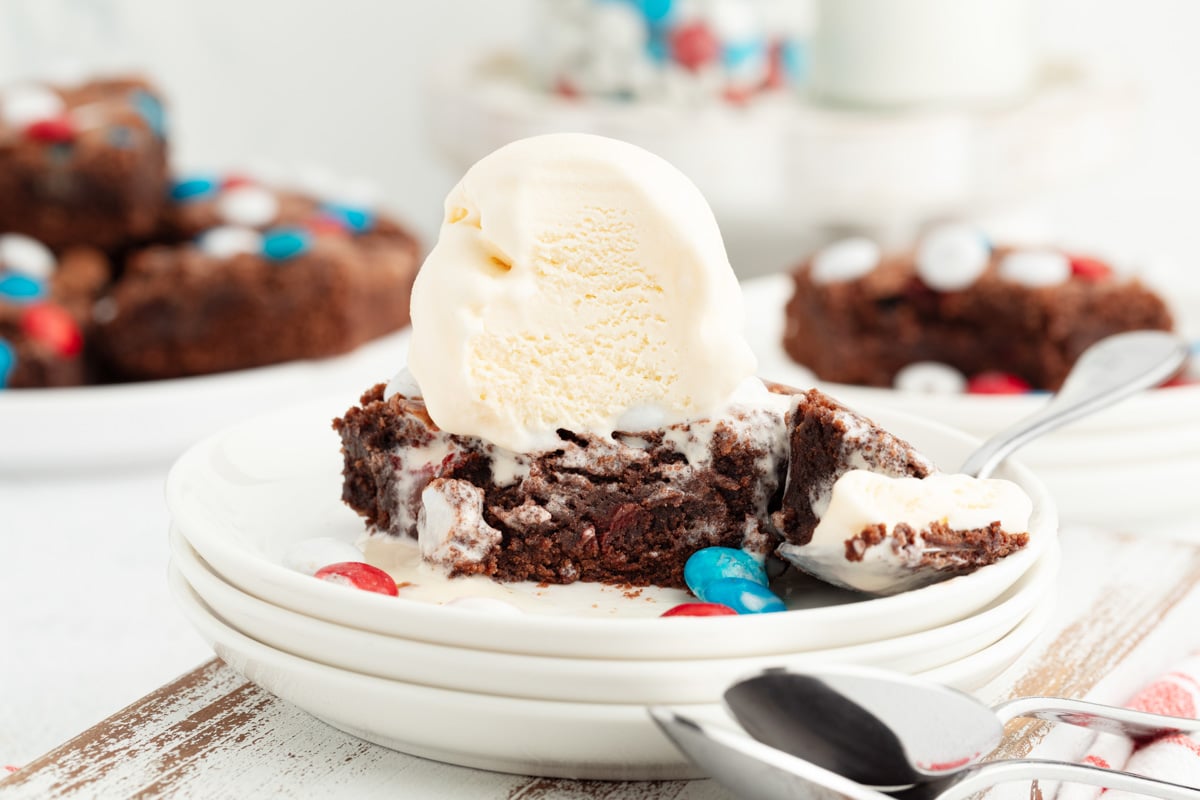
Can I eat these warm or cold?
Both work! They’re gooey and rich when slightly warm but also perfect at room temperature for grab-and-go parties.
Can I customize this brownie recipe?
Absolutely! Try these tasty twists:
- Add mini chocolate chips or chopped nuts.
- Drizzle with white chocolate for extra flair.
- Use holiday-themed M&M candies for different seasons.

What substitutions can I make?
- No coffee? Use 1½ tablespoons of espresso powder mixed with a tablespoon of water.
- No butter? Substitute vegetable oil for a slightly different texture (less fudgy, more chewy).
Where can I find red, white, and blue M&Ms?
- Check your local grocery or big box stores around late June to early July.
- Or grab them online—Amazon has patriotic M&M candy packs year-round.
Why These Are the Best 4th of July Brownies
- Festive & Fun: Red, white, and blue M&Ms add the perfect patriotic touch.
- Foolproof: Starts with a box brownie mix—no stress, no mess.
- Super Moist Brownie Recipe: Thanks to butter, eggs, and coffee—these brownies are soft and rich never dry.
- Perfect for a Crowd: Make a double batch and bring it to any summer party, picnic, or potluck.
So, if you’re looking for a quick, easy, and festive dessert to add to your 4th of July lineup, these patriotic brownies are the answer. They’re packed with chocolatey goodness, topped with crunchy M&M candies, and look stunning on any red, white, and blue dessert table.
Trust me—you’ll never return once you try this box brownie recipe. These M&M brownies are moist, rich, and downright irresistible!
MORE DELICIOUS DESSERTS TO TRY!
Easy Peppermint Brownie Bites
Patriotic Ice Pops and a Fun July 4th Trivia!
Red, White and Blue Jello Jigglers Recipe
Make-Ahead Fruit & Yogurt Breakfast Parfaits
If you like this Patriotic brownies recipe – be sure to give it a review below! If you decide to try it, tag me on Instagram @hipmamasplace. I would love to see your creations!
Also don’t forget to follow Hip Mama’s Place on Facebook, Instagram, Pinterest, and Twitter!
This post may contain affiliate links. Hip Mama’s Place is a participant in the Amazon Services LLC Associates Program, an affiliate advertising program designed to provide a way for websites to earn advertising revenues by advertising and linking to Amazon.com and other retailers- at zero cost to you. You can learn more about our Privacy and Disclosure Policies HERE.

Easy 4th of July M&M Brownies {Patriotic & Moist!}
- Total Time: 1 hour
- Yield: 9 regualr size or 12 small size brownie bars 1x
Description
Make easy 4th of July M&M brownies with a box mix, butter, eggs, and red, white, and blue candies. A moist, patriotic brownie recipe perfect for summer parties!
Ingredients
1 box brownie mix, I like Betty Crocker fudge brownie mix
2 tablespoons black coffee, room temperature
1/2 cup unsalted butter, melted and cooled
2 large eggs, room temperature
2 teaspoons vanilla extract2/3 cup red, white, blue M&M candies, divided
Instructions
- Preheat your oven to 350 degrees. Grease and line an 8×8 baking pan with parchment paper.
- In a large bowl add the brownie mix, coffee, butter, eggs, and vanilla extract. Mix together until all ingredients are incorporated and there are no lumps.
- Pour the brownie mixture into the baking pan and smooth the top using an offset spatula or the back of a large spoon.
- Sprinkle 1/3 cup of the M&M candies on top of the brownies. Do not push them into the batter.
- Bake in your preheated oven for 45-50 minutes or until a toothpick placed about 2 inches from the side of your pan comes out almost clean.
- Right when the brownies come out of the oven, sprinkle the remaining 1/3 cup of M&M candies on top.
- Let the brownies cool in the pan on a cooling rack completely before slicing.
- Prep Time: 15 minutes
- Cook Time: 45 minutes
- Category: Desserts
- Method: Baking
- Cuisine: American
A former school teacher, Jocelyn Brown created Hip Mama’s Place in 2007. Her motto for this blog is: get inspired, create and share! Jocelyn loves sharing about food and recipes, crafts, DIY projects and her random travels with her family. She also loves all things social media, but her latest obsession is Instagram.
Find me on: Web


These look sooo fun and festive! I love how simple they are but still totally perfect for the 4th. That trick with the coffee is clever—bet it makes them extra rich. Definitely adding these to my BBQ dessert list!
These easy to make brownies are perfect for the Fourth of July! I always love finding new patriotic dessert options. Thanks.
You had me at box mix! I will certainly be making these and taking them to my friend’s annual 4th of July party. I know they will be a hit!!
OMG this looks amazing. I love how colorful it looks too. Bookmarking these!
YUM! What a perfect treat for the 4th of July, honestly, any time of the year! We’re big brownie lovers in our house. Just give me a glass of milk, and I’m ready to indulge… LOL!
I’m sold! I love a dessert that’s as easy to make as it is delicious, and it doesnt get much easier than a mix and some candy. Stellar.
These are perfection for the 4th and I will be making these as my sister is coming into town and she will love them! My kids too 😉
This is the way to go! Festive chocolate candy additions and the chocolate enhancing flavor of coffee! Perfection in a treat.
These brownies sound delicious! I love the patriotic color – perfect for the Fourth of July!
These brownies look super cute and delicious, absolutely perfect for 4th of July celebrations! I’ll have to try making this, love brownies😍.
Brownies are among the top five sweet treats for me!! and these look amazing.. I will be making them (or having my daughter make them for she loves to bake and will be home for the summer!)
I really appreciate this easy and festive brownie recipe! I love that it uses a box mix but still turns out super moist and chocolatey. The red, white, and blue M&Ms make it such a hit with the kids
Yummy I really enjoy brownies with a little bit of ice cream. I love that these are patriotic. Il have to try out this recipe soon
These brownies look amazing. I need to make some of these for the 4th. Everyone is going to love them.
What a great idea for the red white and blue M&Ms. I just bought some so I will be making this for dessert.
I do love brownies. Yum! These are perfect for 4th of July.