
Some desserts make you smile—and for my family, this cake batter ice cream is one of those. With a nostalgic cake flavor, creamy base, and a white chocolate magic shell topping that cracks just like the ones you get from an ice cream shop, it’s both a throwback and a new favorite.
We first made this on a summer afternoon when the boys wanted something “fancy” but didn’t want to leave the house. It instantly became one of those “let’s make this again” recipes. Since then, we’ve enjoyed it for birthdays, pool days, and plenty of just-because moments.
Why You’ll Love This Cake Batter Ice Cream Recipe
- Tastes like birthday cake in every bite
- No need to bake, mix, churn, and freeze
- The magic shell adds a fun, crunchy topping
- Totally customizable with your favorite sprinkles
- Perfect for birthdays, summer parties, or sweet cravings
If your kids love ice cream shop flavors like “birthday cake” or “funfetti,” this homemade cake batter ice cream is going to be your new go-to.
Kitchen Tools You’ll Need

Before you begin, gather these tools to make the process smooth and stress-free:
- Medium saucepan
- Whisk
- Candy thermometer (helpful for monitoring temp, but optional)
- Mixing bowls
- Fine mesh strainer (for sifting cake mix)
- Rubber spatula or wooden spoon
- Ice cream maker
- Loaf pan or freezer-safe loaf container
- Plastic wrap or a lid for covering
- Microwave-safe bowl (for magic shell)
- Jar or squeeze bottle (for storing shells)
- Ice cream scoop
Ingredients for Cake Batter Ice Cream with Magic Shell
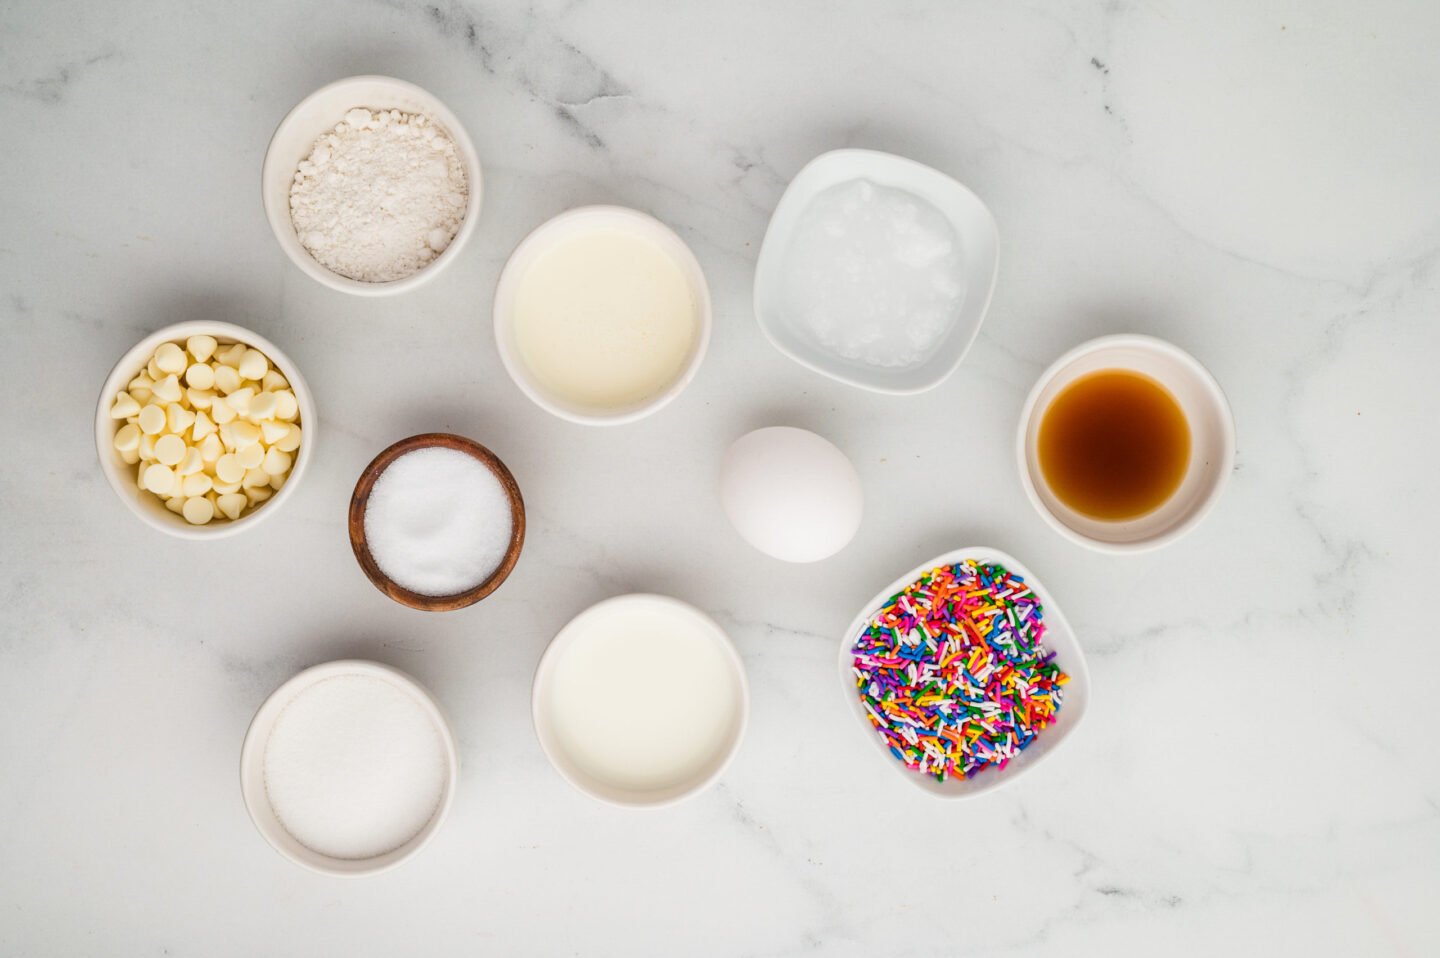
Ice Cream:
- 1 ½ cups heavy cream
- 1 ½ cups whole milk
- ¾ cup yellow or white cake mix (sifted to remove clumps)
- ½ cup sugar
- 2 large egg yolks
- Pinch of salt
- 1 ½ teaspoons vanilla extract
- ⅓ cup rainbow jimmies (optional but festive!)
Magic Shell Topping:
- 1 cup white chocolate chips
- ½ cup coconut oil
- 1 teaspoon vanilla extract
- 2 tablespoons rainbow jimmies (for topping)
How to Make Cake Batter Ice Cream
Step 1: Cook the Base
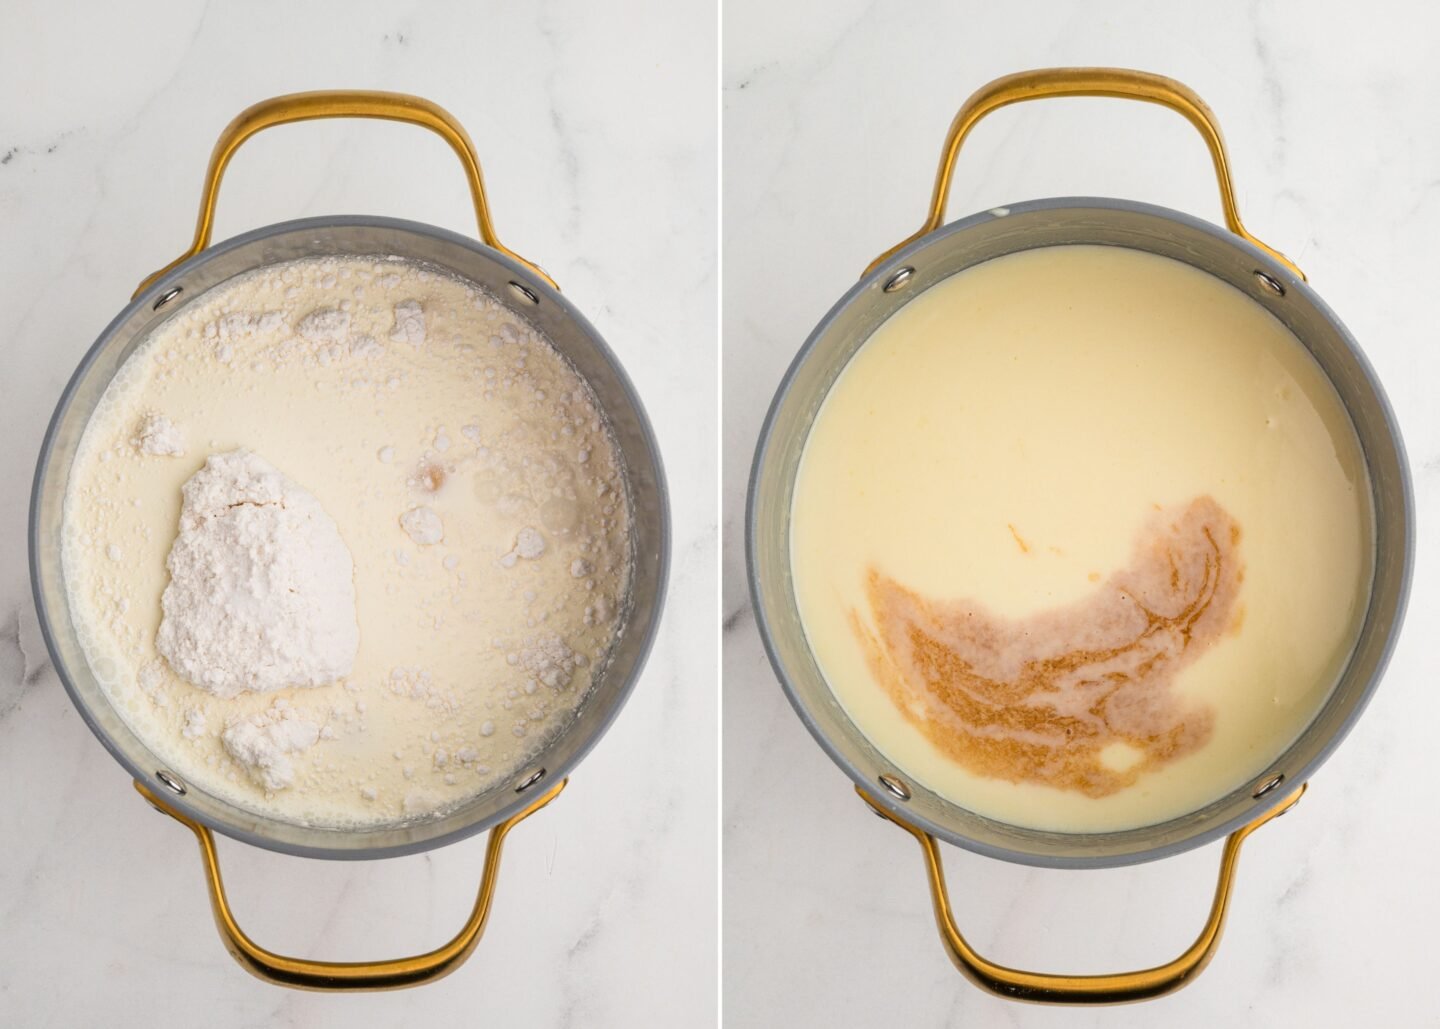
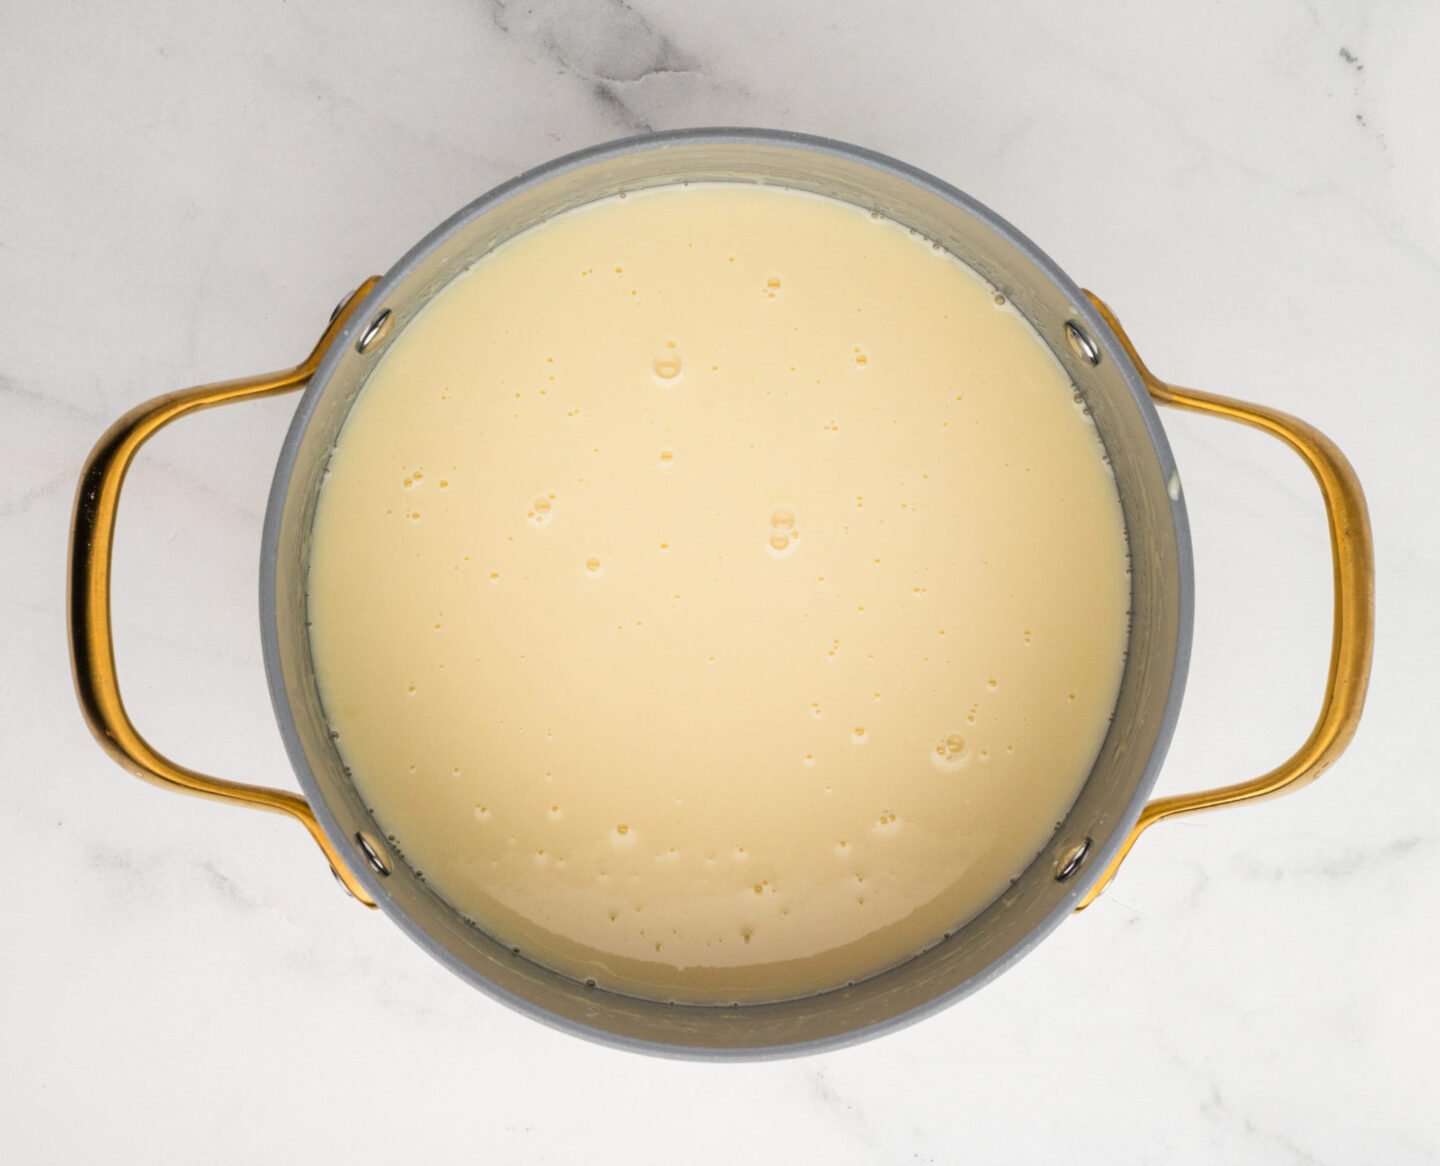
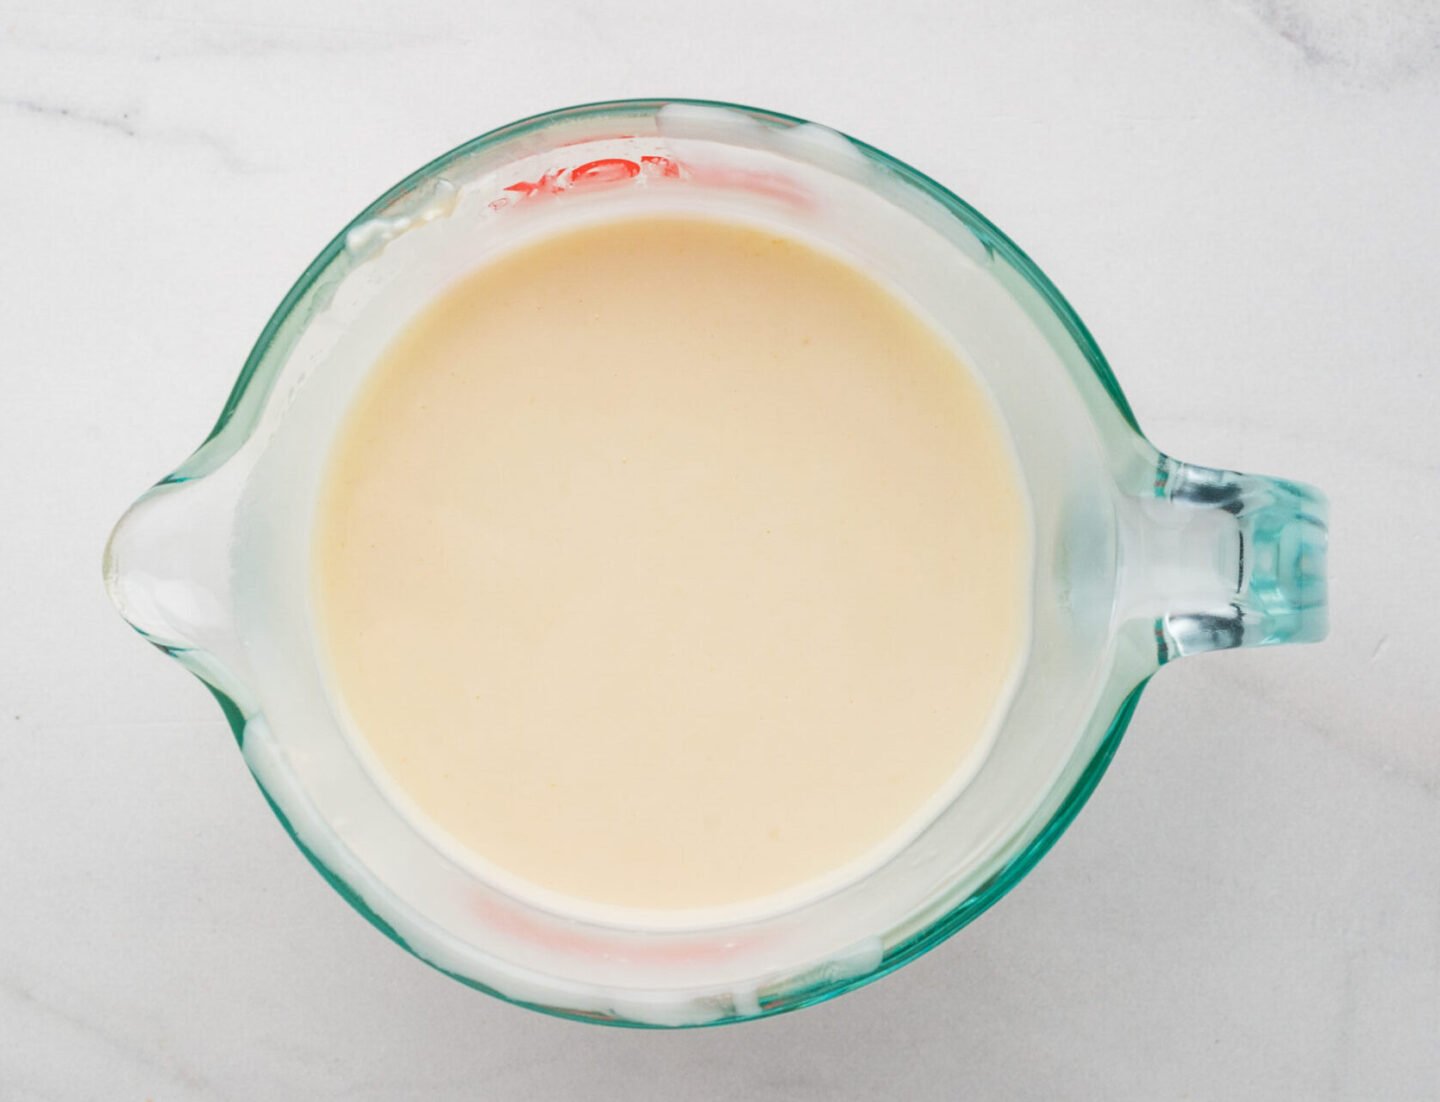
In a medium saucepan, whisk together the heavy cream, whole milk, sugar, sifted cake mix, egg yolks, and a pinch of salt. Heat over medium-low, whisking constantly, until the mixture reaches 160°F (this ensures the eggs are safe to consume). This usually takes 10-15 minutes.
Once the mixture has thickened slightly, please remove it from the heat and stir in the vanilla extract.
Pro Tip: Use a candy thermometer to monitor the temperature. Don’t let it boil—gentle heat is key!
Step 2: Chill the Mixture
Pour the mixture into a heatproof bowl or container, cover, and refrigerate for at least 2-3 hours or overnight. A well-chilled base ensures better texture and easier churning in the next step.
Churn and Freeze
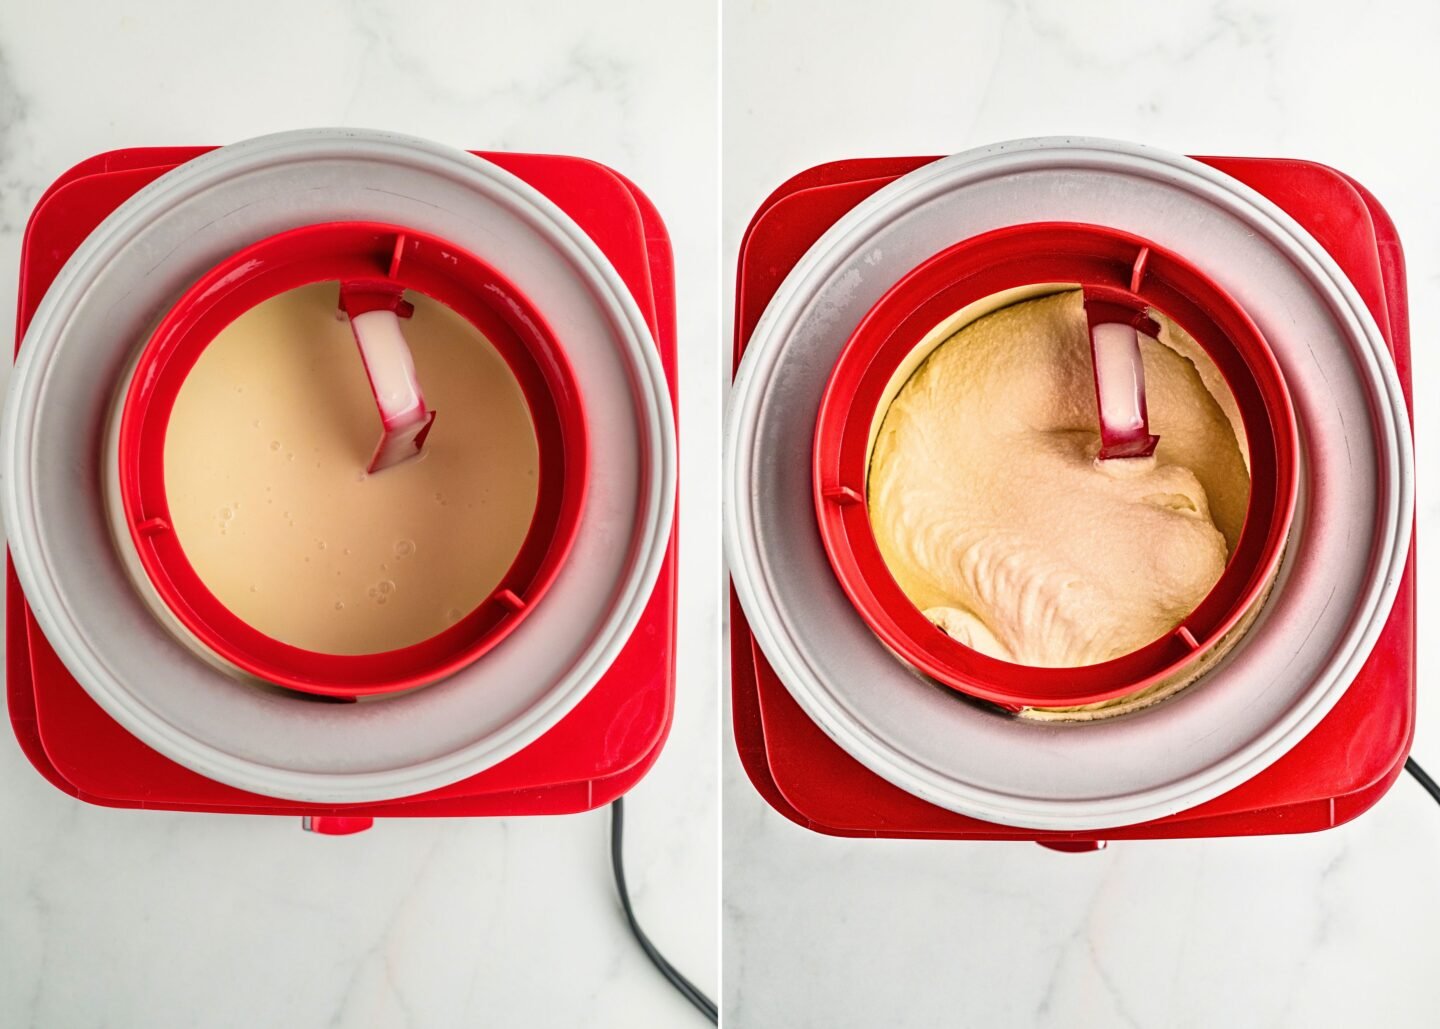
Once chilled, pour the mixture into your ice cream maker. Churn according to your machine’s instructions (usually 15–25 minutes) until it reaches soft serve consistency.
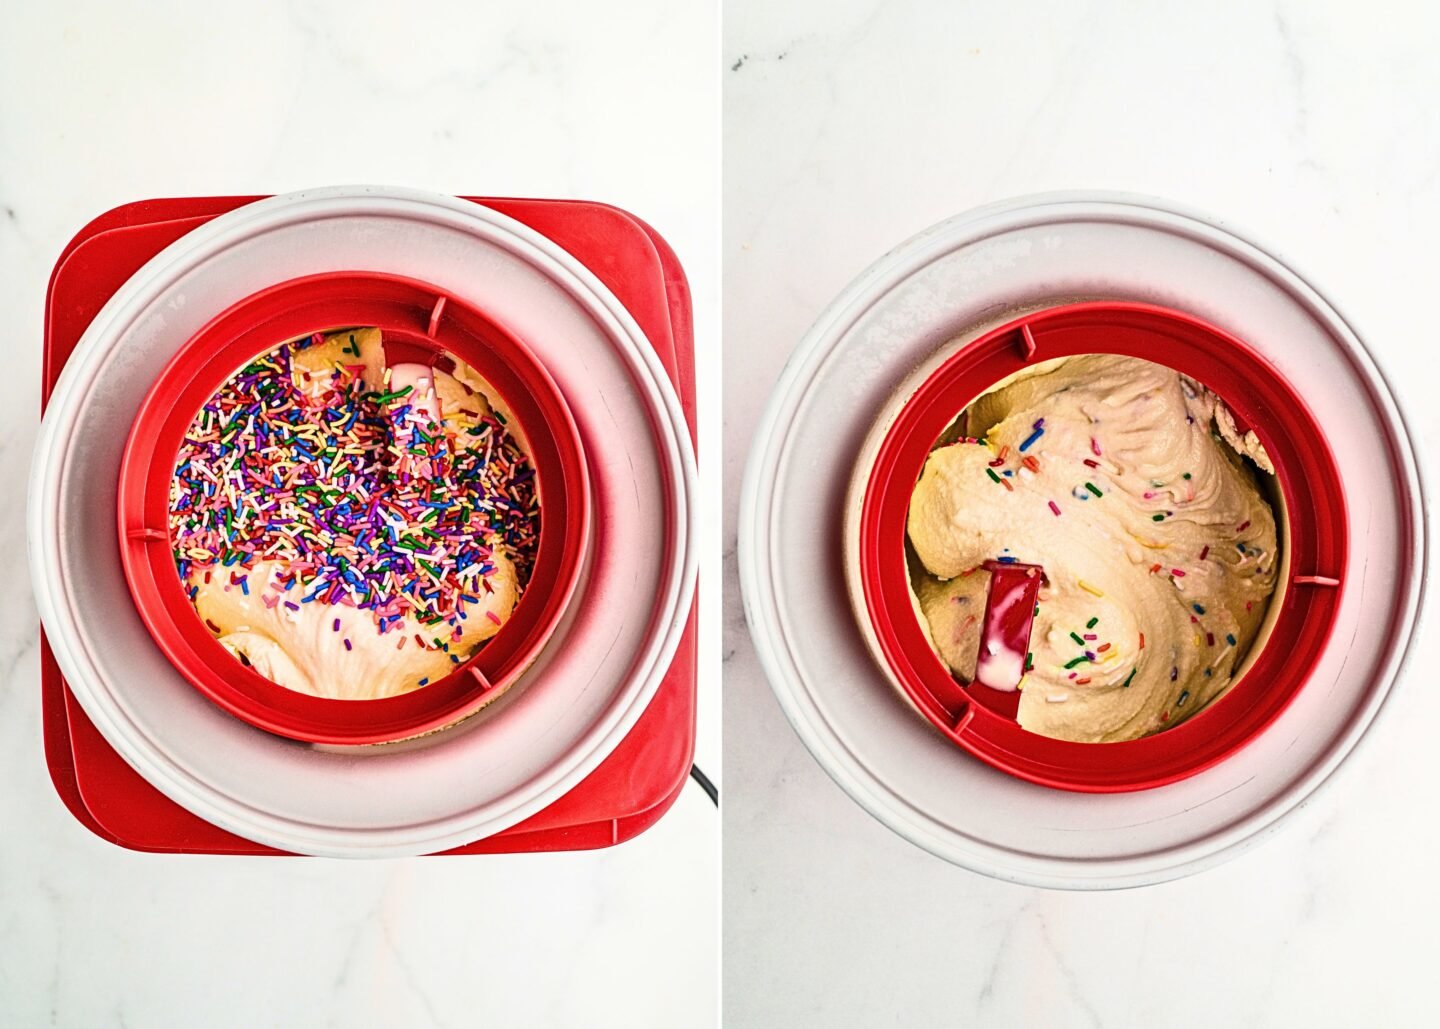
Add the rainbow jimmies during the last 30 seconds of churning, or fold them in gently by hand after transferring the ice cream to a container.
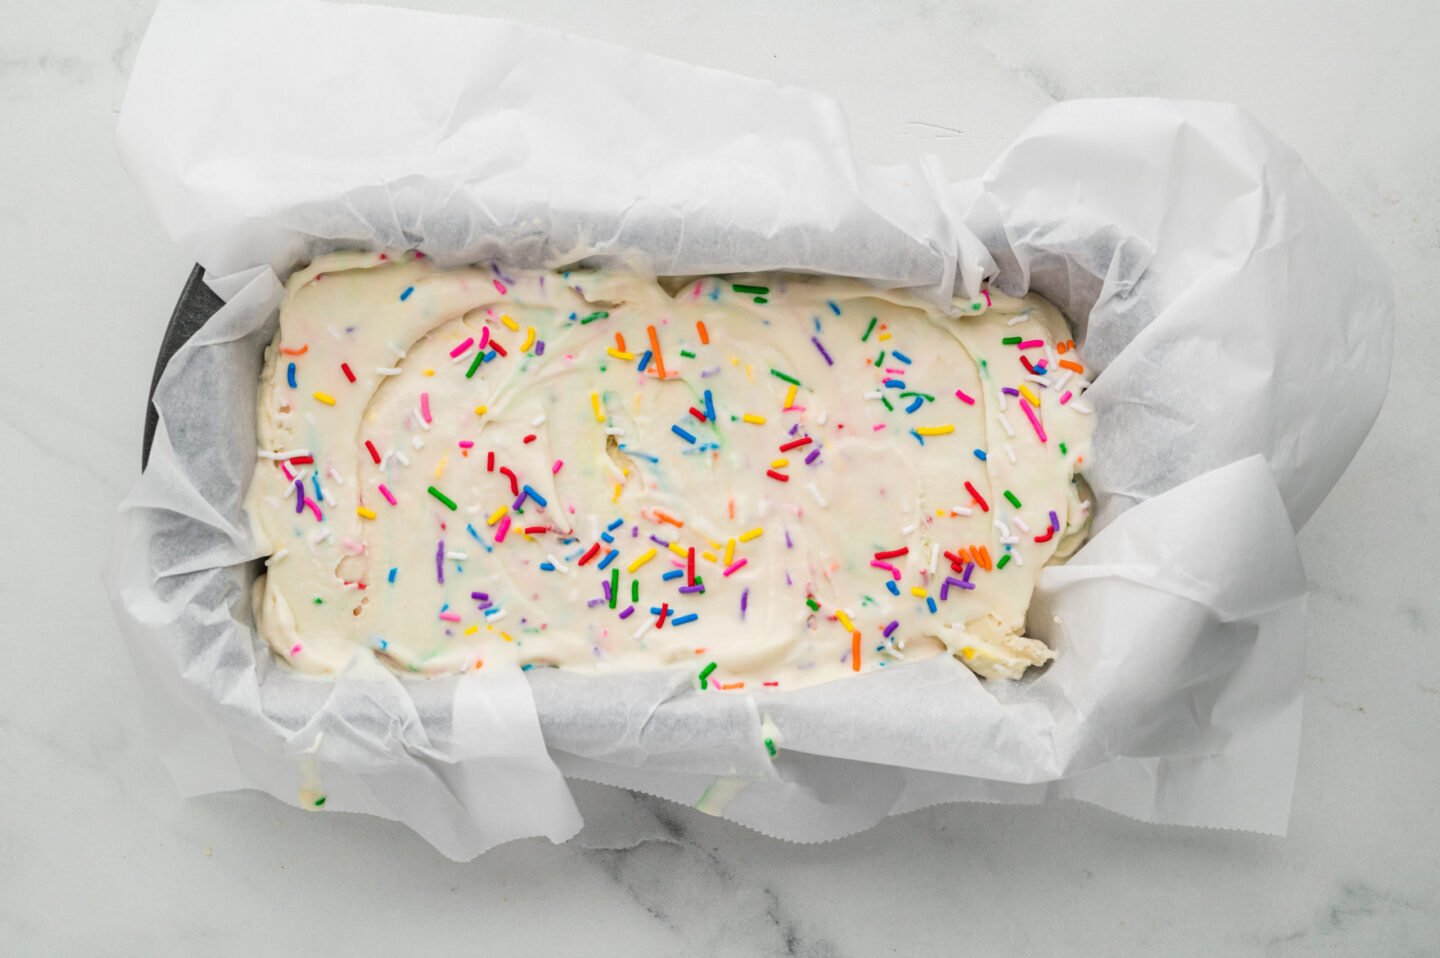
Transfer the soft ice cream to a loaf pan or container and smooth the top with a spatula. Cover tightly with plastic wrap or a lid and freeze for at least 4–6 hours or overnight.
Make the White Chocolate Magic Shell

In a microwave-safe bowl, combine the white chocolate chips and coconut oil. Heat at 50% power in 30-second bursts, stirring between each session until smooth (about 90 seconds total). Stir in the vanilla extract.
Transfer the sauce to a jar or squeeze bottle and store at room temperature.
If your magic shell solidifies, microwave it for 10 seconds and stir until liquid again.
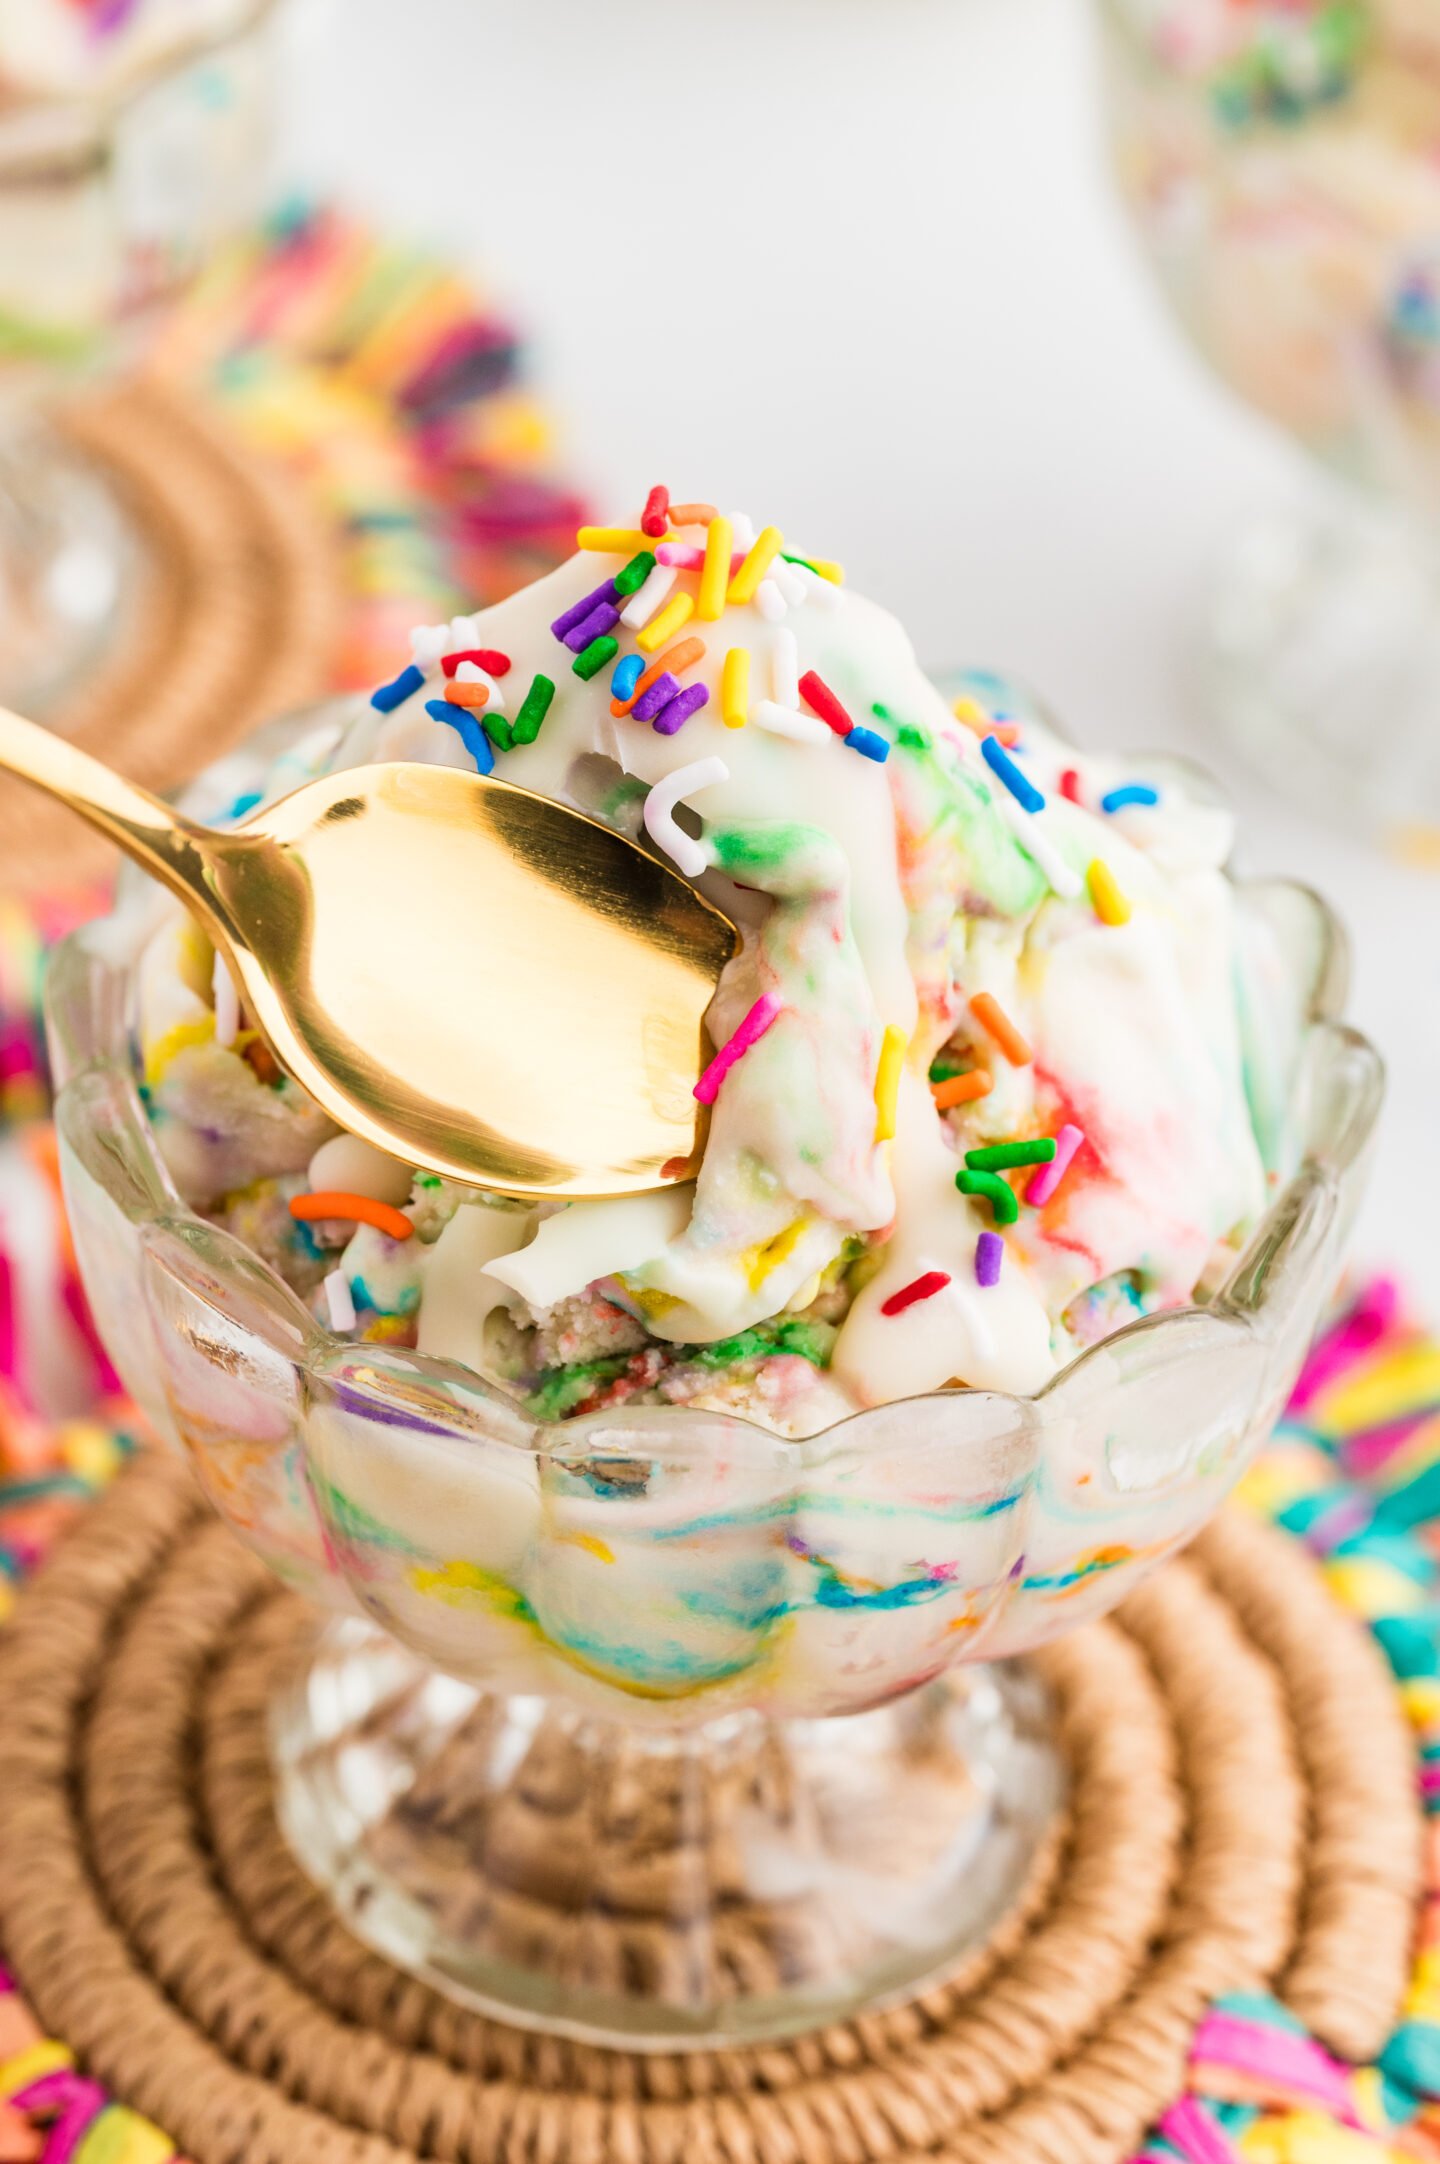
Serve It Up
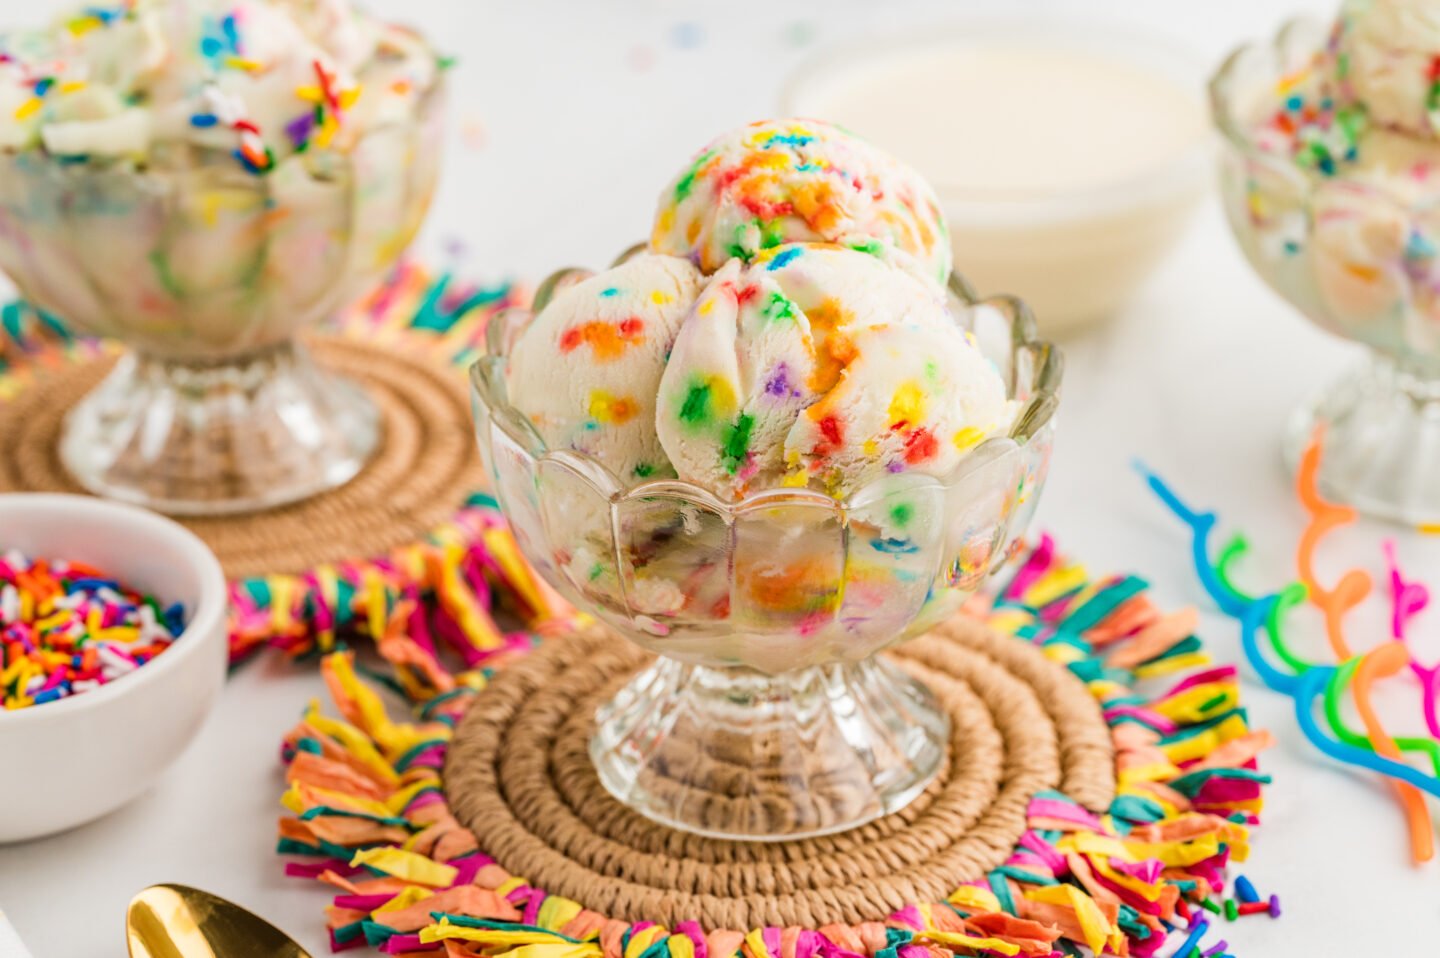
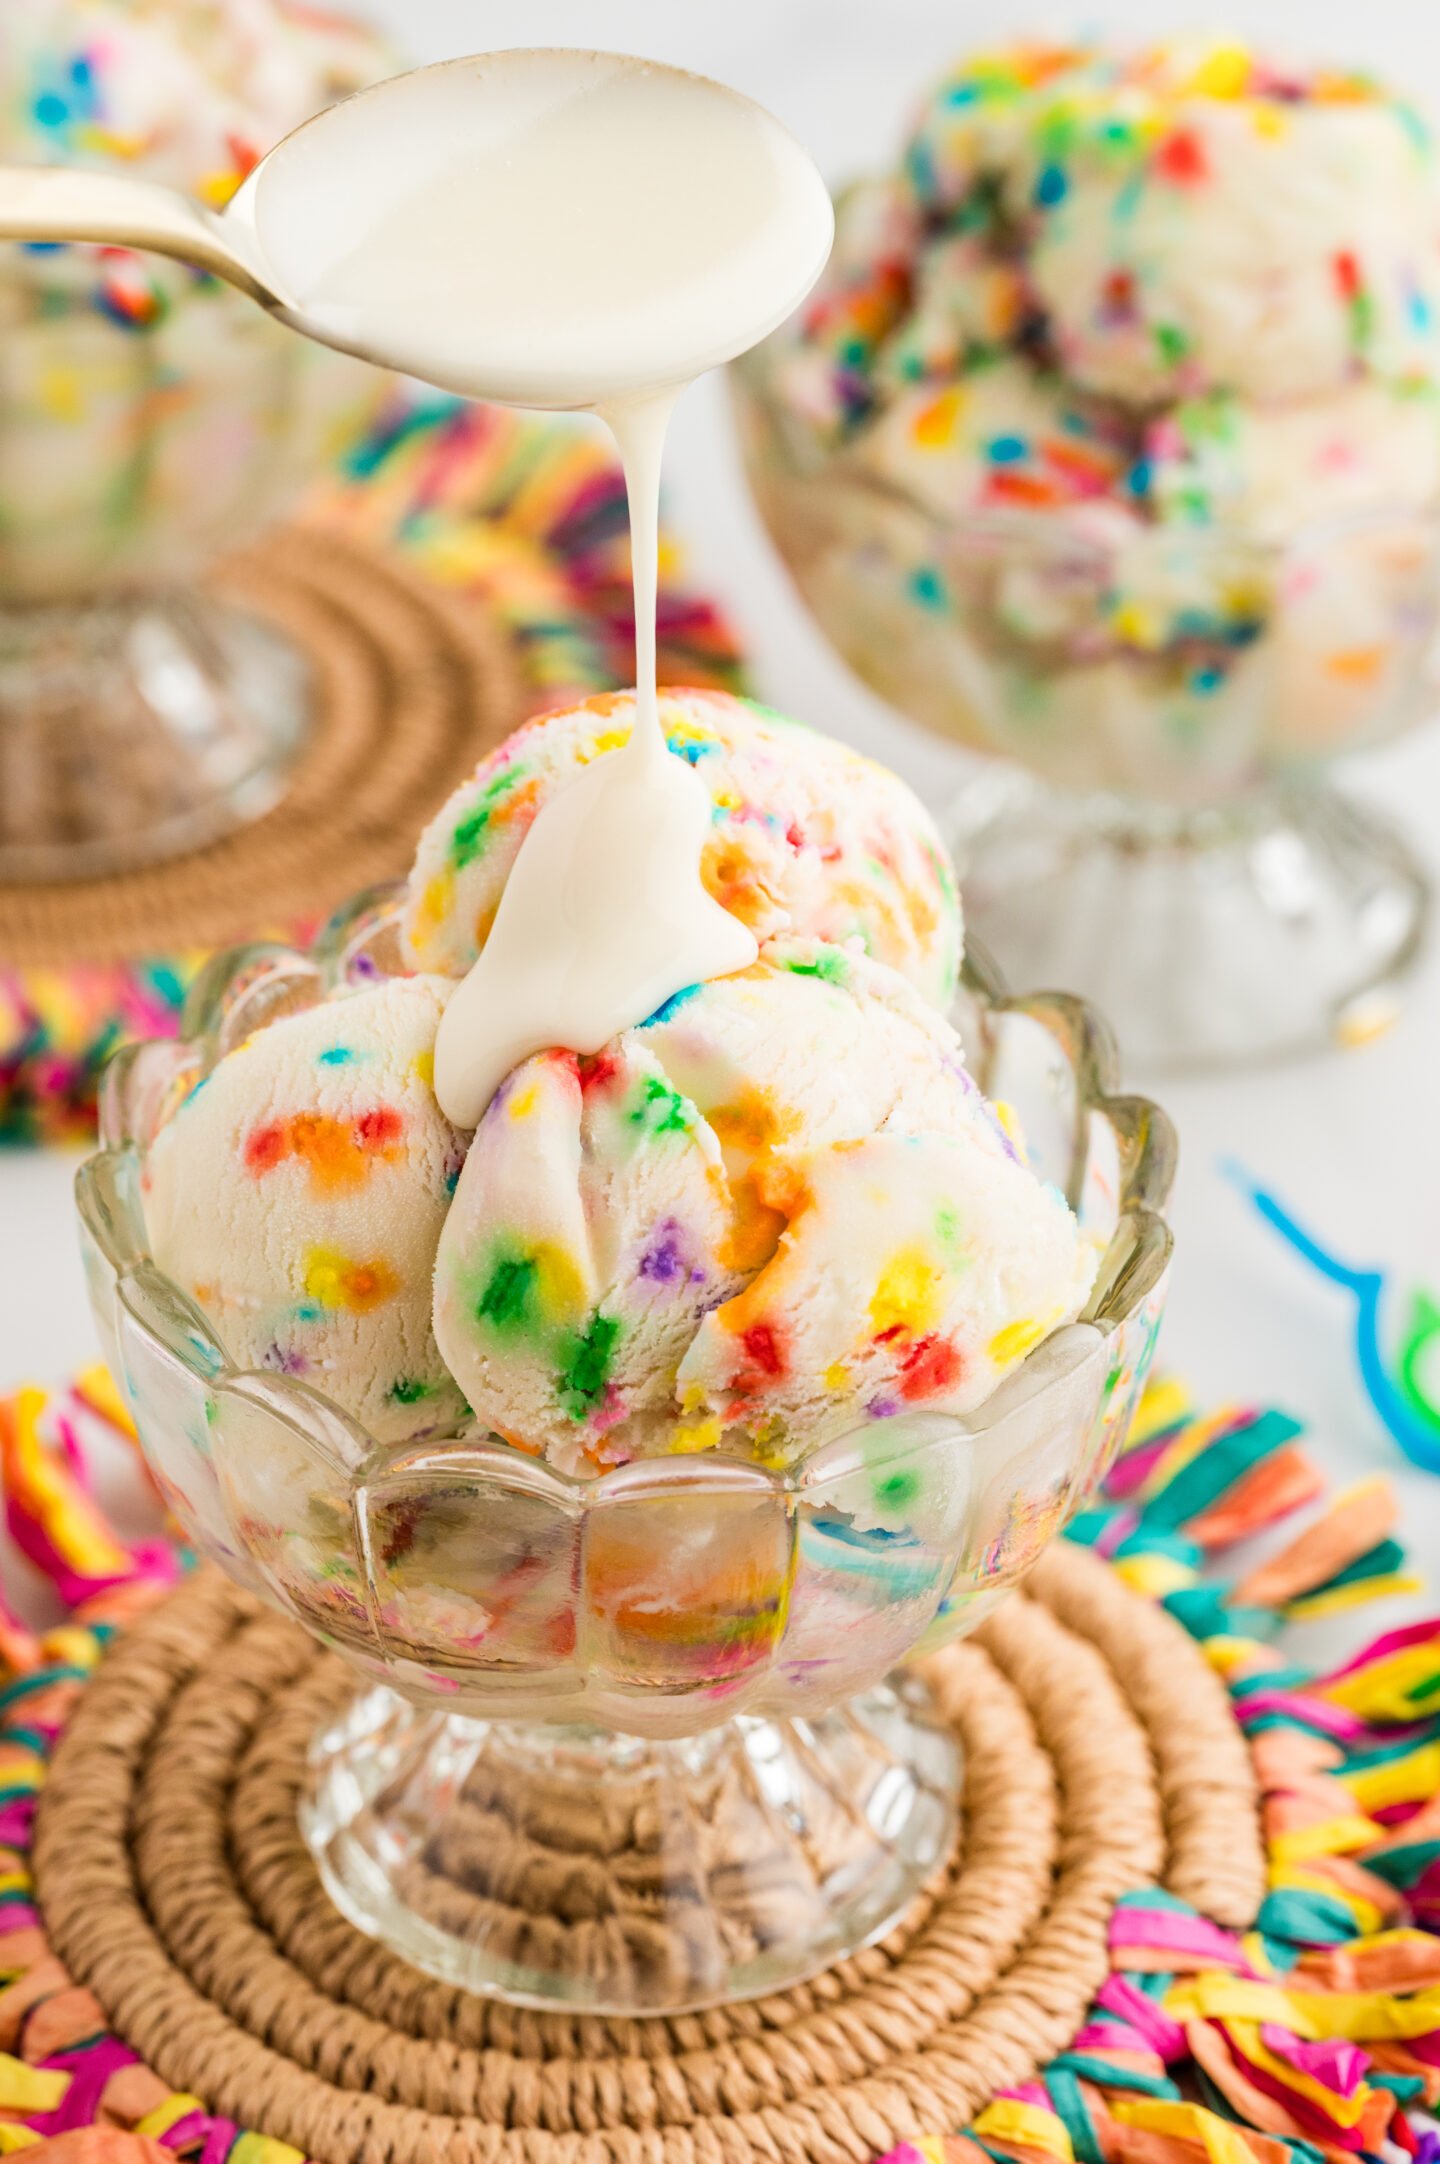
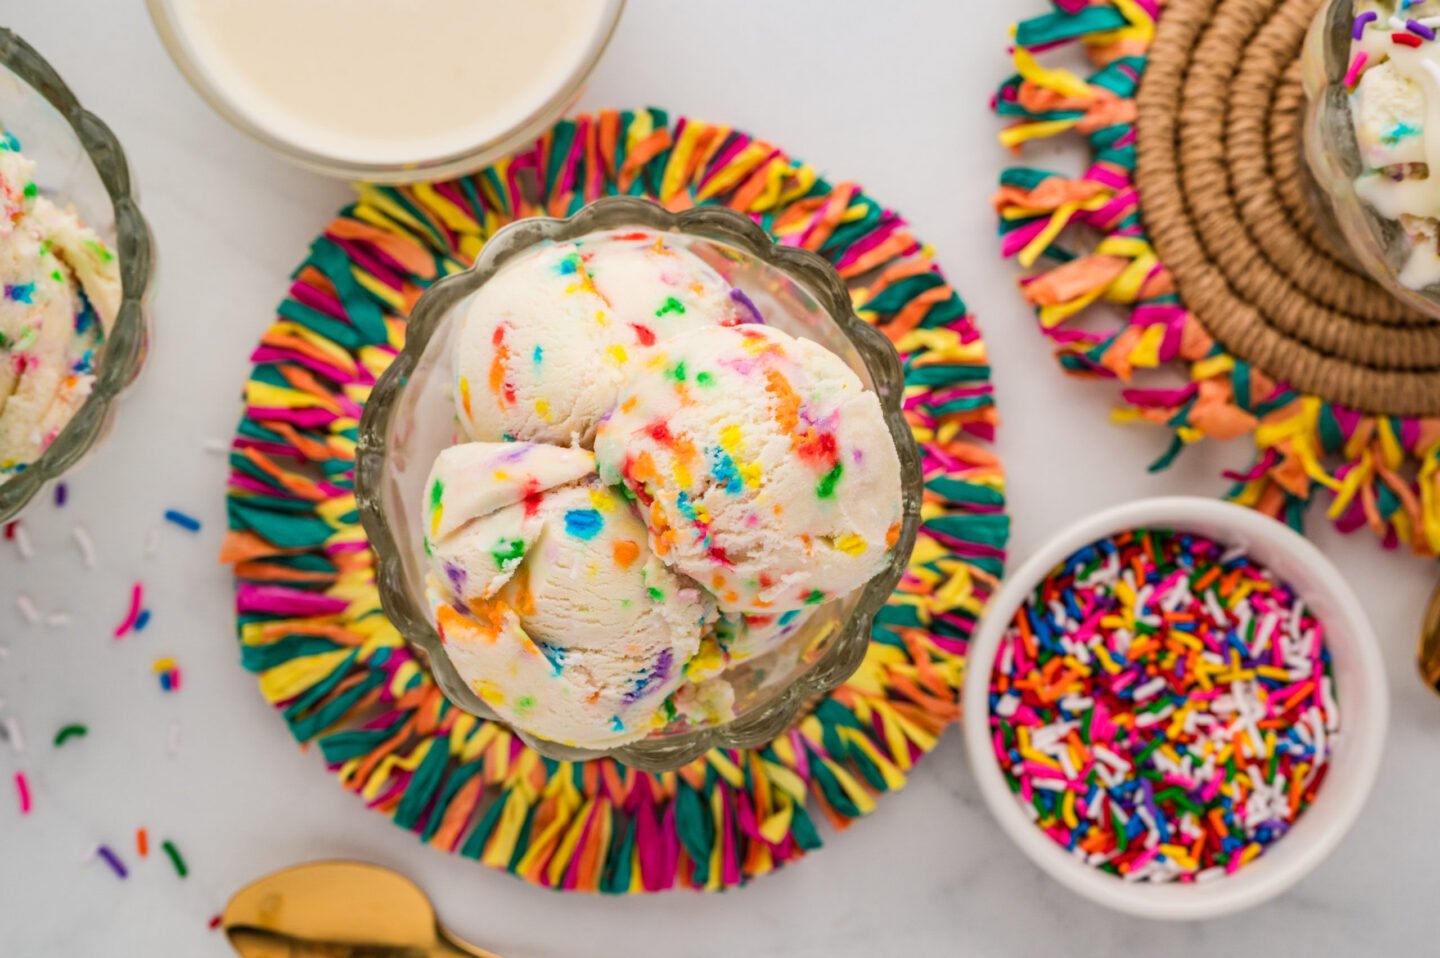
Scoop your cake batter ice cream into bowls or cones. Drizzle with the warm white chocolate shell and quickly add a few sprinkles before it sets. In just seconds, the shell will harden into a glossy, crackable layer of sweet magic!
Tips for the Best Cake Batter Ice Cream
- Use jimmies, not nonpareils – Nonpareils tend to melt and bleed, resulting in streaks of color on the ice cream. Jimmies stay intact and pretty.
- Chill your base thoroughly – A cold base churns faster and creates creamier ice cream.
- Don’t overmix the sprinkles – Fold them in gently to prevent the colors from running.
- Hard ice cream hack – Let the ice cream sit out for 5–10 minutes before scooping, or warm your scoop under hot water for cleaner results.
- Use a high-quality cake mix – A good yellow or white mix provides the authentic flavor of a birthday cake.
Storing Your Homemade Cake Batter Ice Cream

Store leftovers in a freezer-safe container for up to one week. To prevent ice crystals, press a layer of plastic wrap against the surface before sealing the container.
The magic shell topping will keep at room temperature for several weeks. Just shake or stir before using. If it hardens, a quick zap in the microwave softens it right up.
A Celebration in Every Scoop
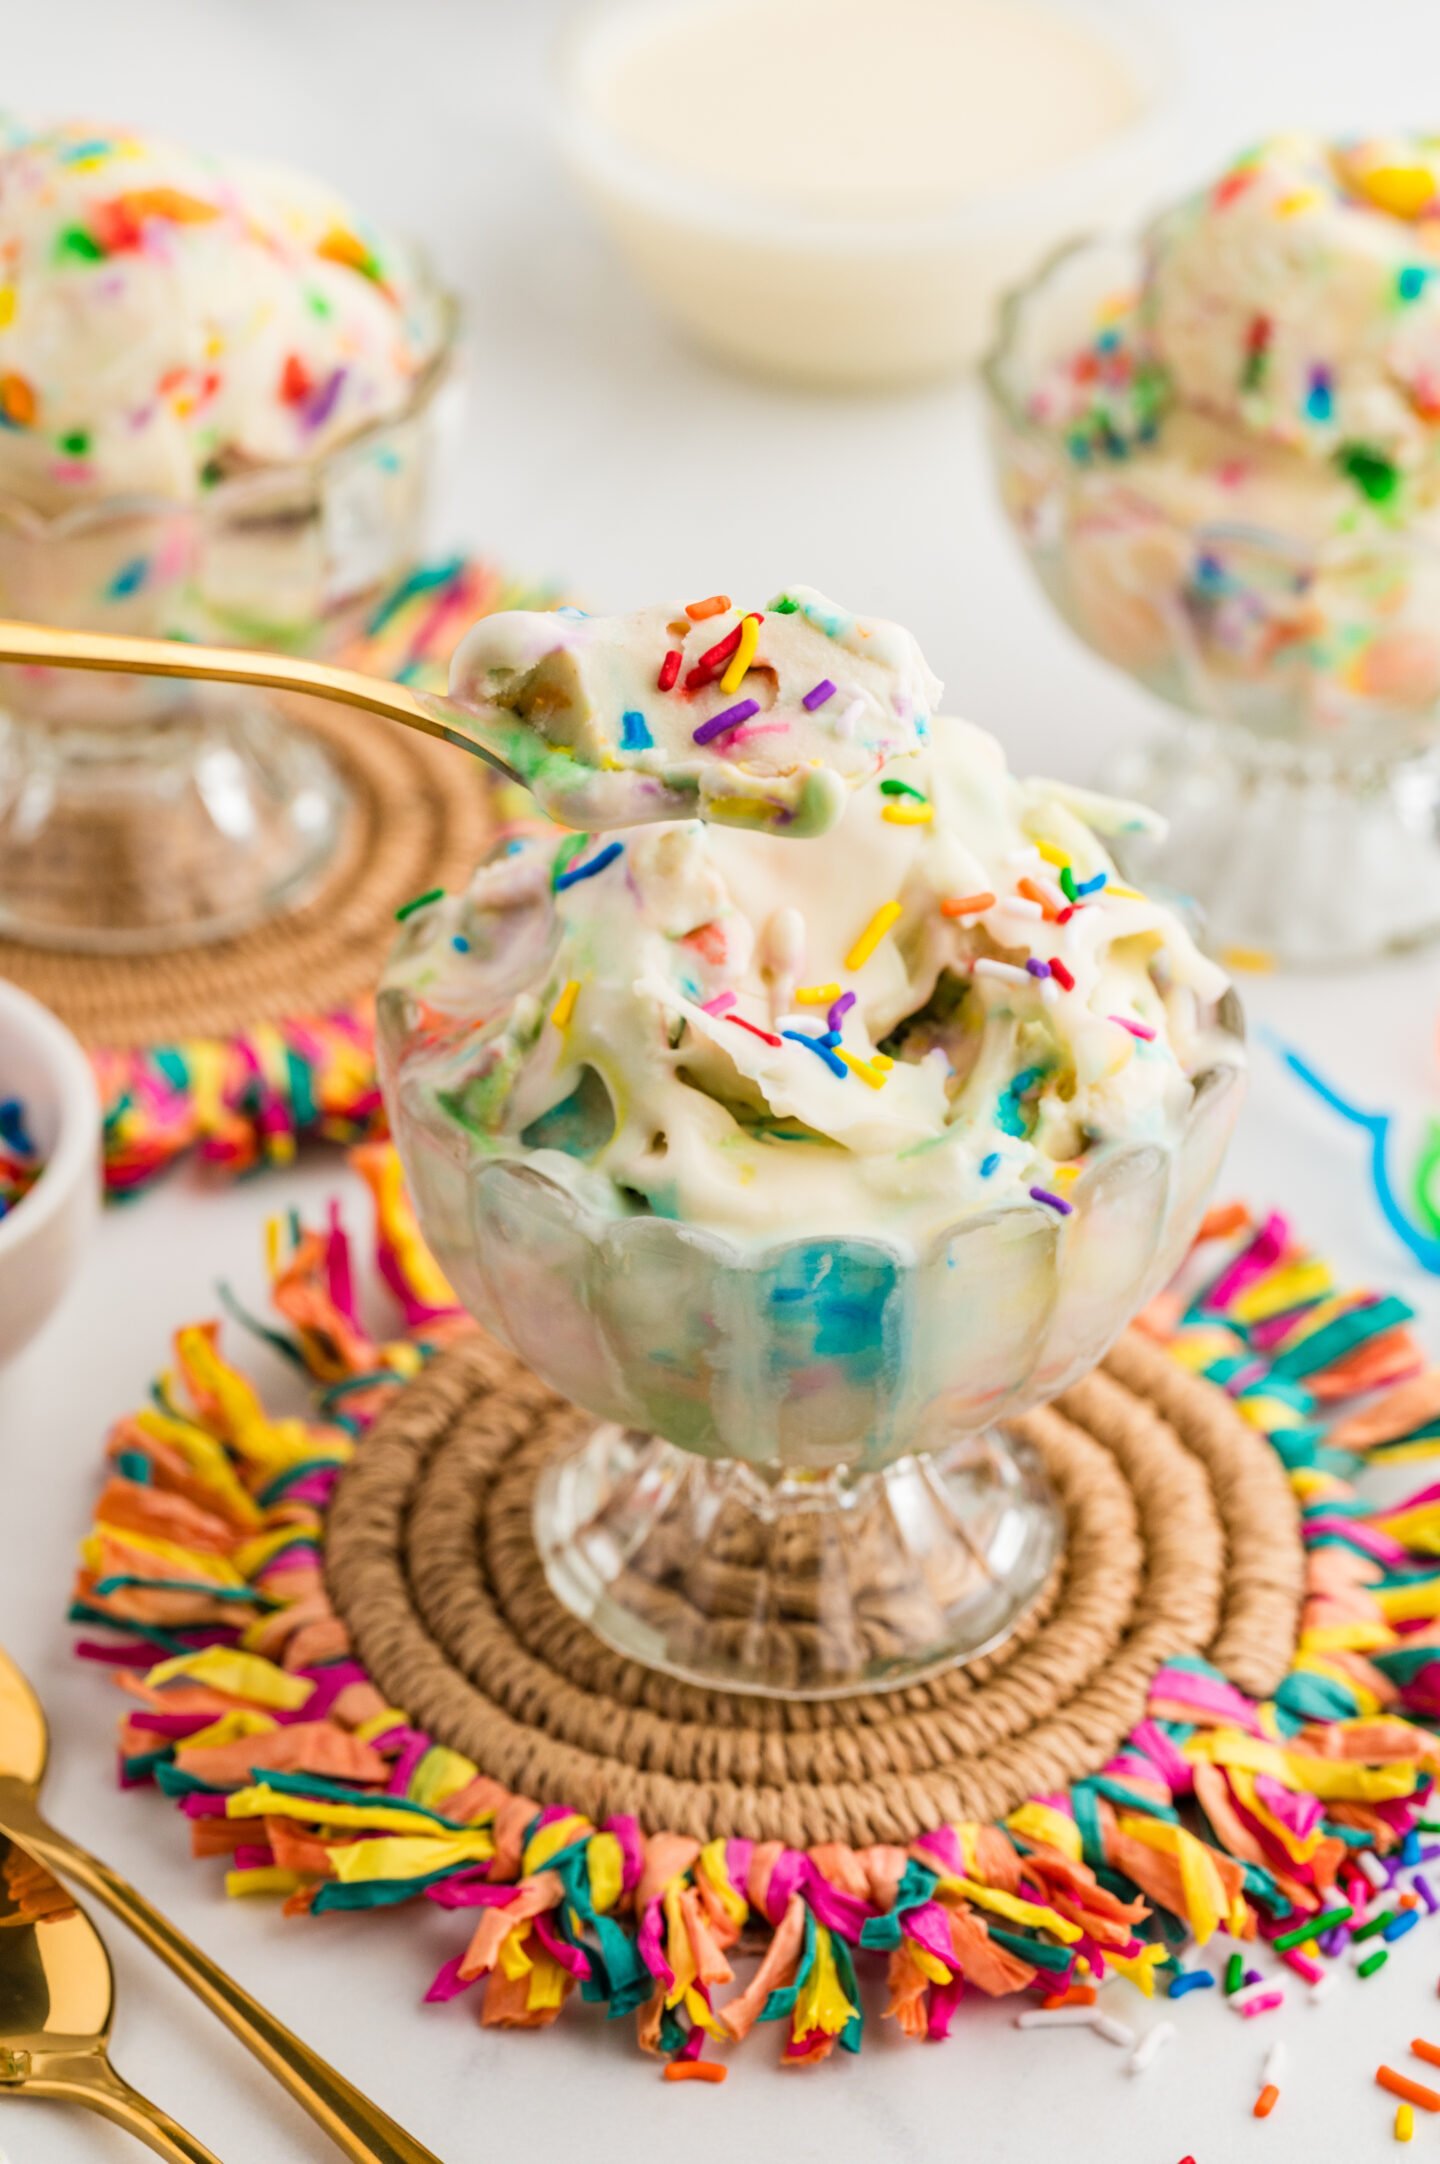
There’s something undeniably joyful about cake batter ice cream. It’s sweet, creamy, and festive, with just the right hint of nostalgia. Add that silky white chocolate shell on top, and you’ve got a dessert that’s fun for kids and adults alike.
Whether it’s for a birthday, a hot summer afternoon, or just because you feel like celebrating life, this homemade cake batter ice cream will never disappoint.
Save This Recipe for Later!
Love this funfetti ice cream with sprinkles? Pin it, print it, or share it with a fellow sprinkle lover. You’ll want this one on repeat all year long!
MORE DELICIOUS SUMMER TREATS TO TRY!
No Churn Strawberry Ice Cream {Easy and Delicious}
Easy Homemade Frozen Yogurt
Orange Creamsicle Pie – Light, Creamy & Perfect for Summer
Oreo Dirt Cake {Easy, No Bake Dessert}
If you like this recipe for homemade cake batter ice cream – be sure to give it a review below! If you decide to try it, tag me on Instagram @hipmamasplace. I would love to see your creations!
Also don’t forget to follow Hip Mama’s Place on Facebook, Instagram, Pinterest, and Twitter!
This post may contain affiliate links. Hip Mama’s Place is a participant in the Amazon Services LLC Associates Program, an affiliate advertising program designed to provide a way for websites to earn advertising revenues by advertising and linking to Amazon.com and other retailers- at zero cost to you. You can learn more about our Privacy and Disclosure Policies HERE.

Cake Batter Ice Cream with Magic Shell Topping
- Total Time: 35 minutes active time, 6 hours freze time
- Yield: 4 big serving bowls 1x
Description
This creamy cake batter ice cream with a crackly white chocolate magic shell topping is the ultimate homemade treat! Perfect for birthdays, summer fun, and anyone who loves funfetti flavor. Includes easy step-by-step instructions and tips!
Ingredients
For the Ice cream:
1 1/2 cups heavy cream
1 ½ cups whole milk
¾ cup yellow or white cake mix, sifted
½ cup sugar
2 large egg yolks
Pinch of salt
1 ½ teaspoons vanilla extract
1/3 cup rainbow jimmies, optional *see note
For the Magic Shell:
1 cup white chocolate chips
½ cup coconut oil
1 teaspoon vanilla extract
2 tablespoons rainbow jimmies, for sprinkling on top
Instructions
For the Ice cream:
1. In a medium saucepan over medium-low heat whisk the heavy cream, whole milk, cake mix, sugar, egg yolks, and pinch of salt. Whisk frequently until the mixture reaches 160 F, about 10-15 minutes.
2. Add the vanilla extract and stir.
3. Pour the mixture into a heat-proof container, cover, and refrigerate until chilled, at least 2-3 hours or overnight.
4. Pour ice cream into your ice cream maker and freeze according to manufacturing directions for your particular ice cream maker until it reaches soft serve consistency. Stir in sprinkles by hand or for 30 seconds in the ice cream maker and transfer into a freezer safe container or bread pan and cover with a lid or plastic wrap.
5. Freeze overnight or at least 3-4 hours.
For the Magic Shell:
1. In a microwave safe bowl combine the coconut oil and chocolate chips. Heat in the microwave at 50% power in 30 second increments, stirring in between each time until smooth, about 90 seconds. Do not over heat.
2. Add the vanilla extract and stir.
3. Transfer to a jar or container and keep at room temperature.
Assembly:
1. Scoop the ice cream into bowls and top with the magic shell.
2. Sprinkle more sprinkles on top quickly before the shell hardens.
Notes
Don’t use nonpareils sprinkles. They will “melt” or bleed into the ice cream or topping making it colored instead of white. Jimmies hold their form and color a lot better. Don’t stir too much after adding sprinkles.
The ice cream is very hard when first coming out of the freezer. Let sit on the counter for 5 minutes before scooping or alternatively you can run an ice cream scoop under hot water and dry before scooping.
If the shell firms up a bit, pop it in the microwave for 10 seconds and stir.
- Prep Time: 10 minutes
- Cook Time: 10 minutes
- Category: Desserts
- Method: No Bake
- Cuisine: American
A former school teacher, Jocelyn Brown created Hip Mama’s Place in 2007. Her motto for this blog is: get inspired, create and share! Jocelyn loves sharing about food and recipes, crafts, DIY projects and her random travels with her family. She also loves all things social media, but her latest obsession is Instagram.
Find me on: Web


Okay, this is genius. Cake batter ice cream and a magic shell? Total childhood nostalgia vibes. I need to try this ASAP—it sounds like the happiest dessert ever!
yay!! i was looking for a fun clever birthday ice cream for an upcoming kids’ party. i am allergic to gums which are in a lot of ice cream recipes so this is perfect !! kids will love it. will love it. win win 🙂
YUM! My grandkids would really enjoy this, I can say I have never made cake batter ice cream. Now I need to try this recipe for the next birthday bash we have.
Looks so so good. I will be giving this a try this week-end
I don’t usually use my ice cream churn, but I broke it out for this recipe. I’m so glad I tried it. It’s AH-mazing!
This cake batter ice cream was fantastic! Super creamy and the shell topping was such a fun addition!
This is the best ice cream I’ve ever made! I love the cake flavor, and that magic shell is fantastic. I’ll never buy from the store again.