
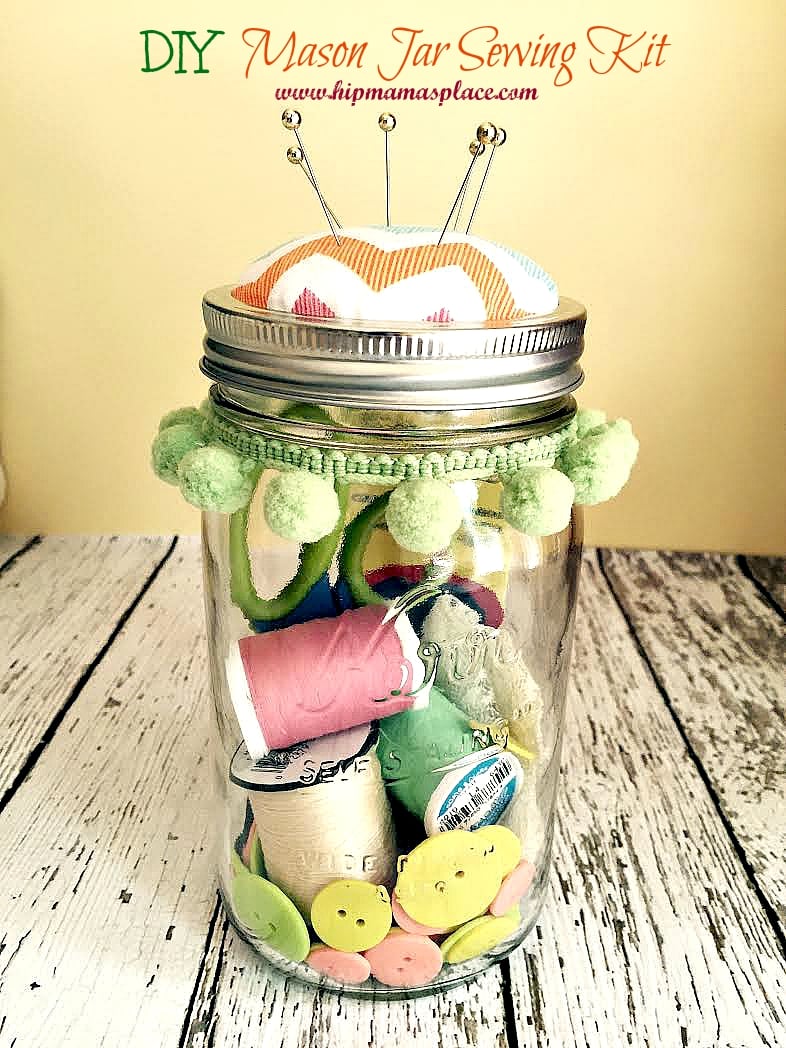
Today, I'm going to show you how to make your own sewing kit using inexpensive mason jar covered with a lovely pincushion made out of a piece of fabric and then filled with sewing supplies.
This sewing kit is super easy to make! It only took me about 25 minutes from start to finish! It's a great way to organize your small sewing supplies and saves you time whenever you need it for sewing emergencies like mending a lost button or hemming a tear on your dress.
Soooo... let's get started! 🙂
First, gather your supplies for this project:
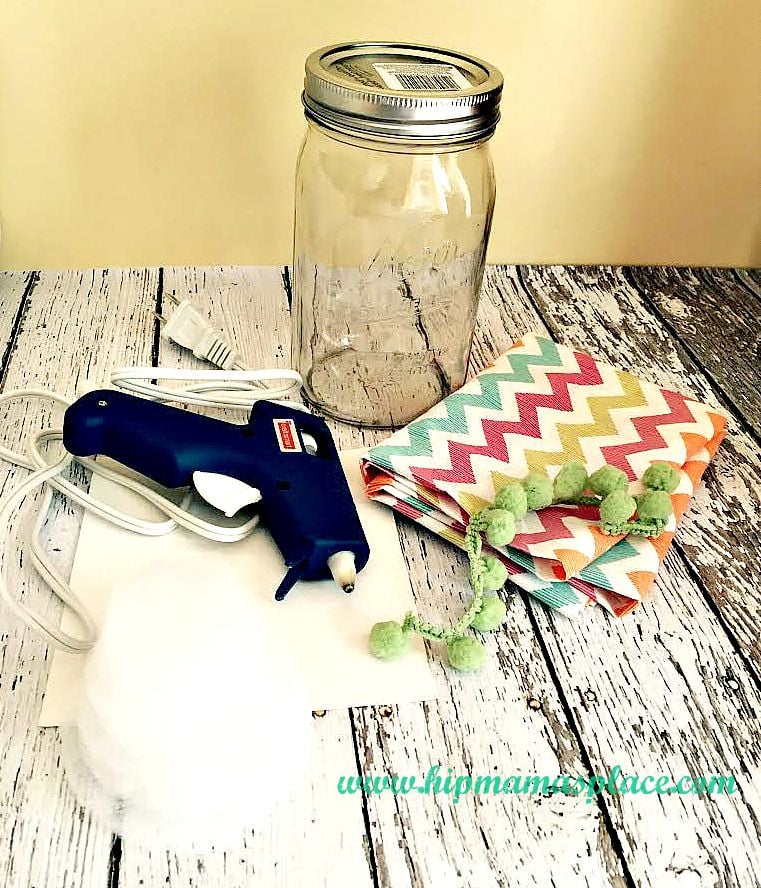
- mason jar, regular size
- any piece of fabric, cut to a 4x4 square
- fiberfill, batting or cotton
- a piece of cardboard
- glue gun
- scotch tape
- scissors
- pencil
Before you start, wipe your mason jar clean to make sure it's free from dust or dirt. Find one that has a wide mouth. I love the regular size Kerr mason jar that I got from Michael's for $2 - it's the prefect size for this project ... in my opinion!
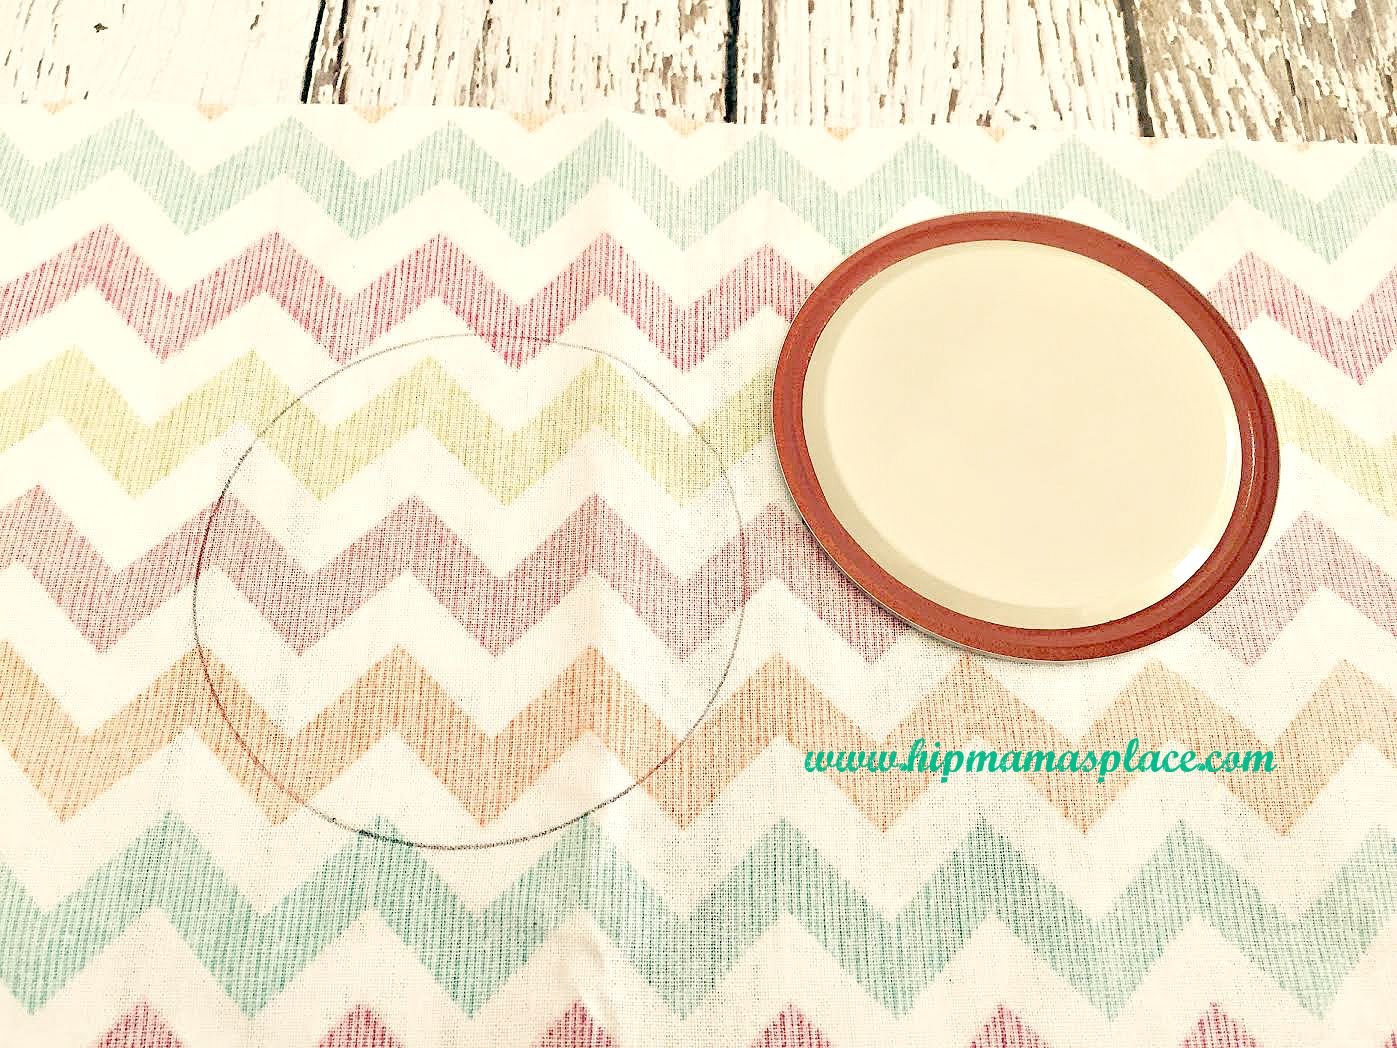
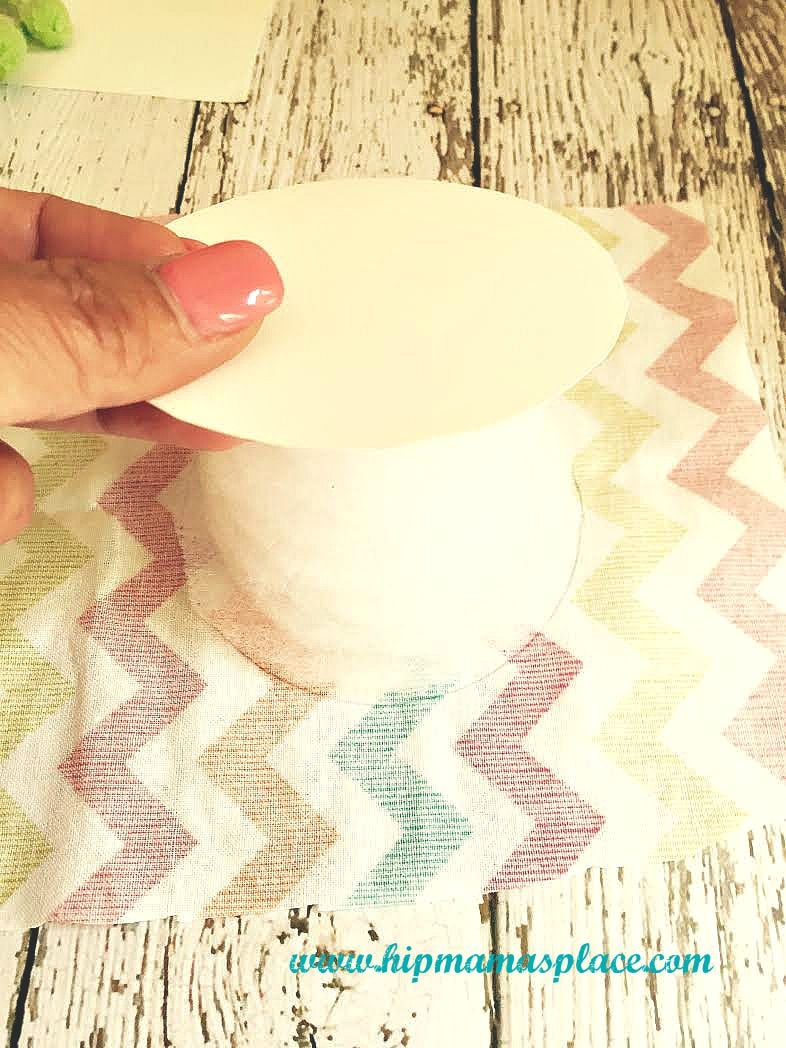
To make the pincushion, trace the round mason jar lid onto your chosen fabric with a pencil. Cut the circle about 1 inch wider than the tracing. Set aside.
For the stuffing, I used batting which I got from Michael's. Trace the same round lid on your batting or fiberfill and cut in concentric circles so that you have a stack of about eight circles that gets smaller and smaller like this.
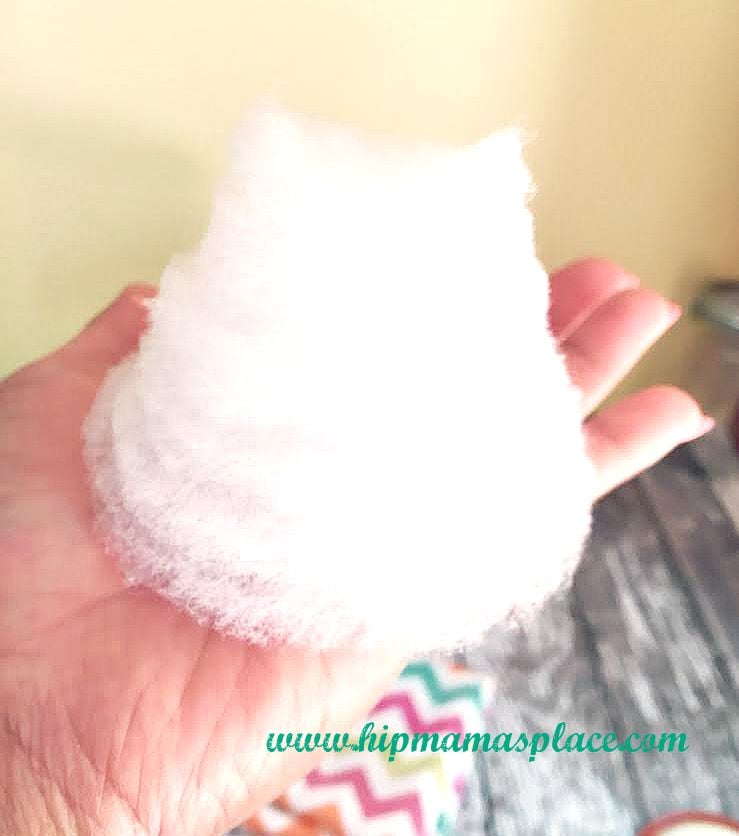
You could use cotton to stuff your pincushion, but fiberfill or batting is best.
Now, take the piece of cardboard and trace the same round mason jar lid with a pencil. Cut the round tracing.
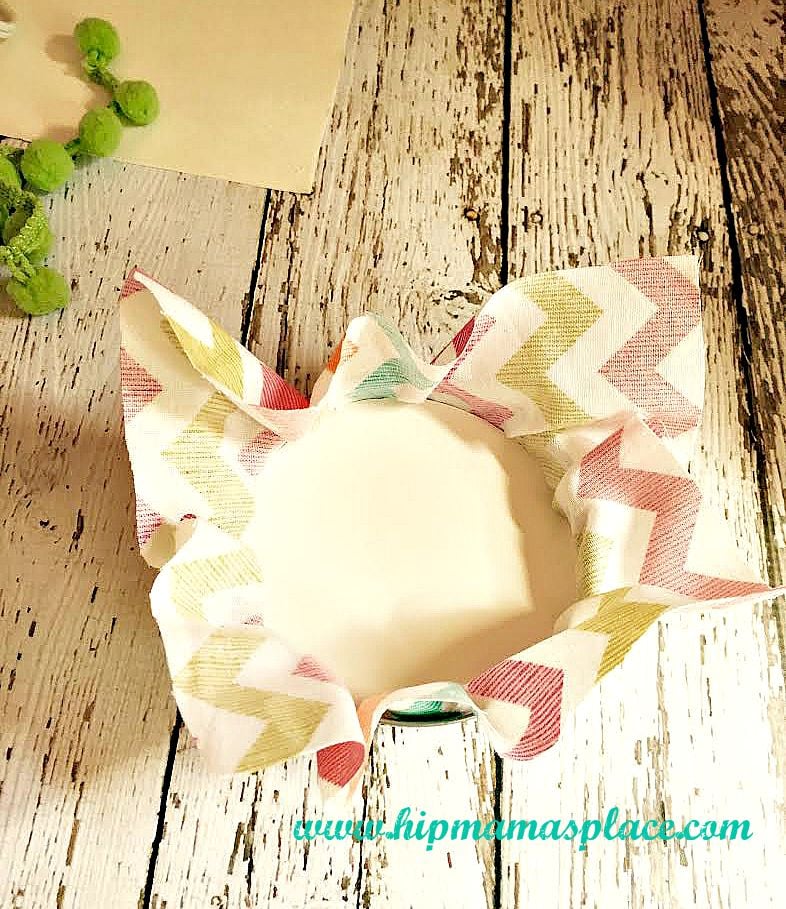
Next, lay your fabric flat on the table, face down. Stack the fiberfill circles on your traced circle on the fabric, then put the round cardboard tracing like this.
Wrap the whole thing with your fabric then then put it into the mason jar ring to make your pincushion like this.
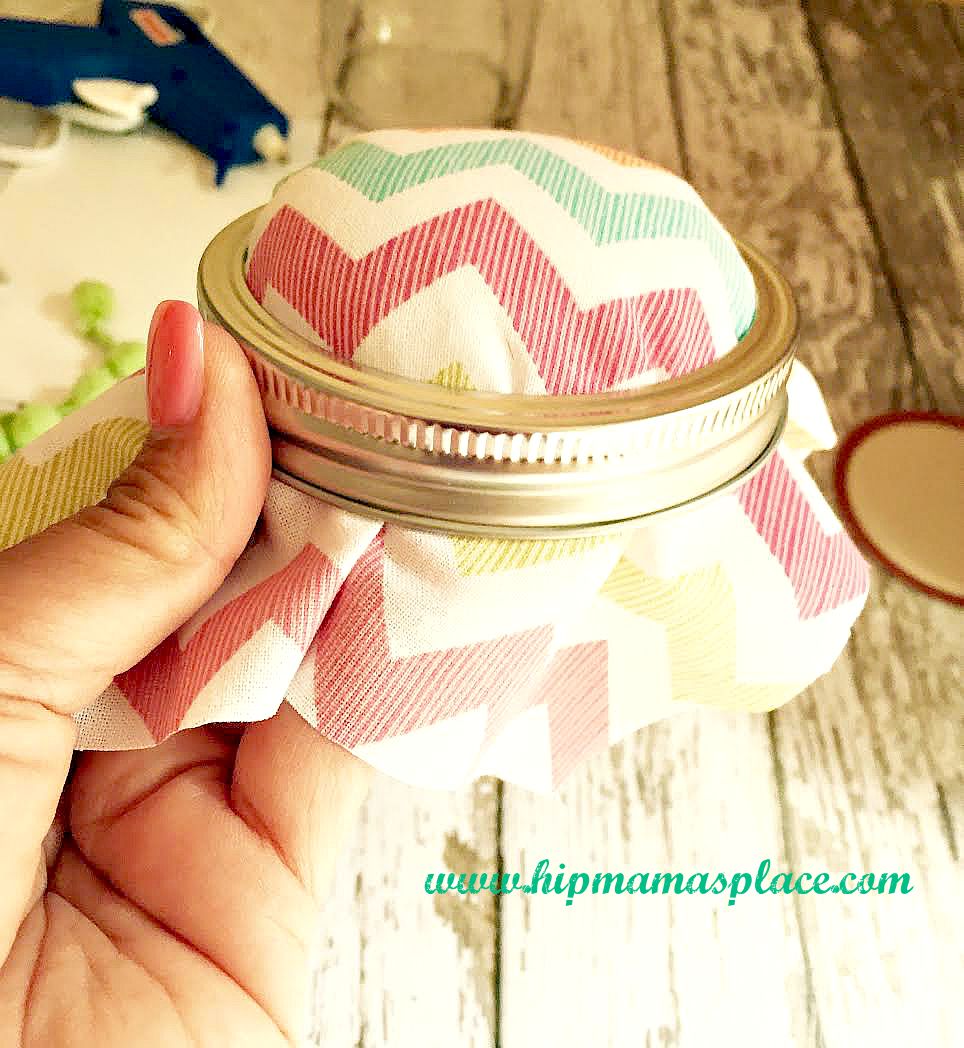
Straighten out the fabric to get rid of creases and folds. Turn it upside down. Make sure to push the round cardboard way down to the top of the ring.
Once you achieve the desired look for your pincushion, cut the excess fabric on each side and secure them with scotch tape.
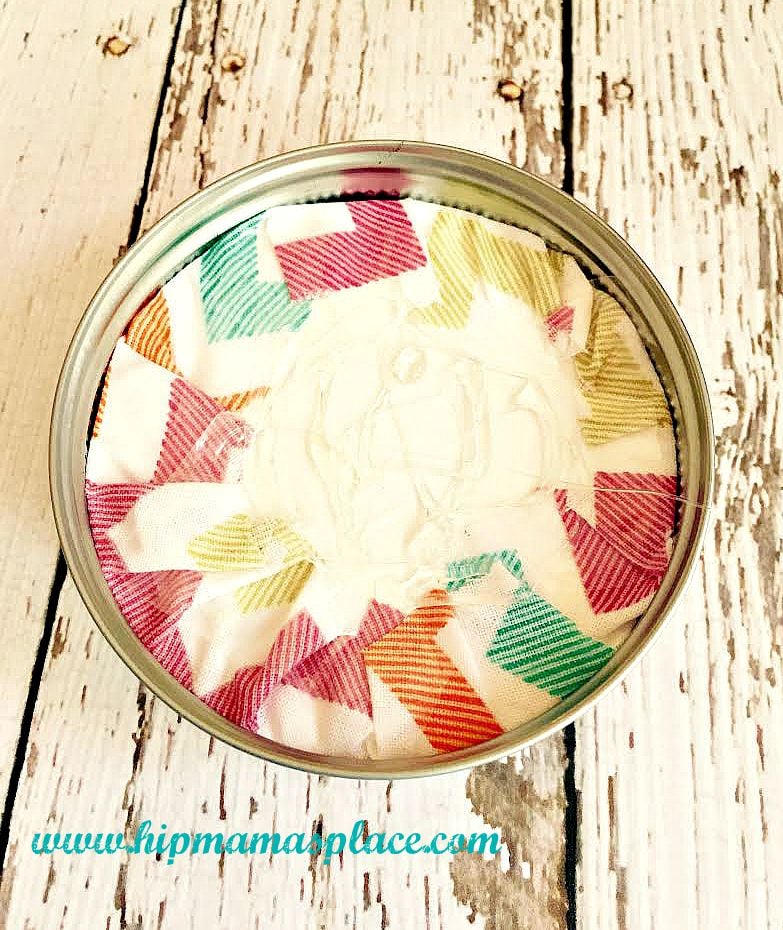
To attach the actual lid and secure your finished pincushion, put hot glue in the middle of the cardboard and then immediately attach the mason jar round lid on it. Let it cool for a few minutes.

Decorate your jar with a pretty ribbon of your choice using a glue gun. I used one of the tons of ribbons I already have from my stash. You know, I used to do a lot of scrap booking and that's how I accumulated most of them.
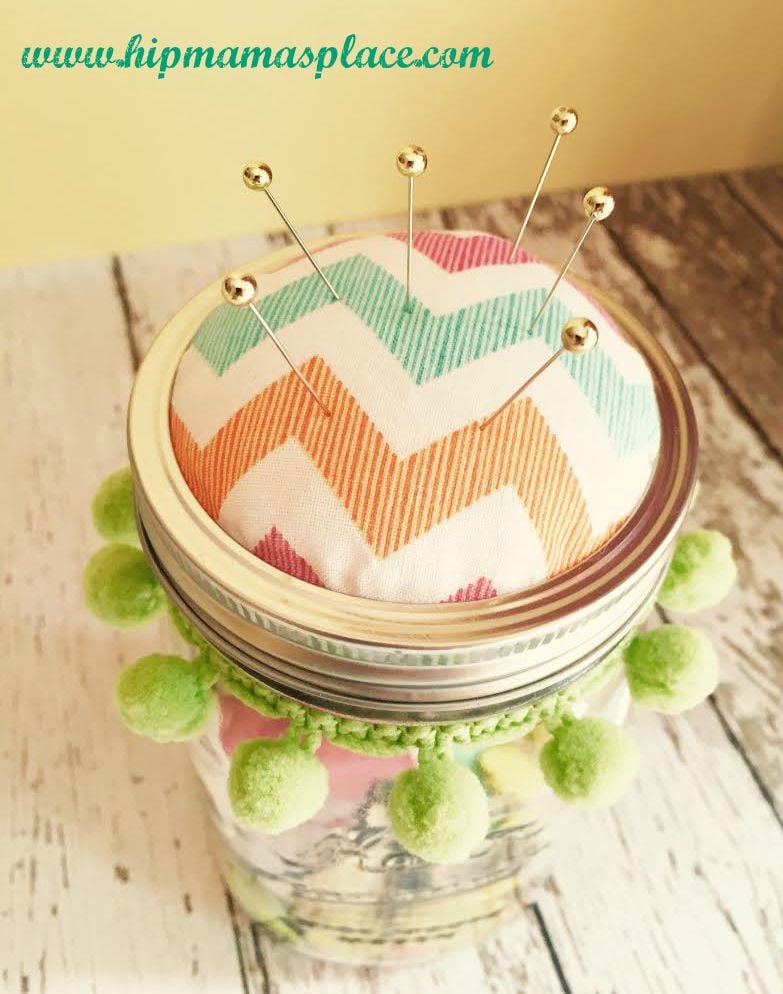
Fill your jar with a number of mending things like small scissors, tape measure, needles, safety pins, threads, buttons and more! Stick some pins and needles on your pincushion lid.
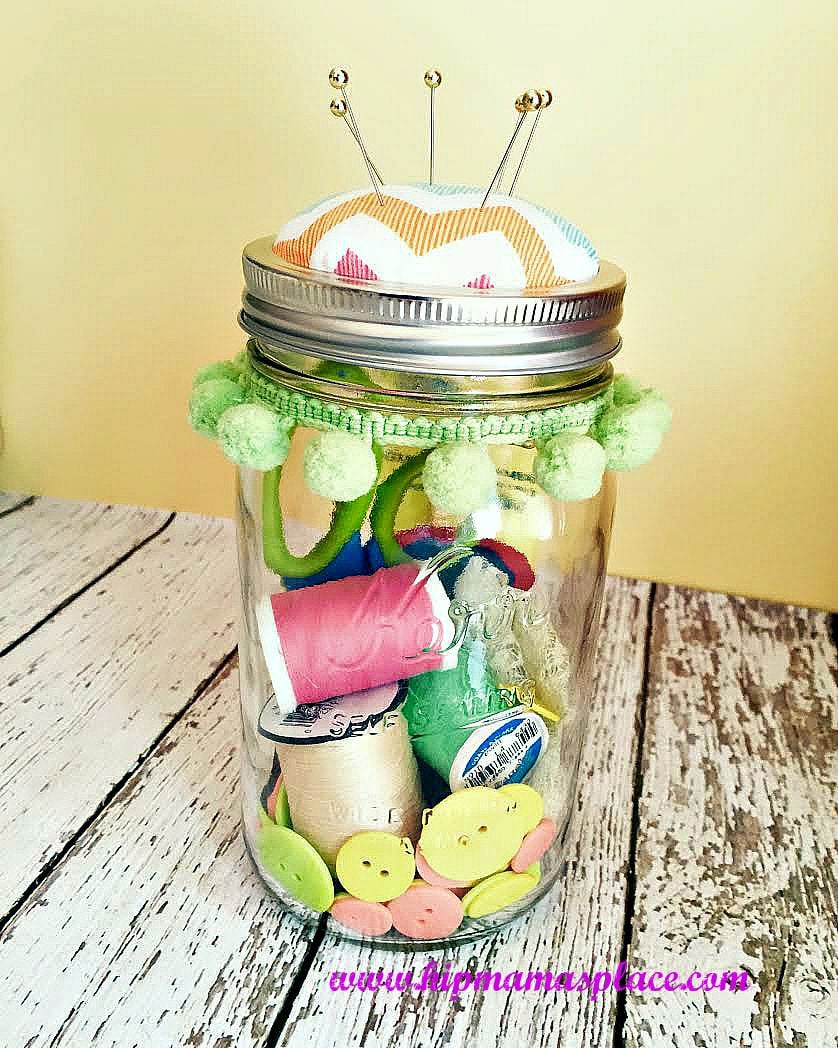
Voilà! You are now ready to show off your lovely, shiny new mason jar sewing kit handmade with love by you! I love how mine turned out.. the photo doesn't do justice! 😉
It also really makes a colorful decor for your craft room too, or as a thoughtful gift anyone will appreciate! 🙂
Ooooh this is so cute! I just had to pin! I can't wait for the weekend to try this out. Thank you for this amazing idea.
This would be a great gift for someone just starting out on their own. I love the pom pom trim and need to make one for myself.
this looks so easy and cute! this would be a great idea for my sister to do with her sewing supplies
OH this is adorable!! I don't even sew and I feel like I need to make one lol!! Super cute and super easy!!
this is so cute,what a great way to make someone a useful gift
I love this idea! This would definitely be handy to keep around in case you have a sewing emergency! Plus its a great gift!
This is such a cute idea.I love it!
Your sewing kit looks so adorable and easy to make! Thanks for sharing!
This is really pretty and creative. I love to make this for my sewing tools
That is simple, and it's cute as can be. I pinned it.
This is such a great idea. Looks lovely and pretty unique. Might do something like this too!
This is awesome, you're so creative. I'm sure my mom would love this one.
This is the cutest idea! This makes a great gift! Thank you for sharing !
I just love how mason jars are so versatile. I've done so much with them lately. I don't sew but I use one for keeping my craft buttons in.
Wow so cute and adorable. You are so creative. Thanks for the idea!
I've been meaning to elevate my sewing kit as its been stuck on a chinese food take out plastic container. It sure doesn't look pretty. I will be giving this a try to posh out my kit.
Love this! It would also make such a cute gift for a bginner!
Awesome idea! What I like about it is that it's also compact so it's going to be a lot easier to store. Thanks for the tutorial, it doesn't seem that difficult to put together!
This is so pretty! I'd love to make one for my sister. I love the fabric you used for this one.
This is such a great idea. Not only does it keep everything organized, but it's also lovely to look at. I love the idea of creating a cushion top for pins.
I pay people to sew for me, but this is cute for DIYers.
This is a lovely idea. I'm going to share it with my mother.
Glad you like it, Jo-Ann! I love simple crafts like this too.. and this one makes a great gift as well. 🙂
This is such a cute and clever idea, yet as you said it is easy to make. I love simple DIY projects like this one.